Section 7: installing the stabilizer – Hangar 9 Piper J-3 Cub 40 ARF User Manual
Page 23
23
Required Parts
• Stabilizer assembly
• Fuselage
• #4 washer (4)
• #2 washer (3)
• 2-56 x 1/2" screw (3)
• 2-56 nut (3)
• Clevis (4)
• Clevis retainer (4)
• Cable ends (4)
• Brass crimps (8)
• Cable
• Pushrod wire keeper
• Control horn (2)
• 2mm x 12mm screw (6)
• Brass fitting (small) (6)
• Brass fitting (large) (2)
• #2 x 1/2" sheet metal screw
• 4-40 x 1/2" socket head screw (4)
Required Tools and Adhesives
• Threadlock
• Pliers
• Drill
• Drill bit: 3/32"
• Adjustable wrench
• Crimping tool
• Phillips screwdriver (small)
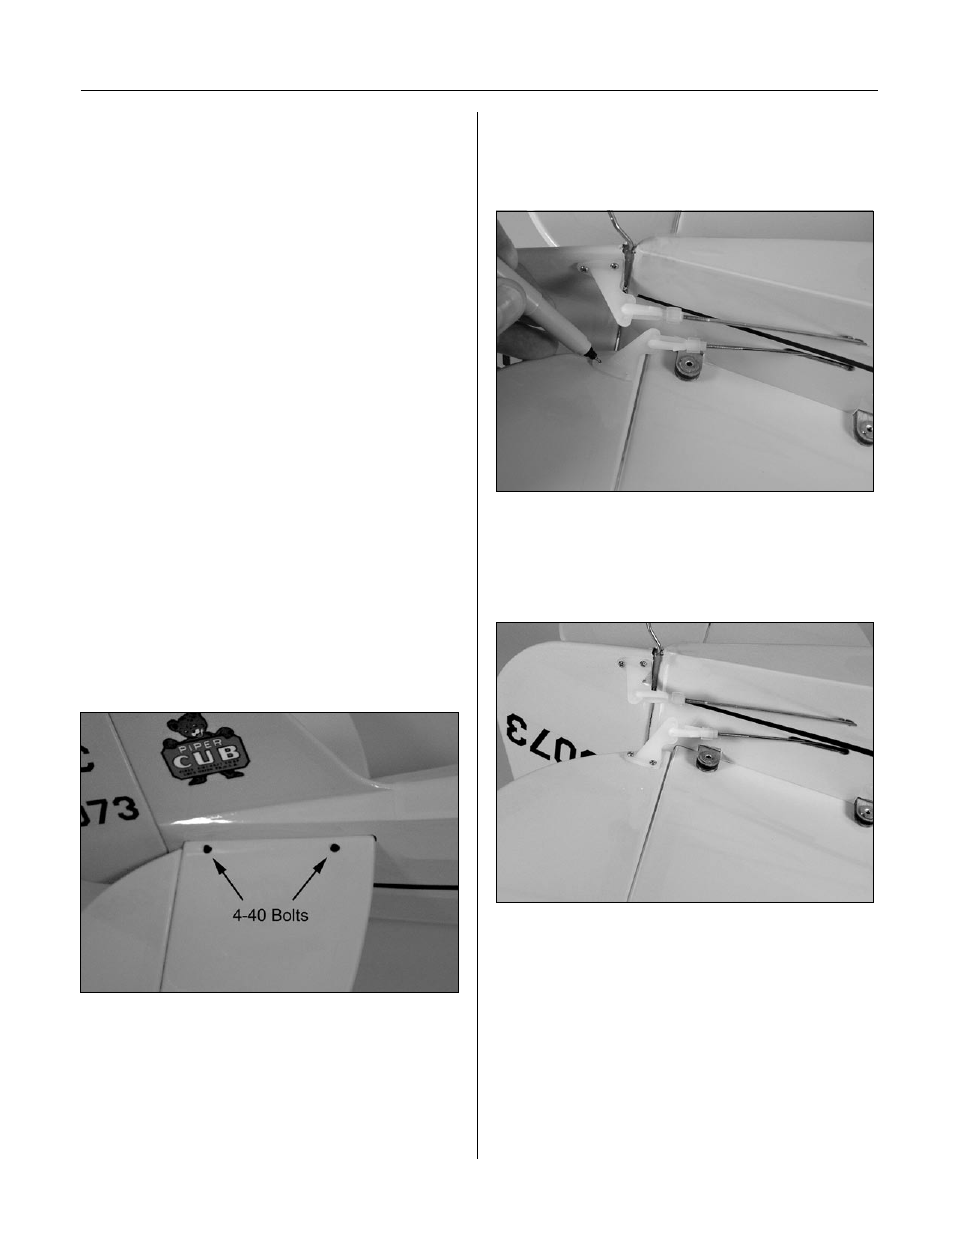
Step 1
Slide the stabilizer halves into the slot in the fuselage.
Use four 4-40 x 1/2" screws and four #4 washers to
secure the stabilizer. Use threadlock to prevent the
screws from vibrating loose during flight.
Step 2
Attach a control horn to one of the elevator clevises. Line
the holes in the control horn with the hinge line and mark
the location for the mounting crews onto the elevator.
Step 3
Drill the holes using a 3/32" drill bit. Use thin CA to
harden the holes. Mount the control horn using the horn
backplate and three 2mm x 12mm screws.
Section 7: Installing the Stabilizer