Hangar 9 Piper J-3 Cub 40 ARF User Manual
Page 12
12
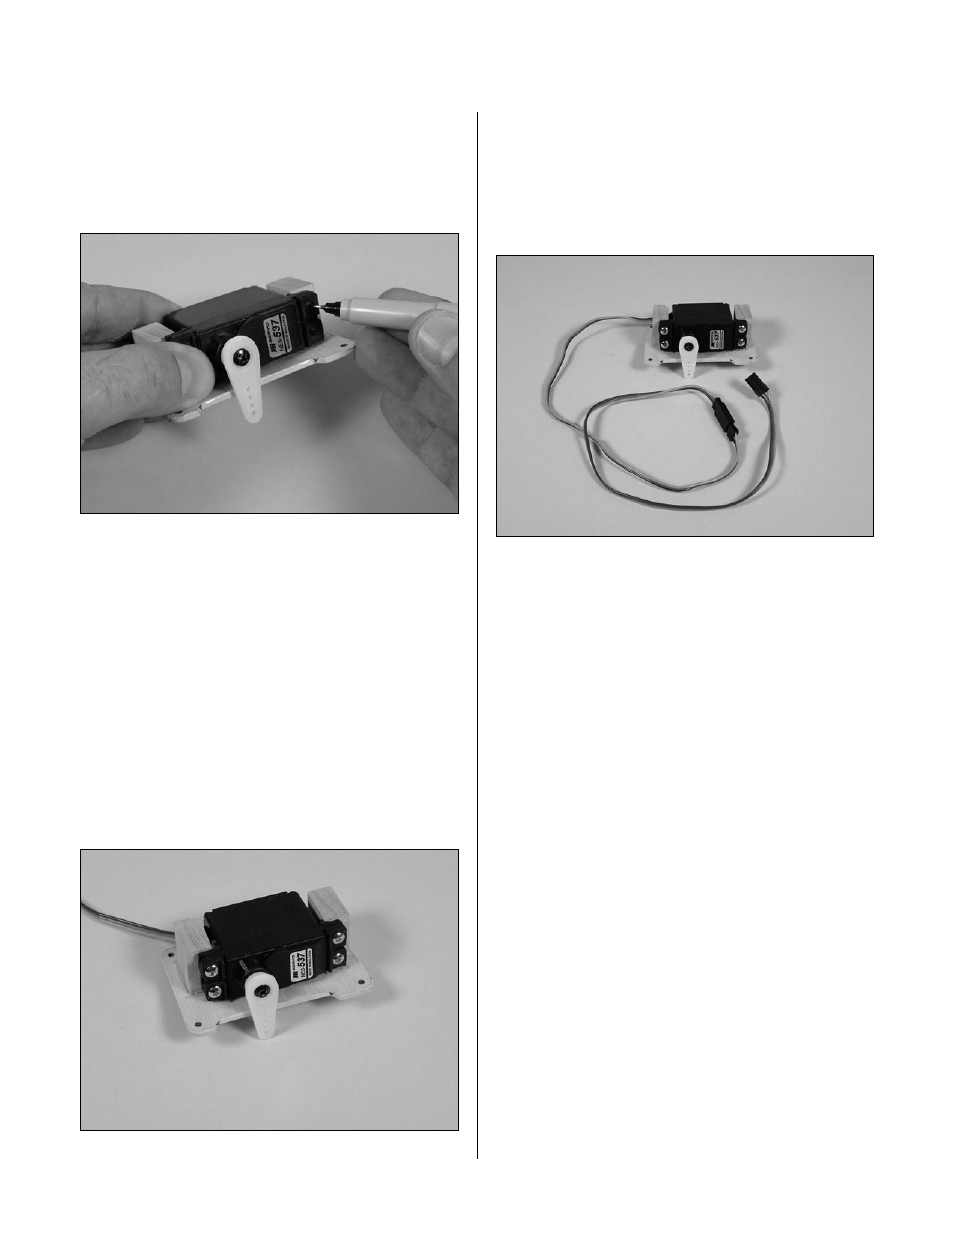
Step 4
Place the aileron servo between the mounting blocks and
use a felt-tipped pen to mark the location of the four servo
mounting screws. Note that the servo must not touch the
hatch in order to isolate engine vibration.
Note: Before mounting the servo,
electronically center the servo using the
transmitter, then install the servo arm to
avoid having to remove the servo and center
the arm later. It may be necessary to slightly
trim one of the servo mounting blocks to clear
the servo wire.
Step 5
Remove the servo and use a 1/16" drill bit to pre-drill
the holes for the servo mounting screws marked in the
previous step. Use the screws supplied with the servo to
mount it to the servo mounting blocks.
Step 6
Connect a 12" Servo Lead Extension (JRPA098) to the
servo lead. Secure the connectors by tying them in
a knot using dental floss or by using a commercially
available connector clamp to prevent the servo leads from
becoming disconnected.
Note: It is always a good idea to secure
the servo connector and servo extension
together to prevent the wires from
becoming unplugged.
Section 3: Servo Installation (Aileron)