Assigning user rights for all remaining functions – BUCHI NIRWare User Manual
Page 270
264
NIRWare Suite
NIRWare 1.5 Software Manual
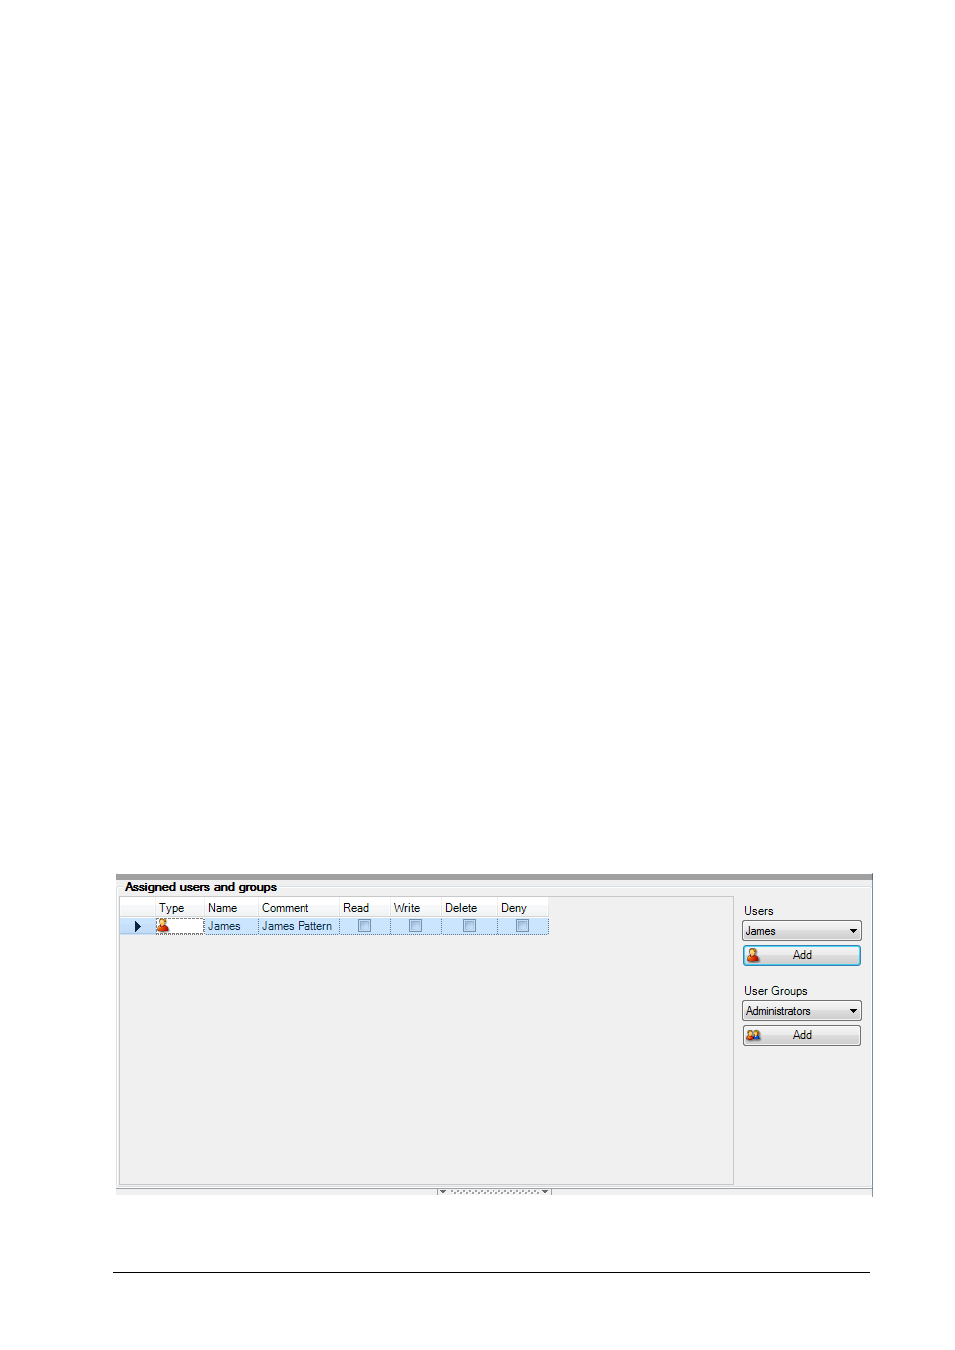
In the upper area, select the item for which you want to modify the user rights by highlighting the
corresponding line and click Add.
The selected item is now added to the Object ID list. The access to all items in the Object ID list is
restricted to the users and user groups listed in the lower area.
To assign user rights to an item in the Object ID list, select the corresponding Object ID by clicking the
arrow and highlighting it in the appearing drop-down list.
Now select a user or user group you want to assign by clicking the corresponding arrow and highlighting it
in the appearing drop-down list. Click Add. The selected user or user group is added to the list in the
lower area.
You can now define the access rights for the added user or user group by activating or deactivating the
corresponding check boxes.
NOTE
To activate the user right, "Read", "Write" and "Delete" need to be checked, "Deny" has to remain
unchecked.
To remove an item from the Object ID list, select the corresponding Object ID by clicking the arrow and
highlighting it in the appearing drop-down list. Now click Remove. The assigned user rights for this item
are automatically removed as well.
Assigning user rights for all remaining functions
By default certain access rights are assigned to the predefined users and user groups in the software
package.
The procedure how to adapt them is explained in the following, considering the NIRCal software as
example:
To complete, restrict or remove the default rights for NIRCal from certain users or user groups, on the left
side of the NIRWare Management Console select Security Designer
– Security Policies – NIRCal.
The following dialog opens: