Adaptive Technologies SM-075-FS User Manual
Page 2
© 2004 Allen Products Company Incorporated, Signal Hill, CA 90755 USA (562) 424-1100 11/03/04
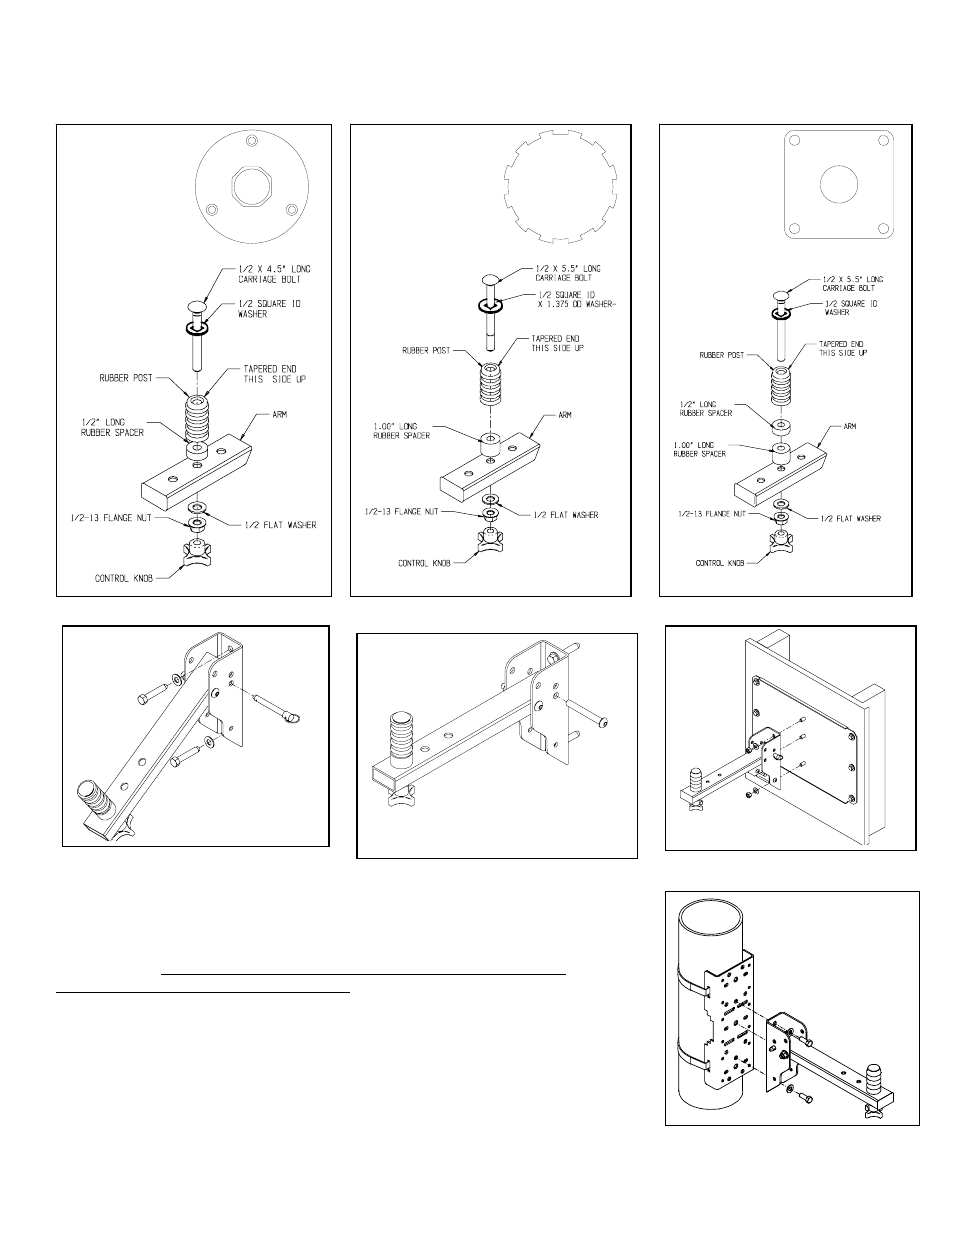
Figure 2:
Molded-In-plastic
ribbed style
use 1” rubber spacer
Figure 3:
Metal style use
½” and 1” rubber
spacer
An optional Stud Brace Plate is available to bridge the SocketMount between two structural wall studs. Use Model#: WP-16 (Figure 5).
An optional Pole Adapter Plate is available to mount the SocketMount to a radial surface. Use Model#: PA-010 (Figure 6).
Step 3. Install Speaker:
Align the tripod socket of the speaker with the rubber post and slowly place the speaker into place.
Rotate the speaker into the desired direction then tighten the flange nut until the speaker is secured to
the support arm. The bottom surface of the speaker or socket should be flush with the arm
surface and the speaker should not be able to move. Thread the friction knob on after the nut is tightened
to cover the remaining threads of the carriage bolt (Figure 7).
Step 4. Stow Arm:
When SocketMount is not in use, fold down the arm by removing the
pin, fold the arm down, and reinsert the pin through the top arm hole (Figure 8).
Step 5. Recommendation: Install Safety Cable
Attach a safety cable (sold separately) to the wall surface
Figure 6 (Optional Pole mount)
Figure 4
Figure 5 (Optional Adapter Plate)
Figure 1:
Plastic cup style
use 1/2” rubber
spacer
Figure 4A