Adaptive Technologies PM-DA-G User Manual
Polestar ™ g-series, Dual adapter, Installation instructions pm-da-48g
© 2011 Allen Products Company, Signal Hill, CA 90755 USA (562) 424-1100 REV00-100411
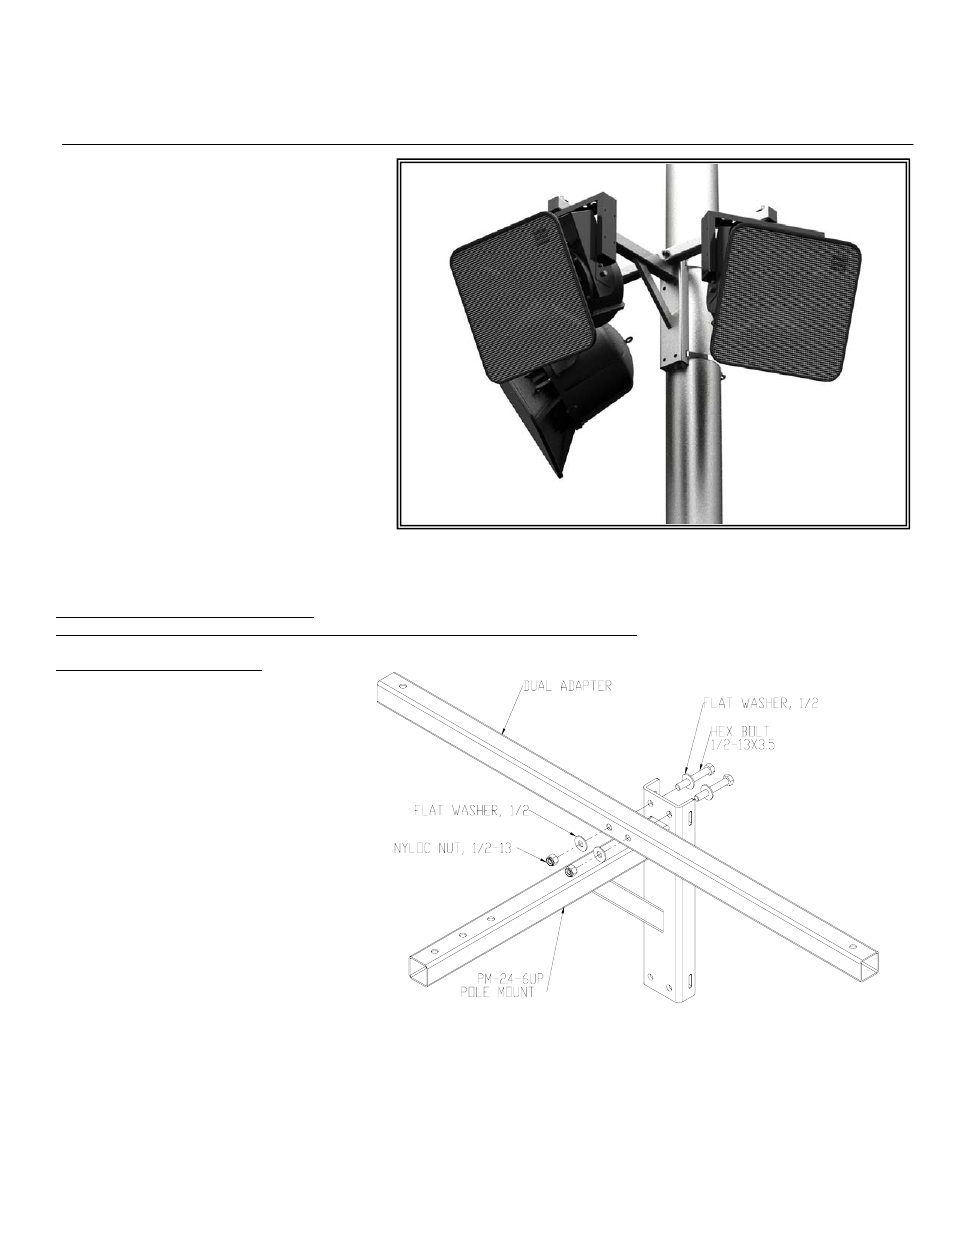
Figure 1
PoleStar
™
G-Series
Dual Adapter
Installation Instructions
PM-DA-48G
Important: This kit requires that mounted objects are
of equal size and weight.
Thank you for choosing the PoleStar
™ G-Series dual
adapter kit. Used with the PM-24-6UP-G it creates a dual
or a triple mounting system. Further, the dual adapter
accommodates many standard speaker mounts, including
yokes, U-brackets and pan and tilt mounts.
Important:
Mounting overhead systems require professional
experience. Improperly installed equipment can result
in property damage, personal injury, death and/or
liability to the installing contractor. Do not install if in
doubt about the integrity of the mounting structure.
Caution:
Due to the wide variety of mounting structures,
environments, materials and mounting methods, the
installing contractor must exercise good judgment in
selecting the proper mounting area and hardware.
Follow these instructions for the most efficient and safest mounting results.
Do not exceed the working load limit of 300lbs/136 kg.
Do not use Pneumatic tool to tighten bolts
Apply Loctite solution to bolts and nylock nuts to prevent loosening over time before assembly
Bolt Torque: 35 to 40 foot pounds
Package Contents:
1 pc
PoleStar
TM
Dual Adapter, G-Series
2 pcs
Hex bolt, ½-13 x 3.5”
2 pcs
Hex bolt, ½-13 x 4.5”
4 pcs
Fender washer, ½ x 2”OD
4 pcs
Hex nylock nut, ½-13
4 pcs Split lock washer, ½,
4 pcs
Flat washer, ½” SAE
2 pcs
Hex bolt, ½-13 x 3”
2 pcs Rubber friction washer, 0.5x2.0x0.125
2 pcs
Square Plastic End Caps
1 pc
Locktite #262 5ml tube
Step1:
Apply Loctite solution to bolts and nylock nuts.
Step 2: Assemble Dual Adapter directly to
Pole Adapter
Attach the dual adapter directly to the two upper
holes or on the two holes below the extension arm
of the pole mount using the included 3.5” long
bolts, flat washers and nylock nuts. Check final
horizontal alignment then tighten permanently (Figure 1 and Figure 2).