Adaptive Technologies MM-016-BT User Manual
Multimount, Mm-016, Adjustable wall mount installation instruction
©2004 Allen Products Co., Inc. Signal Hill, CA 90755
(562) 424-1100
1004-rev01
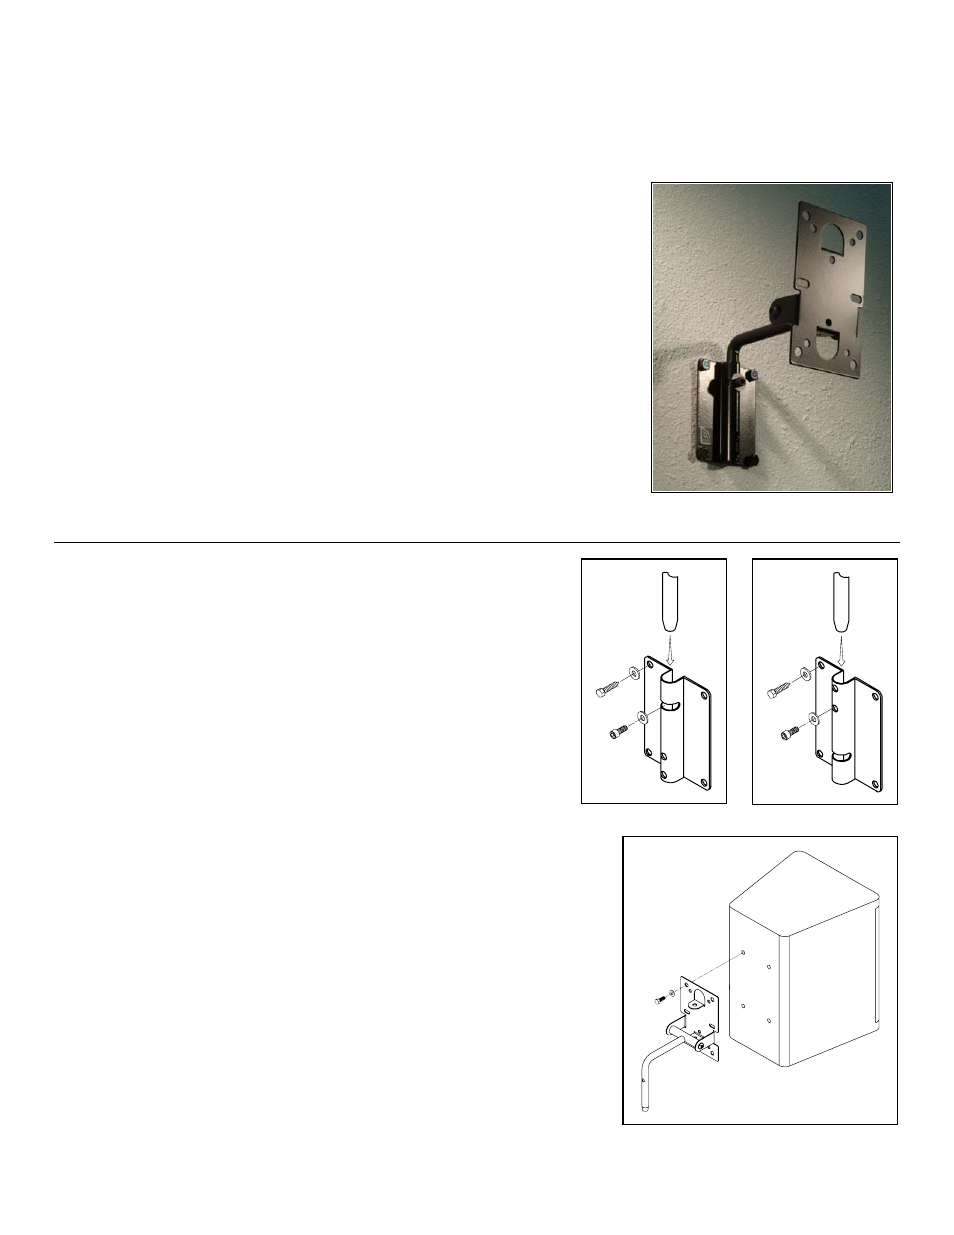
Figure 2A
Vertical Orientation
MultiMount
™
MM-016
Adjustable Wall Mount Installation Instruction
Thank you for selecting the MultiMount MM-016 speaker mount. This product
permanently mounts and aims up to 25lbs./13 kg. loudspeakers to wall and ceiling
structures. The MultiMount’s independent pan and tilt features allow sound to be
aimed and re-aimed quickly and precisely. Its versatile adapter plate accommodates
most speaker manufacturer’s mounting hole patterns.
Warning:
Mounting and/or rigging loudspeakers requires experienced professionals.
Improperly installed loudspeakers can result in property damage,
personal injury, death and/or liability to the installing contractor.
To assure a trouble free installation, read through and follow these instructions
carefully before beginning
.
If you have doubts about the integrity of the structure
you are mounting to or you are not sure about the proper hardware to use, consult
a structural and/or hardware specialist.
Be sure that all of the following items are included in this kit before
proceeding:
Item
#
Qty.
Description
1.
2 pc. Wall mounting plate
2.
2 pc. Speaker adapter plate assembly
3.
1 pc. Hardware kit (for both mounts)
Note to Installing contractor:
Due to the wide variety of wall structures, materials and
mounting methods, these instructions assume that the installing
contractor will exercise proper judgment in selecting the
mounting area and hardware.
As a guide, the installation, when complete should be capable of
supporting 5 to 10 times the actual applied load. Also, use a back
up safety system such as a safety cable.
Step 1. Install wall mounting plate
With pan angle option
To enable the pan angle option, attach the wall mounting plate to the
wall with the
open center slot towards the ceiling
using the appropriate
hardware for the wall structure
(Figure 1A).
Without pan angle option
To disable the pan angle option, attach the wall mounting plate to the
wall with the
open center slot towards the floor
using the appropriate
hardware for the wall structure
(Figure 1B).
Step 2. Select speaker orientation
2A. Vertical Orientation
Attach the speaker adapter plate assembly to the appropriate mounting
holes of the speaker using the manufacturer’s suggested screws and
washers. Tighten screws permanently
(Figure 2).
Figure 1A
Figure 1B