Adaptive Technologies MM-016-BT User Manual
Page 2
©2004 Allen Products Co., Inc. Signal Hill, CA 90755
(562) 424-1100
1004-rev01
Horizontal Orientation
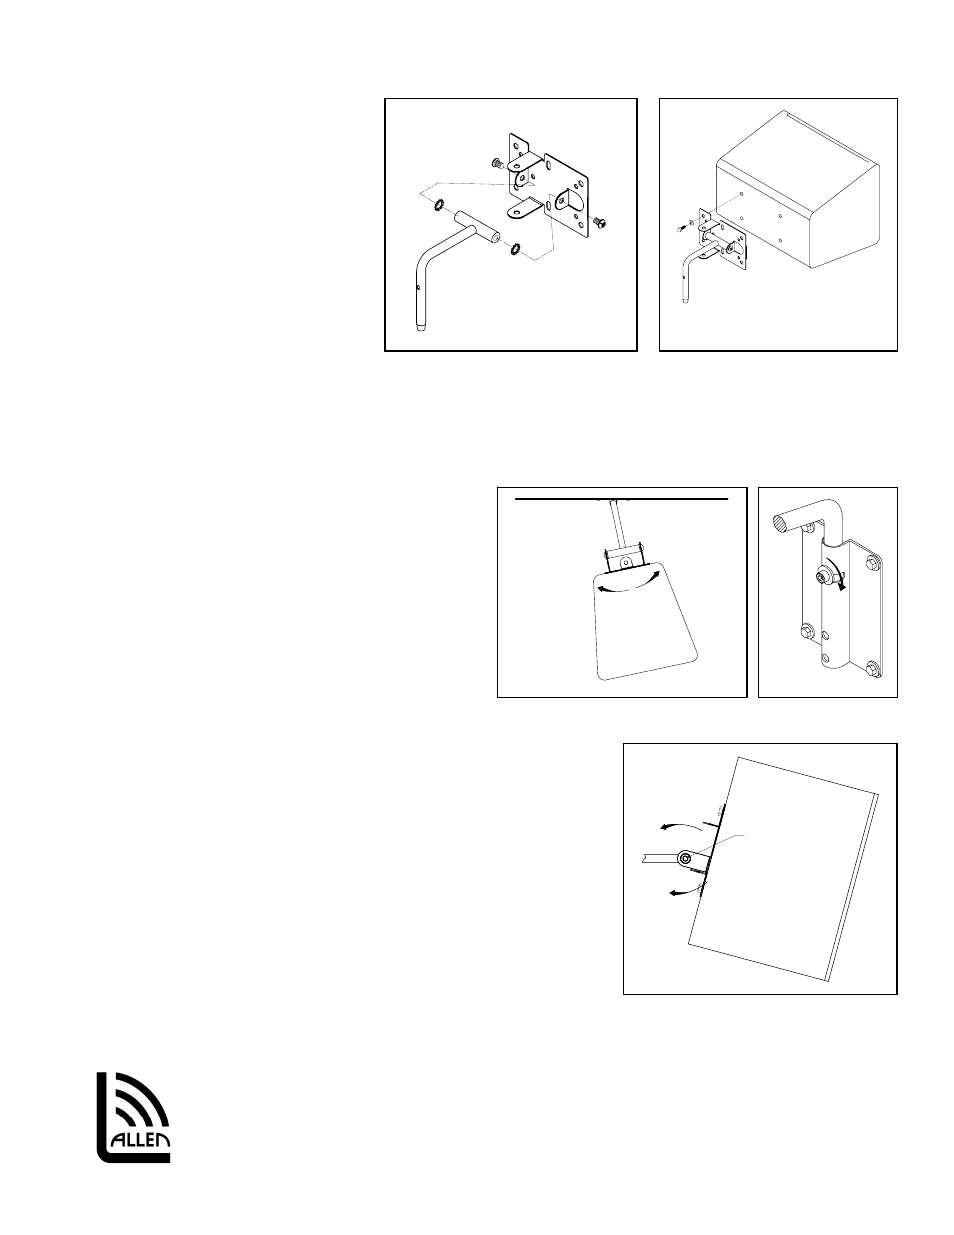
2B. Horizontal Orientation
Detach the two socket head screws
of the adapter plate from the
support arm using a 3/16” allen hex
wrench (Figure 5), Re-attach the
support arm to the shorter tabs of
the adapter plate with the included
star washer and socket screws. Place
the star washers in between the
pivot rod and the tab of the adapter
plate.
The sharp edges of the star
washer must face the tab of the
adapter plate
(Figure 3A). Do not
tighten yet.
Attach the speaker adapter plate to
the appropriate mounting holes of
the speaker using the manufacturer’s suggested screws and washers. Tighten screws permanently
(Figure 3B).
Step 3.
Lift the assembled speaker with the support arm and
insert the support arm into the top of the wall
mounting plate. Line up the threaded hole of the
support arm with the open slot for pan angle
installation
(Figure 1A)
or to the second barrel hole
for no pan angle installation
(Figure 1B)
of the wall
mounting plate. Install the included socket screw
and flat washer until snug
.
Step 4.
Pan Angle Adjustment:
Loosen socket screw (do not remove) (Figure 4B).
Rotate the speaker horizontally until the speaker is
aimed into the desired direction then tighten the socket screw at the
mounting plate permanently.
(Figure 4A and 4B).
Step 5. Tilt Angle Adjustment
Loosen socket tilt screw (do not remove) (Figure 5). Tilt the speaker to
the desired tilt angle then retighten the side socket tilt screws of the
speaker adapter plate. Be sure that the screws have been tightened
permanently before releasing the weight of the speaker.
If the tilt angle needs to be adjusted, do not pull on the speaker,
rather repeat step 5.
Step 5. Recommendation: Install Safety Cable
Attach a safety cable (sold separately) to the mounting surface
(Must be able
to support at least five times the weight of the speaker), then attach
the other end of the safety cable to the speaker. If no attachment is provided
on speaker, consult speaker manufacturer for advice on best attachment point and method.
Figure 4A
Figure 4B
To Tighten
Socket head
tilt screw
Figure 5
To loosen
Figure 3A
Figure 3B
Allen Products Company Inc.
1635 E. Burnett Street
Signal Hill, CA. 90806 USA
Tel: 562-424-1100 Fax: 562-424-3520
Web page: www.allenproducts.com