Recording cd, Easy cd recording – Panasonic RX-E300 User Manual
Page 20
Attention! The text in this document has been recognized automatically. To view the original document, you can use the "Original mode".
Recording CD
Normal and chrome tapes can be used.
The unit automatically identifies the type of tape.
Any change made to the volume or equalizer effect during recording
will not affect the recording,
Easy CD recording
Ail the tracks are recorded in their originai sequence onto a single
tape. (The reverse mode is automatically set to *).}
Only part of a track way be recorded at the end of the forward side.
This track will be re-recorded in its entirety at the beginning of the
reverse side.
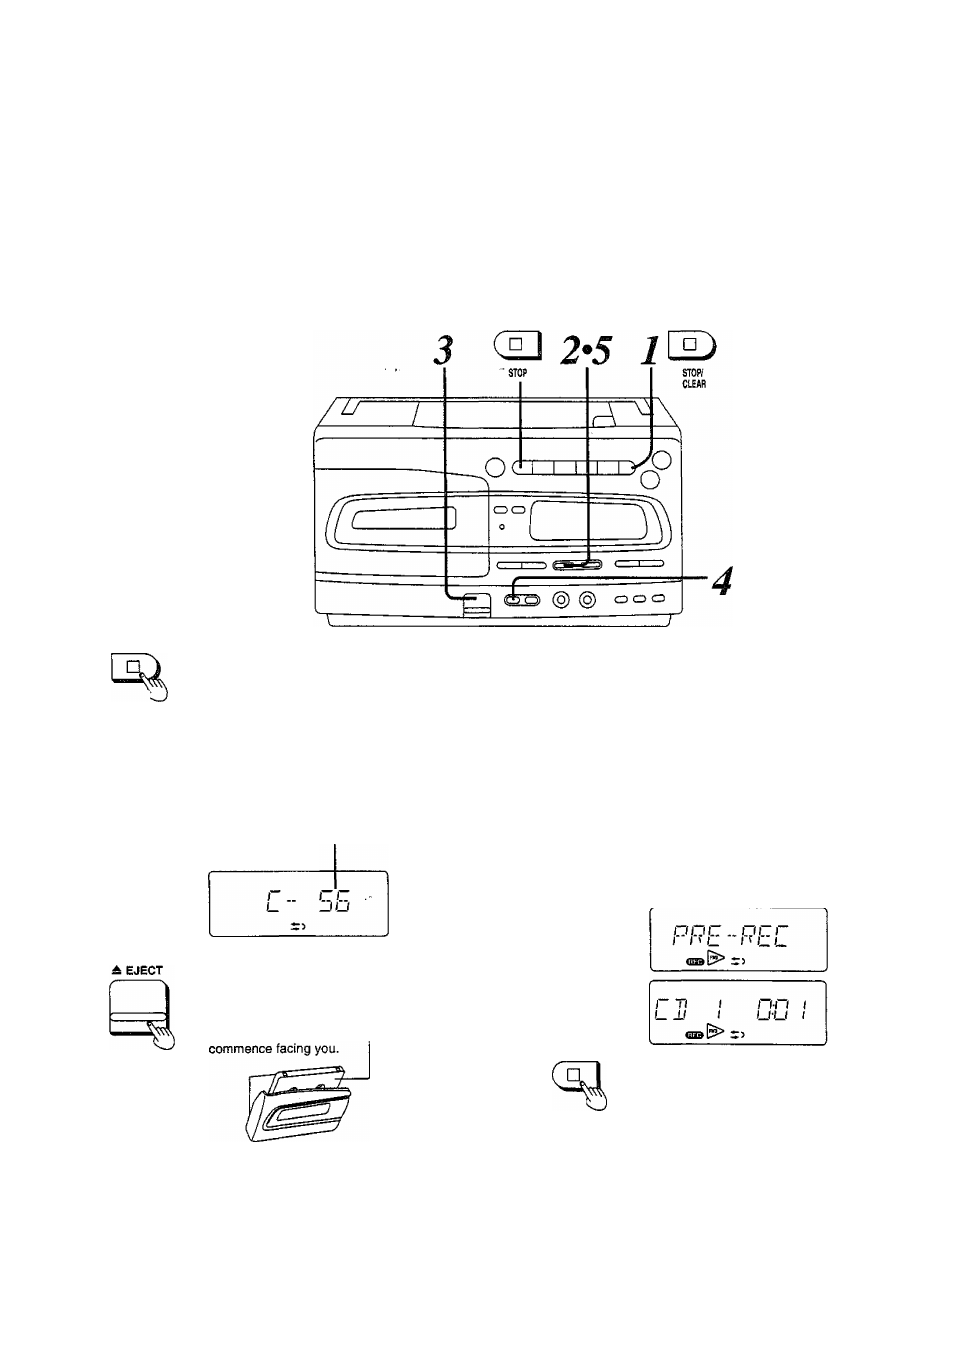
Insert a CD.
There is no need to take up the leader tape.
Press □ STOP/CLEAR.
STOPf;
CLEAfl
EASY CD REC
Before loading the tape;
Press EASY CD REC to find
out how long the tape must be
to accommodate the recording
of all the tracks.
Length of the tape required to record all
tracks
Press ^ EJECT and load the
tape, which is longer than the
length indicated in step 2.
With the side on which recording is to
(Example: 60-minutes tape)
The tape travel direction is automatically
set to play the forward side. (The
display lights.)
Press DOLBY NR to select the
DOLBY
Dolby noise reduction setting.
(See page 19.)
EASY CD REC
Tape now rewinding
10-second blank
now being recorded
Recording starts
Press EASY CD REC to start
recording.
When this button is pressed, the leader
tape is rewound and after a 10-second
blank is recorded, recording starts.
(The recording level is set automatically.)
QO (
STOP
To stop recording;
Press □ STOP button.
The CD play also stops at the same time.
For your reference:
When you intend to record especially important material, ensure you
replace worn out batteries beforehand, or simpiy plug the unit into a
household mains outlet.
20