Selecting input mode, Start recording, Record on a tape – Panasonic PV C2020 User Manual
Page 13
Attention! The text in this document has been recognized automatically. To view the original document, you can use the "Original mode".
Record On a Tape
Selecting Input Mode
Method 1:
Press
CHAT.
The display will change as
follows.
c
'—►LINE-
D
(CABLE) (TV)
—►125 or 69-
Method 2:
a Press ACTION for MAIN MENU,
b Press AT-^ ► to select “TV”, then press
ACTION for SET UP TV screen,
c Press
AT
to select “INPUT SELECT,” and
then press ► to select “TUNER" or “LINE.”
d
Press ACTION twice to exit this mode.
Q All connections are made. (See page 7.)
n Your unit is plugged in.
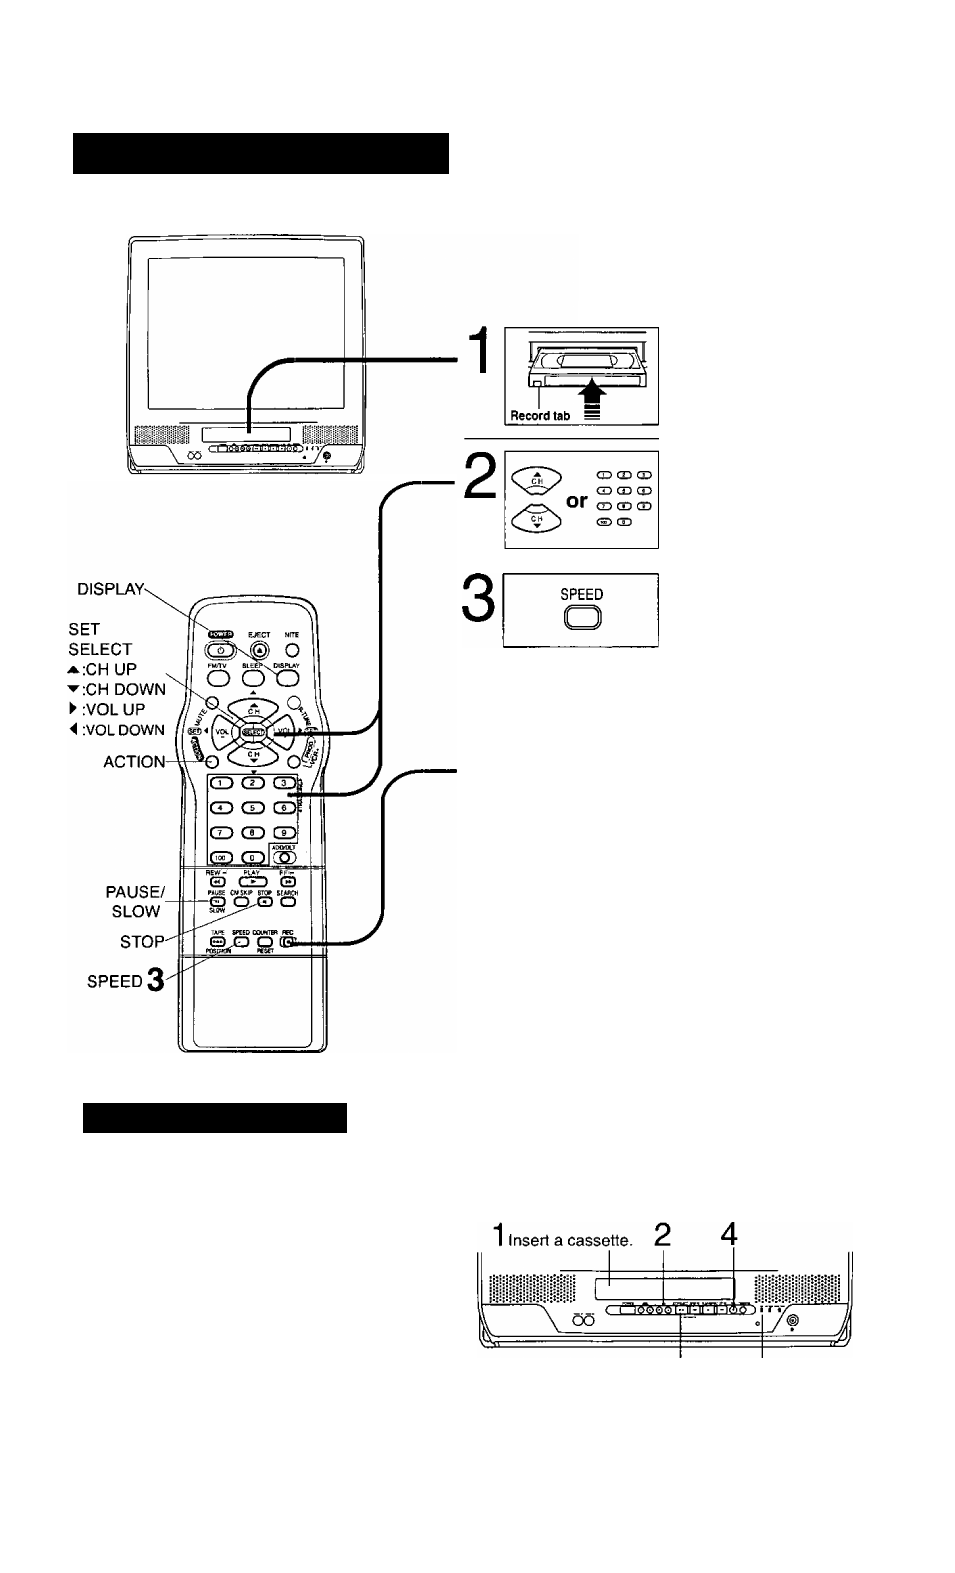
n Cassette with record tab in place.
Check list before you begin.
Insert a cassette.
• The unit power comes on
automatically.
Select Channel.
Press CH AW, or
NUMBERED keys.
• To select “LINE," see bottom
of this page.
Select Recording
speed (see page 6.)
Press SPEED.
SP = Standard Play
LP = Long Play
SLP = Super Long Play
• Selected speed is displayed.
4
REC
Start Recording.
Press REC.
• To edit out unwanted portions,
press PAUSE to pause and
resume recording.
• You cannot view another
channel during recording.
To stop -> Press STOP
One Touch Recording (OTR)
Press REC repeatedly to set the recording length
(30 min - 4 hours.)
* The unit stops recording at a preset time.
• PROG TIMER indicator lights on the unit.
C
Normal Rec—►0:30—►1:00
4:00-^—3:00-<—2:00
► 1:00^
After the unit has been in Rec Pause mode for 5 minutes, it
will stop automatically to protect the tape and video head.
The remaining recording time of an OTR can be displayed by
pressing DISPLAY.
You can operate on the unit
Press to stop. REC Indicator
13