Yamaha CNR-80 User Manual
Page 13
Attention! The text in this document has been recognized automatically. To view the original document, you can use the "Original mode".
■Front Panel A
Vorderwand A
Panneau frontal A
Panel delantero A
Frontpanel A
"1
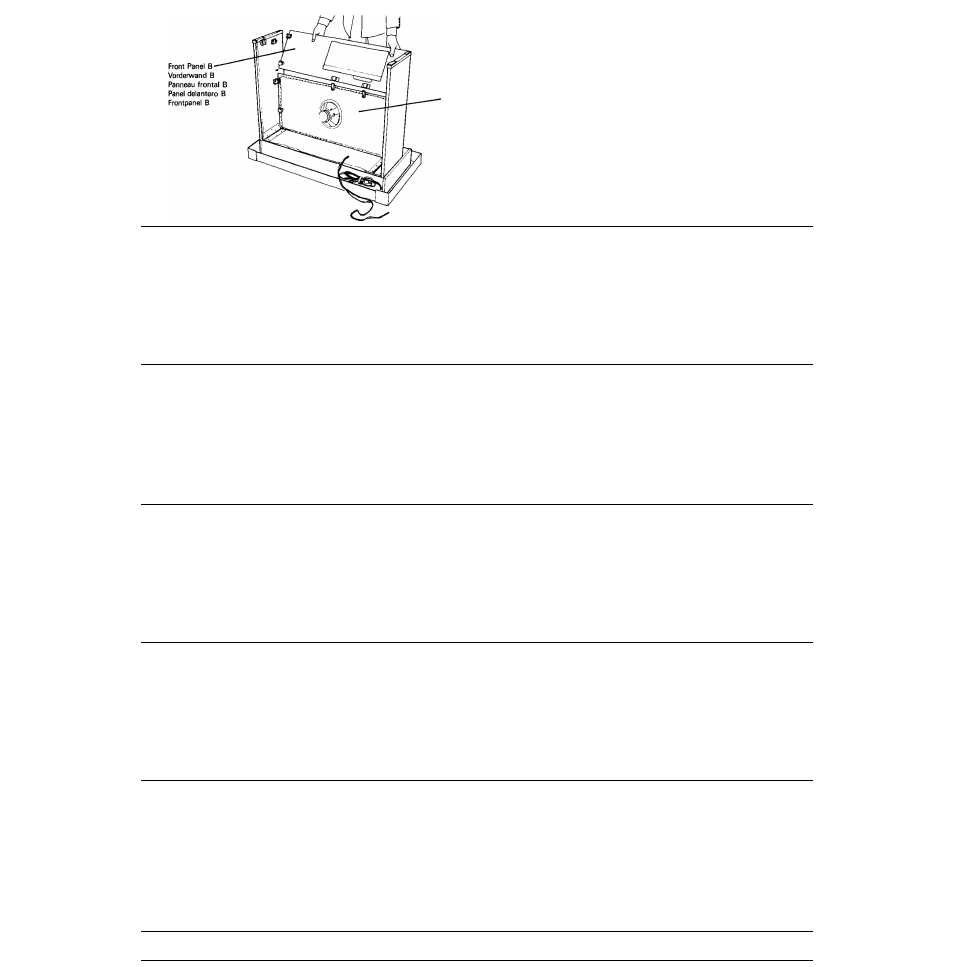
5) ASSEMBUNG TOE FRONT IVUVEL [BJ
4^; The hcx)ks on both ends of the Front Panel (B) are aligned with the
âv side pegs. At the same time the two central catches are inserted into
the latch on the front panel (A),
Finally, Insert the lock unit into the lock block until it is locked firmly.
5) MONTAGE DER LAUTSPRECHERPLATTE [B]
Bringen Sie die SchnappverschHisse an beiden Enden der Laut
sprecherplatte mit den Gegenstücken (Seitenteilen) zur Deckung und
lassen Sie sie fest einrasten.
Schieben Sie zum Schluß die Befestigungseinheit in den Befestigungs
block, bis sie fest verbunden ist.
5) ASSEMBLAGE DU PANNEAU FRONTAL PI
Les crochets situés aux extrémités dü panneau frontal (B) corres
pondent aux chevilles latérales. De même» les 2 attaches centrales
:; “ s’insèrent dans le loquet du panneau frontal.
Insérer enfin runité de verrouillage dans le bloc de verrouillage
jusqu’à ce qu’il se bloque convenablement.
5) MONTAJE DEL PANEL DELANTERO [B]
Los ganchos de ambos extremos del panel delantero (B) están aline
ados con las clavijas laterales. Al mismo tiempo, los dos pestillos
centrales se hallan insertados en las hembras de la cerradura del
panel delantero (A).
Por último, inserte la unidad de cierre en el bloque hasta cerrarlo
seguramente.
|í
5) MONTERING AV FRONTPANEL
[B]
Hakarna pá báda sídor pá frontpanel B passas in over stiften. Sam-
B: tidigt passas de tvä pinnarna och öglorna pä mitten i varandra mot
B;. frontpanel A. Se slutligen tili att läsen knapper igen ordentligt.
Montera slutligen lásanordníngen i lásblocket. Se till att den fasts
ordentligt.
.
■
. 11 ■.
fc'--