Camera recording – Panasonic NV-F55EA User Manual
Page 41
Attention! The text in this document has been recognized automatically. To view the original document, you can use the "Original mode".
Camera Recording
• For playback of a tape that was recorded via a
camera, select the audio track on which the sound
from the camera microphone was recorded by
pressing the corresponding Audio Output Selector,
• If you leave the VTR in the pause mode for more
than 5 minutes, the VTR will stop automatically to
protect the tape and the video heads.
• Even if the video camera is equipped with video
recorder remote control functions, this VTR can
not be remote-controlled from the camera.
Preparation
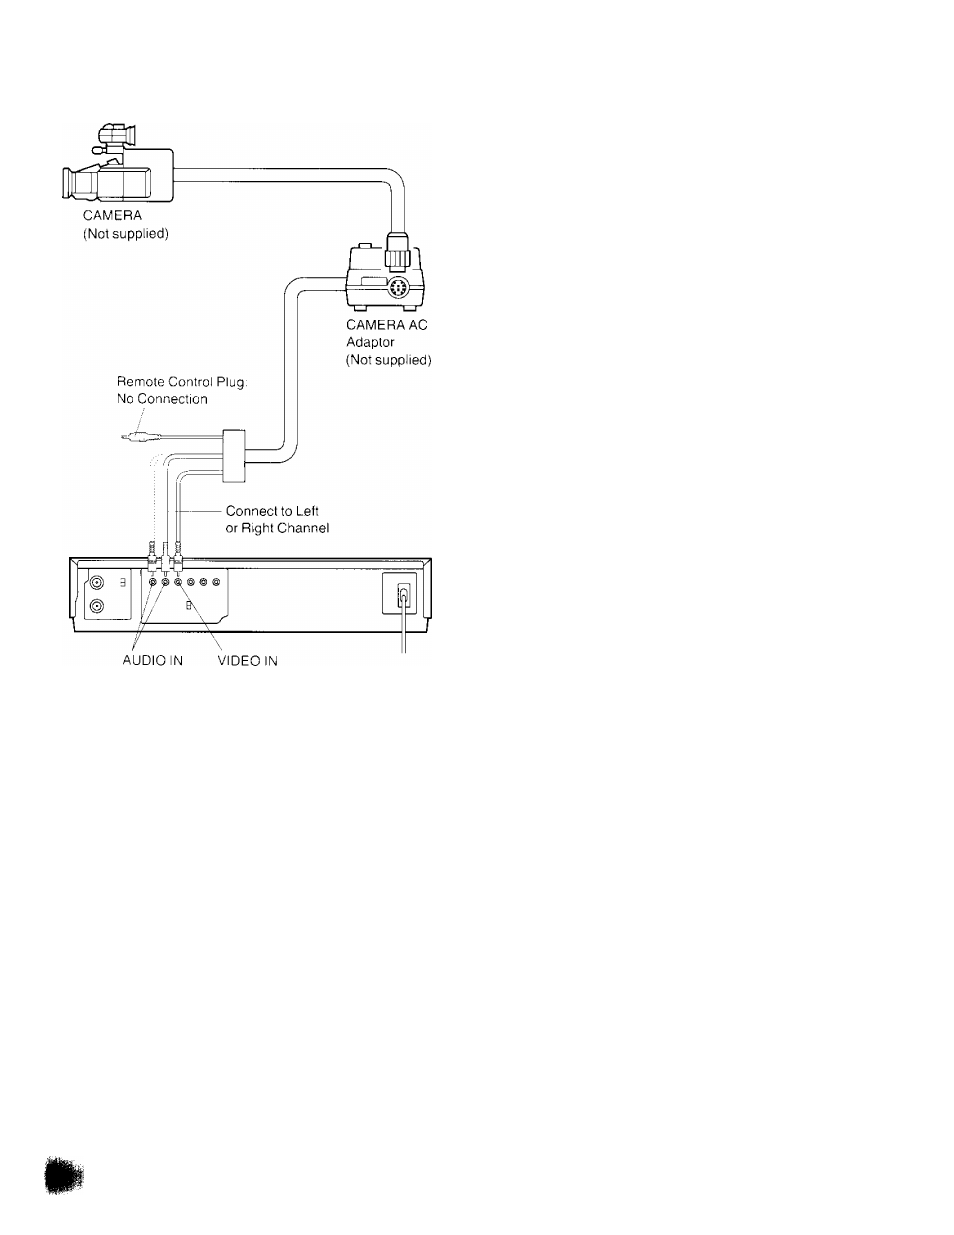
•Connect the Video Camera via the Camera AC Adaptor
to the VTR as shown in the illustration above,
• Insert a video cassette with the erasure prevention tab
intact.
When a video cassette is already inside the VTR, press
the VTR On/Off Switch to turn it on.
• Press the Input Signal Selector on the Remote Controller
to select the “A1 ” programme position (or select with the
Channel Up or Down Button on the VTR).
• Set the Tape Speed Selector to “SP" or “LP”.
•Adjust the audio recording level as described on page 27.
1
Turn Ihe Camera AC Adaptor on and make the
necessary adjustments on the camera.
Refer to the operating instructions of the camera you
are using.
2
Press the Record Button on the VTR to start recording.
Avoid recording unwanted material:
Press the Pause/Still Button (II) of the VTR, and the
recording will stop temporarily. To restart recording, press
the Pause/Still Button
(II),
again.
3
Press the Stop Button (■) on the VTR to stop the
recording.
41