Power source, How to connect the reel to the power source, About the power source – Daiwa TANACOM 1000 User Manual
Page 4: Battery indicator, Attention
2
Power source
How to connect the reel to the power source
About the power source
Battery indicator
1.
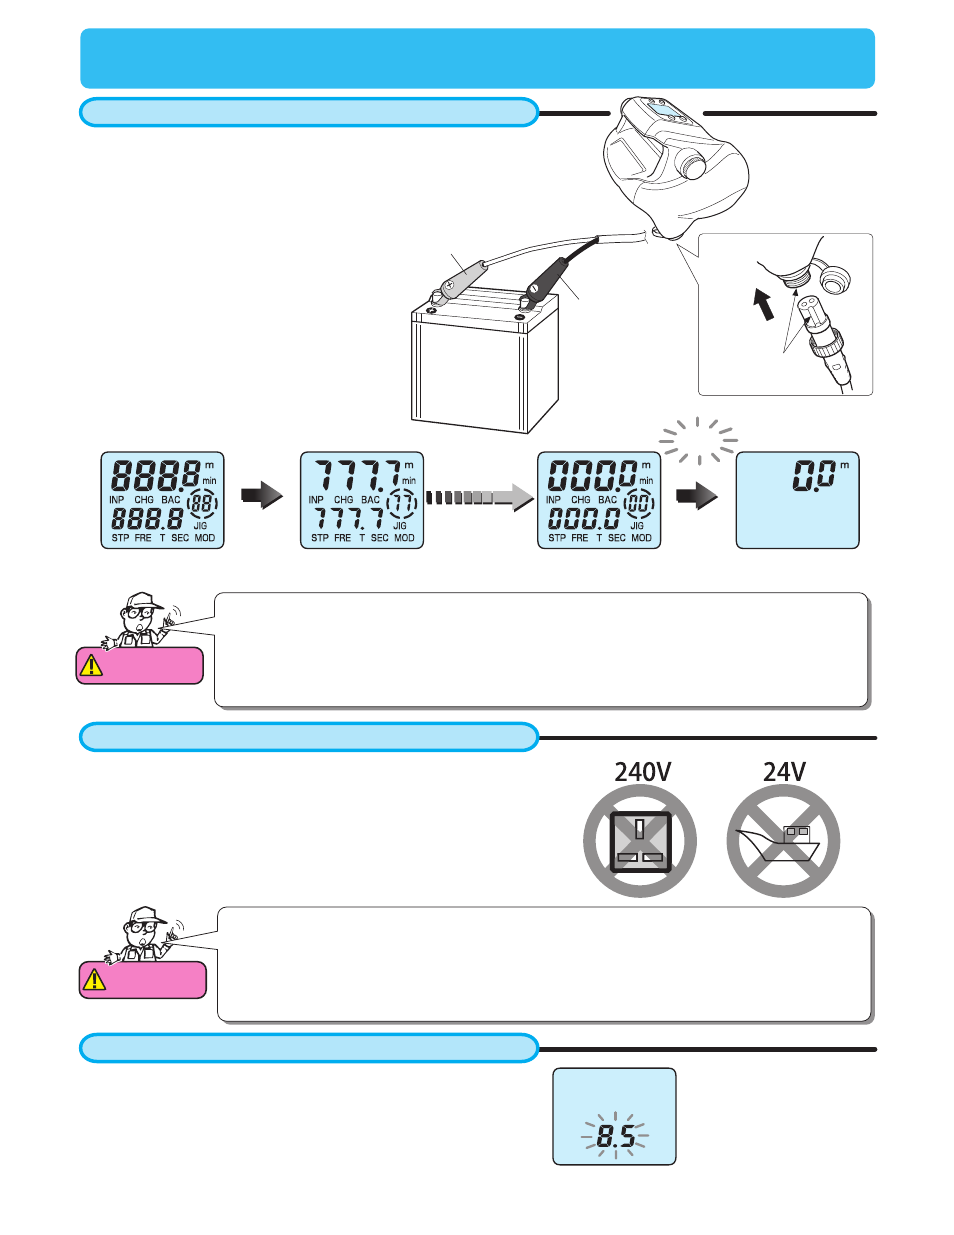
Attach the cord clips to the battery. Red covered clip is the plus
(+), and the black covered clip is the minus (-).
2.
Insert the connector into the reel. After this,
the display appears as below.
By taking the appropriate steps, the indication
will change as shown below and the data
will be set.
This reel is made to accept DC 12 Volt power only. Power sources
providing other than this cannot be used.
The power provided by a boat can be unstable, causing the reel to
stop unintentionally.
With power on, digits of the inverse counter (counter in the lower
area) will blink if voltage gets below DC 9 V.
If the display shows this when the motor is not running, then
battery voltage is likely to be low. In this case, replace the battery
with a recharged one.
0.5 sec
Beep !
Attention
1.
When changing batteries, the display’s back up memory stays active for about 15
minutes after the old battery is disconnected. Thus the above display startup sequence
does not need to replay when the new battery is connected within the 15 minute time
frame.
Attention
Make sure of the following before departure.
1. Recharge the battery before your fishing trip. Over time, a battery can naturally discharge.
2. Confirm the boat can provide the proper power source (i.e. voltage, connector shape etc).
3. Corroded connections can prevent the flow of electric current. Remove any corrosion or
dirt from the connectors.
Match slot
with key
All the features light
An indication change
Set completion
Black
Red
This figure shows the
voltage is 8.5 V
To make the most of the reels performance, be sure to use the
specified battery for the electric reel.