Installing the rack front panel and bezel, Installing the rack front panel and bezel -13 – Dell PowerVault 770N (Deskside NAS Appliance) User Manual
Page 19
Attention! The text in this document has been recognized automatically. To view the original document, you can use the "Original mode".
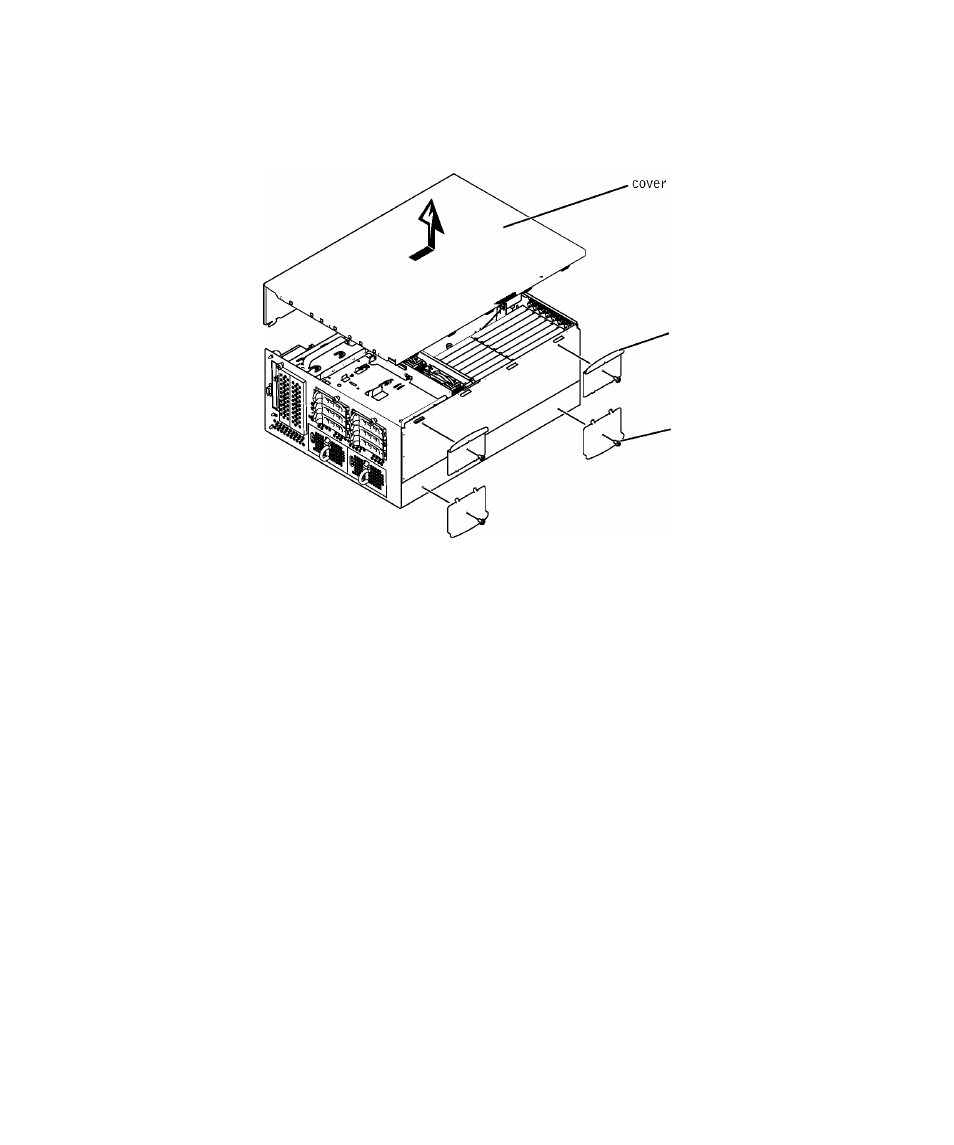
F i g u r e 1 - 9 . R e m o v i n g t h e F e e t a n d t h e S y s t e m C o v e r
. foot (4)
hex-head
Phillips
screw (4)
b
Slide the system eover baek and grasp the eover at both ends,
c
Carefully lift the eover away from the system and set it aside.
3
Remove the eosmetie trim panels on the left side of the ehassis:
a
Remove the seven T-10 Torx serews from the top, left, and bottom edge of the
front panel.
These seven serews seeure the eosmetie trim panel to the front panel and ehassis.
b
Slide the eosmetie trim panel about 0.5 ineh toward the baek of the ehassis and
lift it away.
5
Remove the 12 remaining T-10 Torx serews that seeure the tower front panel to the
ehassis.
6
Lift the front panel away and set it aside, out of the way.
Installing the Rack Front Panel and Bezel
1
Install the гаек front panel on the ehassis, seeuring it with 13 of the Torx serews you
removed in the previous proeedure (see Figure 1-10).
Notiee that the raek front panel is wider than the tower front panel and has handles
and thumbserews for the front vertieal rails.
R a c k I n s t a l l a t i o n G u i d e
|
1-13