Roller stand assembly, Colposcope assembly and operation – Welch Allyn 88460 Optical Colposcope with Swing Arm Roller Stand - User Manual User Manual
Page 8
4
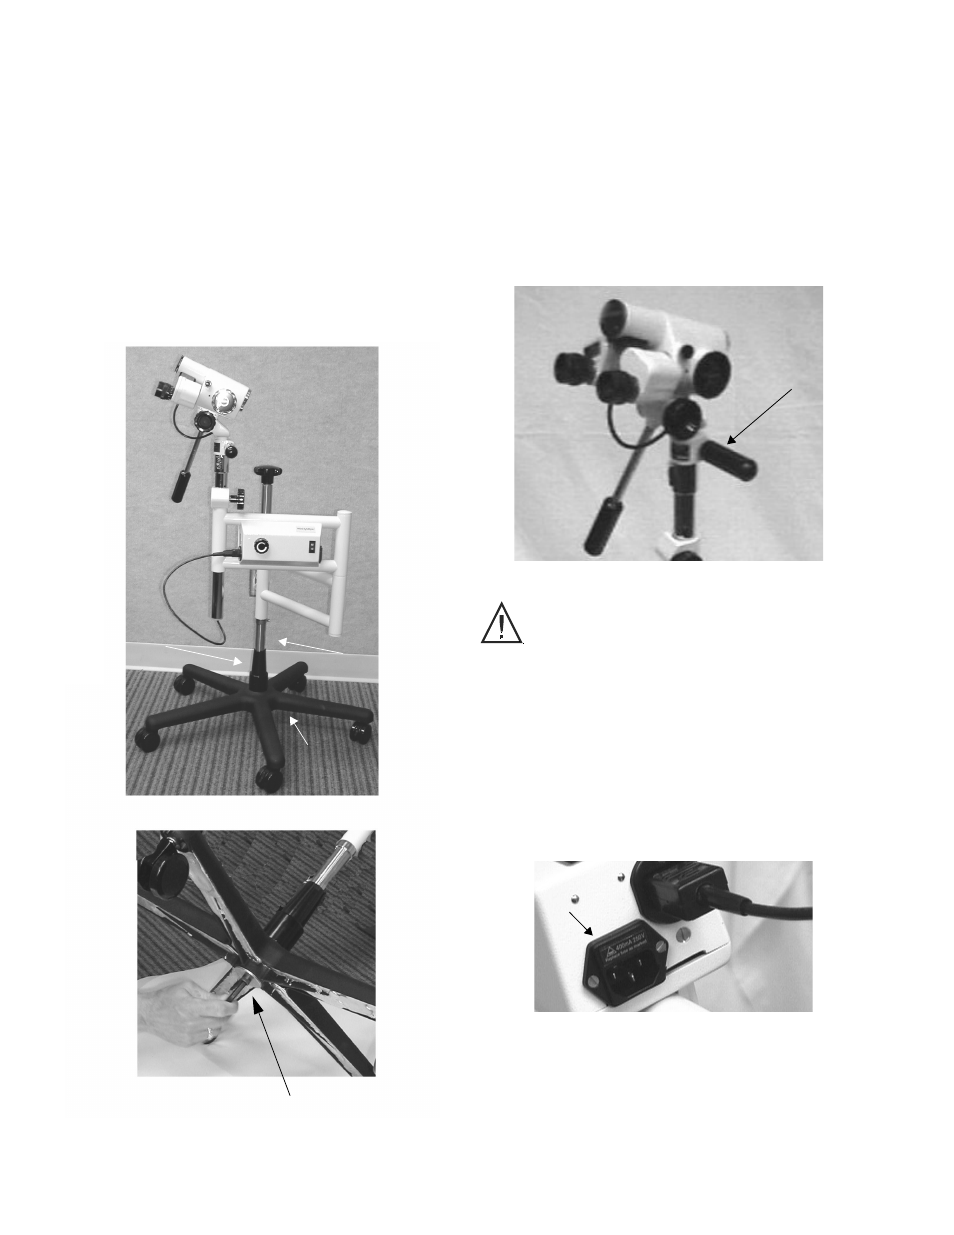
Roller Stand Assembly
Use the roller stand with Swing Arm mount for additional
mobility of the colposcope.
Remove the swim arm post (A) from the shipping con-
tainer. Place the adapter (B) (large end first) on the post
and tighten the set screws with the wrench provided.
Place the swing arm post (A) and adapter (B) into the
roller base (C).
Place the two washers on the cap screw . Carefully tilt
the post assembly and base. Secure the cap screw and
washers in the bottom of the base assembly (C) and
tighten with the wrench provided.
Colposcope Assembly
And Operation
After assembly of the appropriate stand, insert the colpo-
scope head extension tube into the stand. Tighten the
adjustment knob to adjust the head to a convenient
height for colposcopy. Verify that the fine height adjust-
ment handle (A) is in the middle position. On the Swing
Arm mount it is possible to change the height of the
swing arm (see “Height Adjustment of the Swing Arm”
on page 3).
Before connecting the unit with the power cord to the
wall outlet, check that the voltage in the wall outlet is
comparable to that written on the name plate of the col-
poscope. Colposcopes in the United States are preset at
125 volts to allow for fluctuations in a 110 volt outlet.
There are two fuses (A) located in the power cord input
socket on the transformer. These fuses protect against
excessive fluctuations in voltage. Replacement fuses are
included with the replacement bulb. Type and rating of
fuse are written on the name plate and fuse holder.
It is possible to plug the light cable from the colposcope
head into the corresponding socket of the transformer.
A
B
C
Cap Screw
A
Use the light transformer with AC-50-60 Hz only.
A