Vintage Cellars 1800 Series CellarPro User Manual
Page 4
4
I . P r i o r t o I n s t a l l a t i o n
Test the unit before installing it.
1. Remove the unit from the box. SAVE THE BOX AND PACKING MATERIALS.
2. Remove any materials that have been packed inside the exhaust cavity
3. Plug in the power cord. The cooling system is programmed with a 3-Minute
Delay at Startup to protect its internal components
4. Let the unit run on a hard, flat surface for no more than 10 minutes.
5. Make sure that all fans in the cooling unit are spinning.
6. Check that the cooling unit is discharging cold air from the bottom (it should
be approximately 10°F colder than the temperature on the digital display)
7. Turn the unit “off”, install the unit, and wait 24 hours before operating your
CellarPro cooling unit. This will protect the unit from internal damage that
could arise if the unit was shipped, stored or tilted on its side.
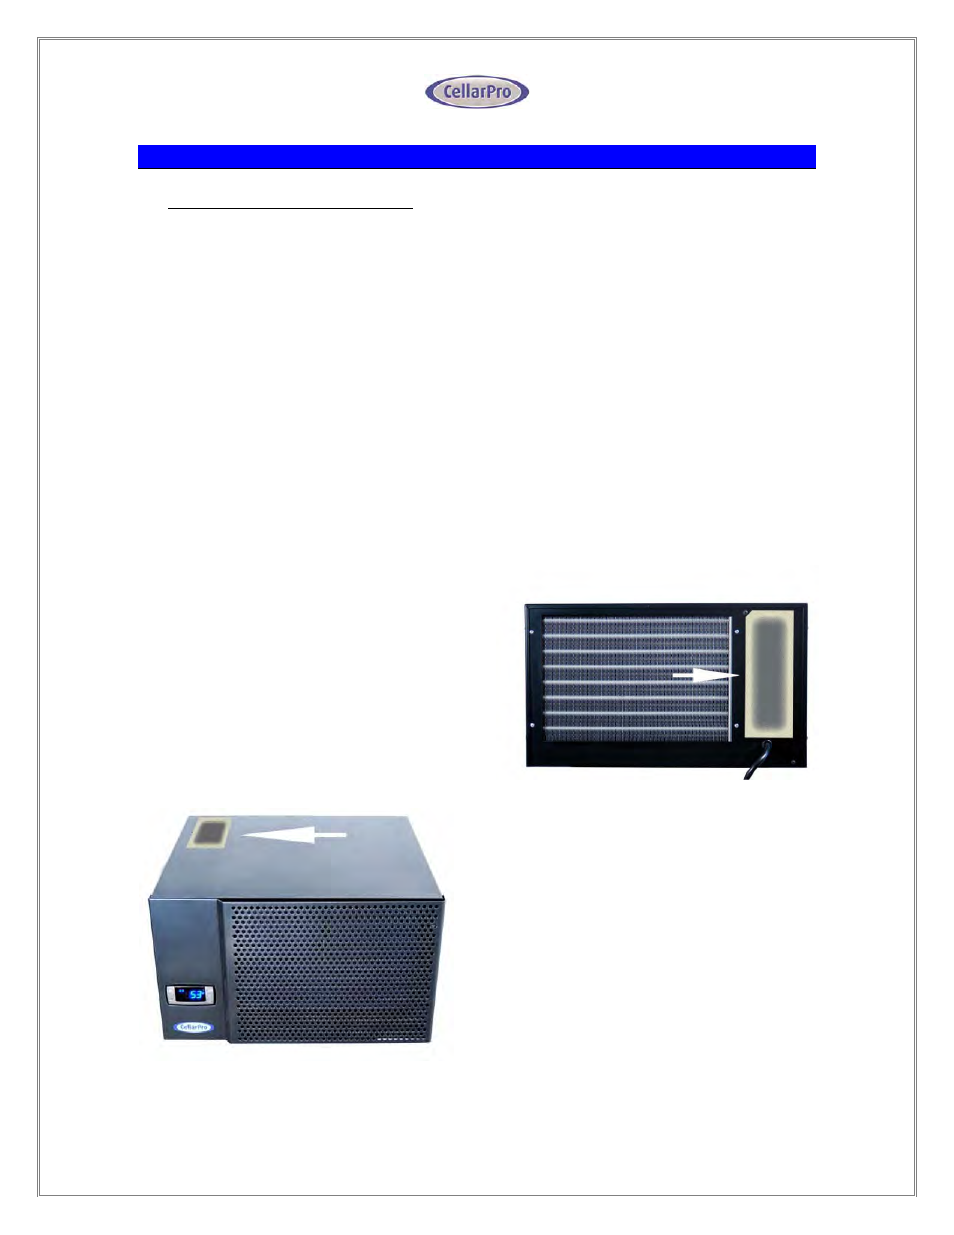
Make sure that the exhaust panel is installed in the correct position – it should
cover either the TOP or the REAR exhaust vent:
o
TOP VENT CONFIGURATION: If
the hot air will be discharged
through the TOP of the cellar,
install the exhaust panel on the
BACK of the cooling unit (as
shown in the Picture A). In this
configuration, the cavity on TOP
of the cooling unit is OPEN.
Picture
A
Top
Vent
Configuration
o
REAR VENT CONFIGURATION: If
the hot air will be discharged through the
REAR of the cellar, use the exhaust panel to
seal the TOP of the cooling unit (as shown in
the Picture B). In this configuration, the
cavity at the REAR of the CellarPro is OPEN.
Picture
B
Rear Vent Configuration