Preparing the installation location, Through-the-wall – Vintage Cellars WhisperKOOL InCellar User Manual
Page 14
InC
033114
Page 12 | 1-800-343-9463
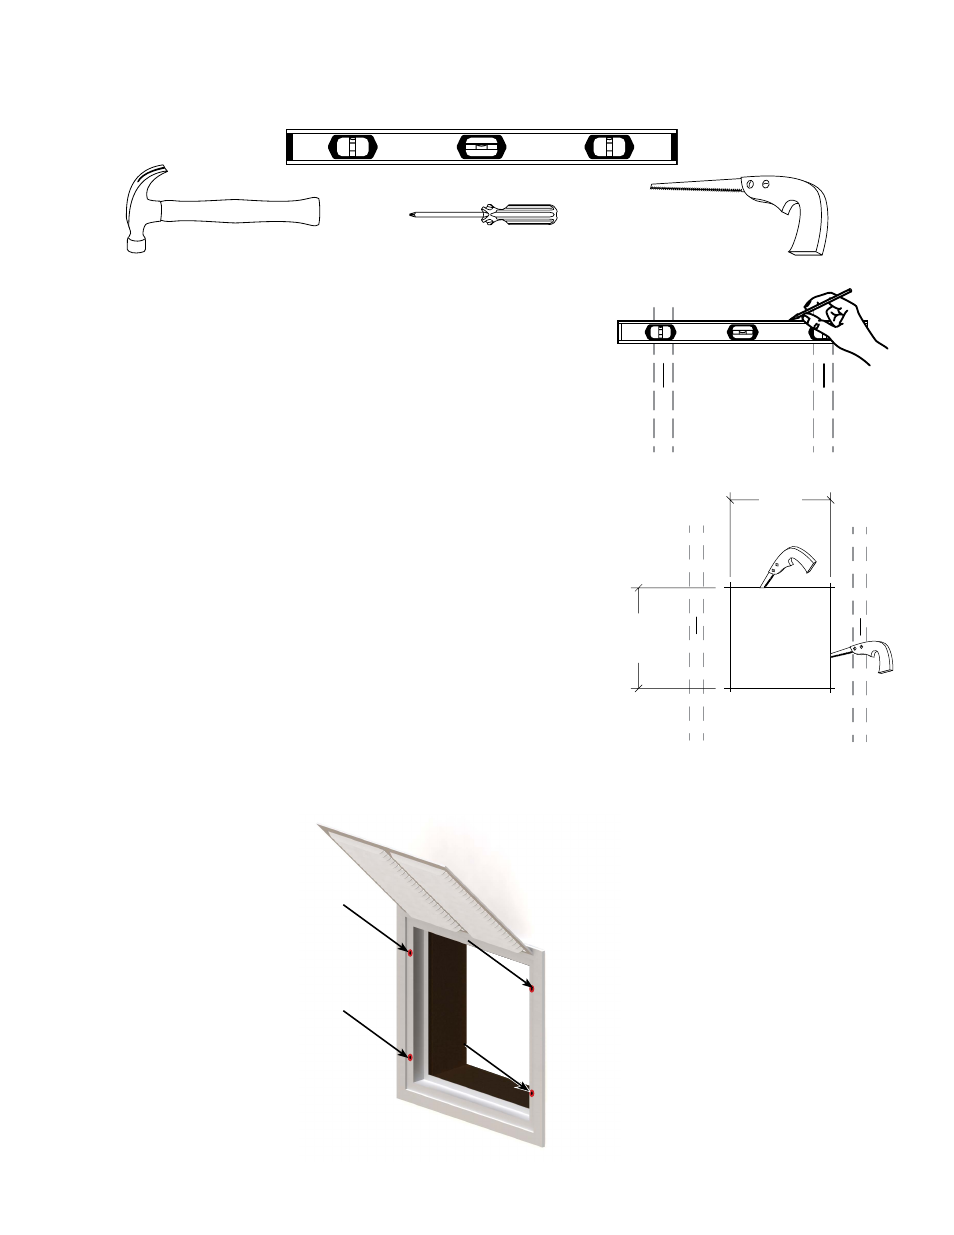
Locate the desired installation location. Using a stud finder, locate the studs on
either side.
Place the unit against the wall to determine the height of the Intake Plenum
on the rear of the Cooling Unit.
Using a level and a pencil, make an outline of a 12 1/4” square in between the
two studs to provide an entry for the two Intake Plenums pieces.
Using a saw, cut out the outlined square. Be careful not to cut into any studs,
electrical, or plumbing.
If present, only remove the insulation covering the area of the cut-out.
Now you have to make the same hole on the other side of the wall. Since you
already have one hole, this is an easy process. Using a nail, mark all four corners
of the first hole by making nail holes through the sheetrock. Then on the other
side of the wall, connect the holes with a pencil mark and cut.
Though there are still steps prior to the installation of the unattached Intake
Plenum, check to see that the Plenum fits snugly through the cut-out area.
Place the Register on the unattached Intake Plenum. Mark the holes that will
be drilled.
Pre-Drill the holes on the unattached intake Plenum.
PREPARING THE INSTALLATION LOCATION
Through-the-Wall
Minimum Tools Needed
Level
Hammer
Saw
Screwdriver
12 1/4”
12 1/4”