3 setting up the balance, 4 level adjusting, Setting up the balance level adjusting – Rice Lake Equipoise Series, Rice Lake Weighing Systems User Manual
Page 8
4
Equipoise Series Technical Manual
The LCD color indicates the following:
• Green - battery has a full charge.
• Yellow - battery is nearly full of
charge.
• Red - battery is being charged.
• Do not use any other type of power adapter than the one supplied with the
balance.
• Verify that the AC power socket outlet is properly protected.
Please charge the battery before using the balance for the first time
As the battery is used it may fail to hold a full charge. If the battery life
becomes unacceptable, contact your distributor.
2.3
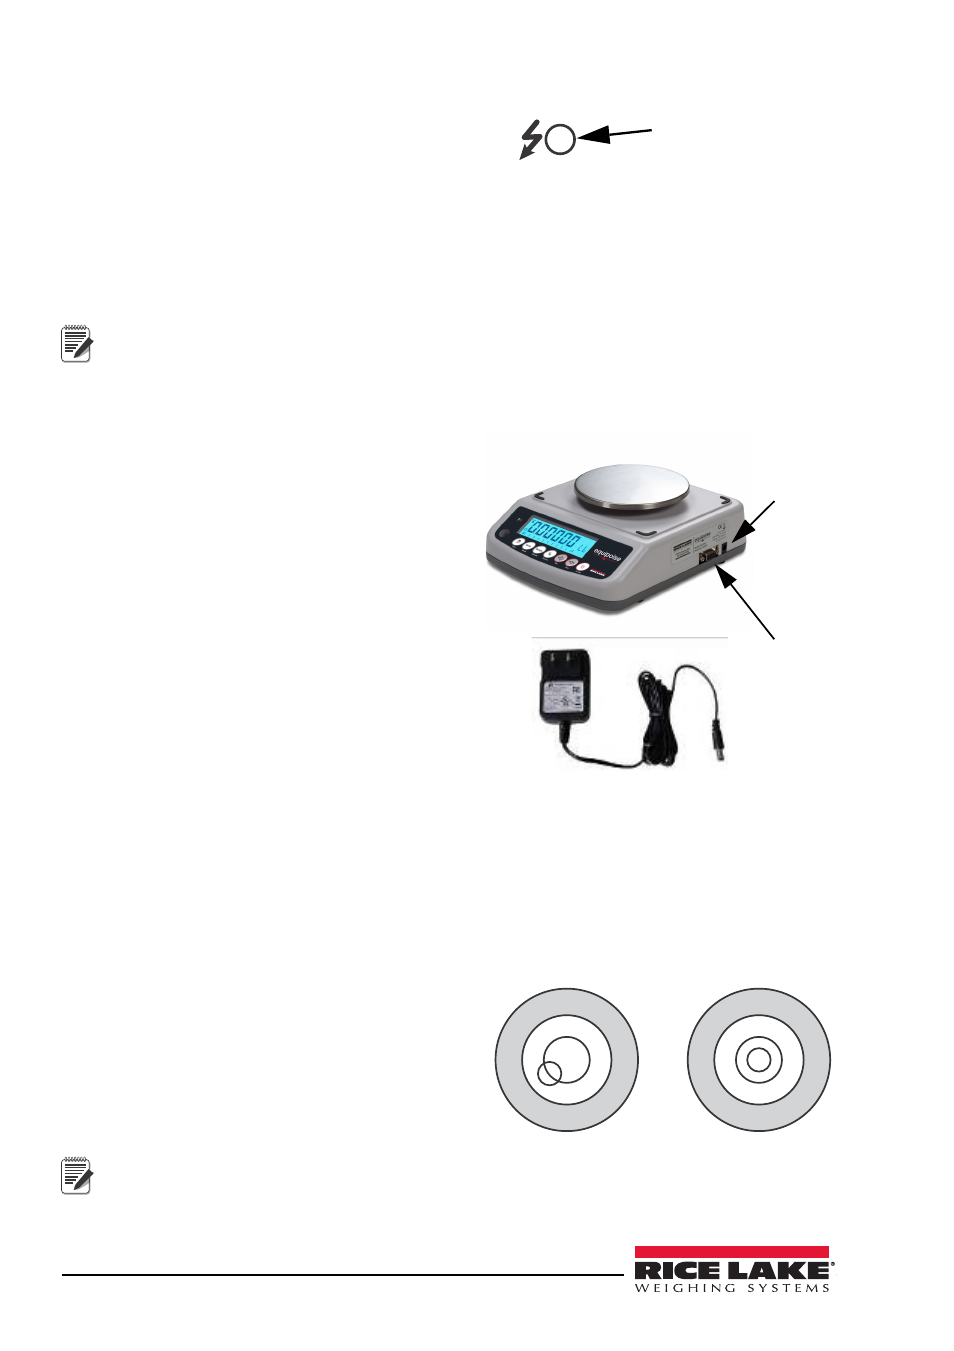
Setting Up The Balance
• Place the balance on a table or other flat
surface.
• Plug the adapter pin in to the balance
adapter jack, located on the right side of
the balance.
• The adapter plugs into an AC power
outlet. The balance should be located near
an easily accessible socket outlet with a
protective ground/earth contact.
• Press the On/Off key to turn on the
power. Press the key again to turn off.
• Display will show the version number
and will began self test.
• When the self test is complete, the normal weighing mode will be displayed.
• A warm-up time of 15 minutes stabilizes the measured values after switching on.
• Calibrate with exact calibration weights. A minimum of 1/3 of the balance
capacity should be used for calibration. See details in “Normal Calibration” on
The balance is now ready for use.
2.4
Level Adjusting
1. Place the balance on a table or other
flat surface.
2. Check the water mark. If bubble is
not center, adjust the leveling feet
until it reaches center.
Always re-check the level when
you change the location.
LED Light located
on display panel
Note
Adapter
Jack
RS-232
Not Level
Level
Note