0 assigning an ip address, 1 deviceinstaller, Assigning an ip address – Rice Lake Ethernet TCP/IP User Manual
Page 10
6
Ethernet TCP/IP Card Installation Manual
3.0
Assigning an IP Address
The following section covers the steps required to assign an IP address. The IP address must be assigned and
configured before a network connection is available. There are four methods, any one of which can be used:
•
Lantronix
®
DeviceInstaller
TM
•
Network port login
•
Command Prompt
•
Web Configuration
Both of these installer tools are located on the Ethernet Configuration CD, PN 72763.
Refer to www.lantronix.com to ensure you have the most up-to-date version of DeviceInstaller.
If connecting from a PC to the Ethernet card, use a crossover cable. Otherwise, use a straight through
cable if connecting via a network.
Refer to the Lantronix User’s Guide found on the Ethernet Configuration CD for further information on the
Ethernet configuration procedures.
3.1
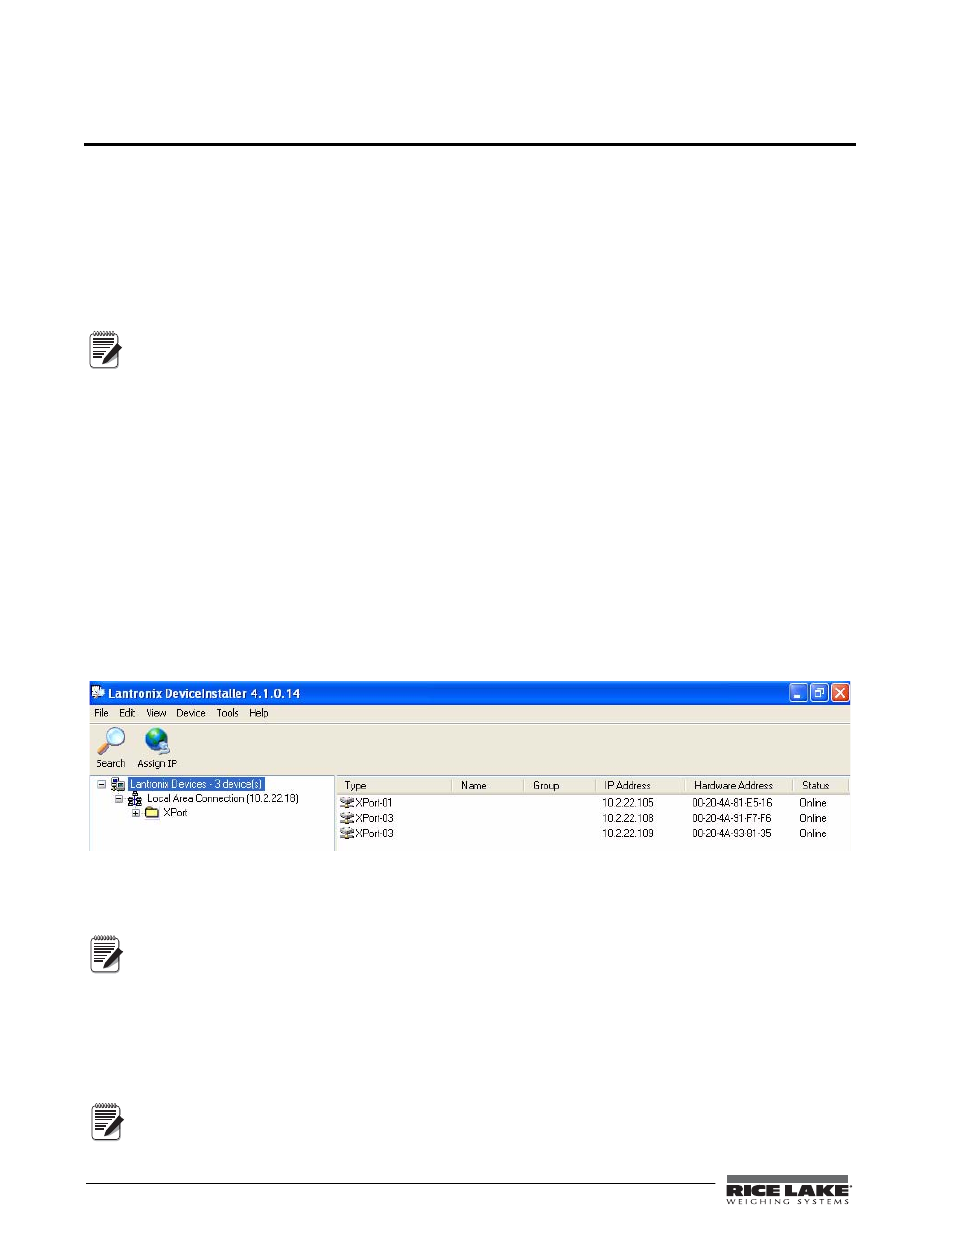
DeviceInstaller
DeviceInstaller provides the preferred method for setting up an IP address for the Ethernet card with
Rice Lake
indicators
. Depending on firewall restrictions and other network variables, however, DeviceInstaller may not be
able to find the Ethernet card. If you encounter troubles in using the instructions listed in this section, use the
Windows Command Prompt (Section 3.3 on page 7), which will always work regardless of network variables.
The DeviceInstaller runs on a personal computer to help assign an IP address. To use the DeviceInstaller, use the
following steps:
1. Insert the Ethernet Configuration CD into the hard drive of your PC running Windows
®
95, 98, ME,
2000, or XP.
2. Install DeviceInstaller per on-screen instructions.
3. Start the DeviceInstaller program and follow the on screen instructions.
Figure 3-1. DeviceInstaller Main Menu Screen
Rice Lake indicators
come supplied with a pre-configured IP address which automatically enables Dynamic Host
Control Protocol (DHCP)—It is recommended that you assign a static IP address to your card for use in the field.
The web connection to the Ethernet card requires the original JAVA by Sun Microsystems. For a free
download, go to www.JAVA.com
4. Click
Action / Assign IP Address
to assign a new IP address.
5. Enter the hardware address found on LX1.
6. It is recommended that you assign your own IP address to the card. Enter a chosen IP address in the
Enter
IP
field. Record the configured IP address for future reference.
7. Press
Set IP
to assign a new IP address.
The DeviceInstaller will search the network to see if the proposed IP address is already being used. If it is
already in use, on the network, the operation will fail.
Note
Note
Note