Engine installation – Losi LOSA0881 User Manual
Page 35
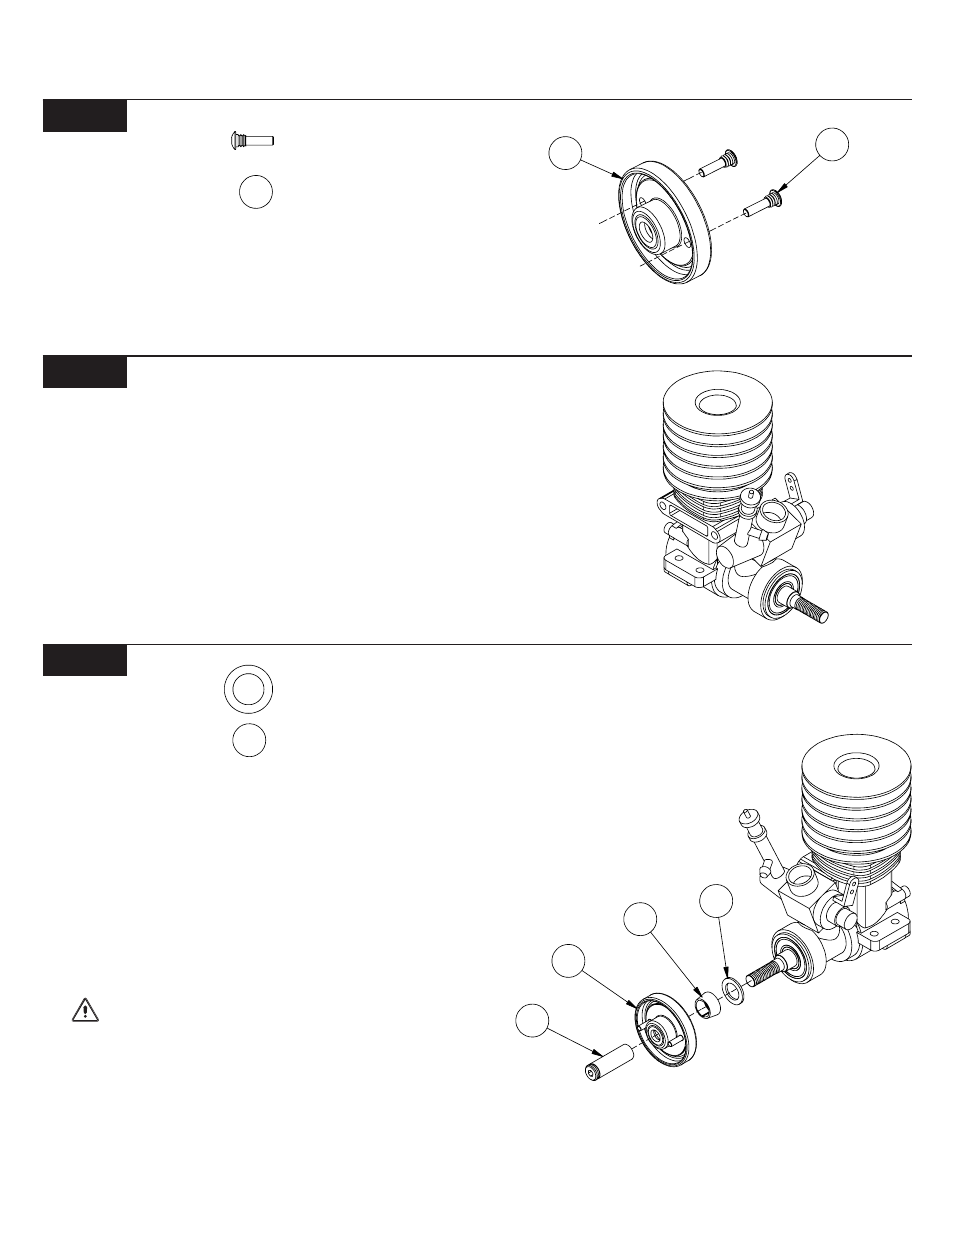
ENGINE INSTALLATION
3 2
Figure 73
Figure 71
Step 1. Thread a clutch pin/screw (151) into each of the small holes in
the flywheel (152) and tighten with a .050" Allen wrench. The screws
should be inserted from the rear as shown.
Tip: A small amount of thread-lock compound should be used on
the threads of the clutch pins.
Step 2. Remove any hardware that came installed on the crankshaft of
your engine. This includes all nuts, washers, and prop hubs.
*NOTE: If your engine did not come with a glow plug you will need
to purchase one. Use a glow plug wrench, or a 5/16" nut driver to
install the glow plug into the head of the engine. Most glow plugs
come with a brass washer. Make sure that this washer is placed on
the glow plug before it is installed.
Step 3. Slide a flywheel shim (153) over the crankshaft, and against
the front bearing on the engine. Slide the flywheel collet (154), large
side first, over the crankshaft and next to the shim (153).
Tip: There are two shims included in the kit. If the flywheel inter-
feres with the case of the engine, add a second shim. If after the
engine is installed, the gears don't line up properly, a second shim
can be added to help correct the alignment.
Step 4. Slide the flywheel (152), pins out, over the crankshaft. The
flywheel (152) should be seated over the collet (154). Thread the
clutch nut (155) onto the crankshaft and tighten it using a 3/32"
Allen wrench.
IMPORTANT NOTE: The clutch nut should be very tight.
Hold the flywheel with a rag in order to get a good grip while tighten-
ing the clutch nut. There are special tools available for inserting in the
head of the engine to keep it from turning over while tightening the
clutch nut. Other than these special tools, nothing should ever be
inserted in the head of the engine to keep it from turning over!
Figure 71
Figure 72
Figure 73
151
153
154
152
155
153
Figure 72
151
152