La-z-time, Home theater assembly instructions: la-z-time, Home theater assembly details – La-Z-Boy Home Theater User Manual
Page 9
La-Z-Time
®
Home Theater
Assembly Instructions:
La-Z-Time
®
Home Theater
Assembly Details:
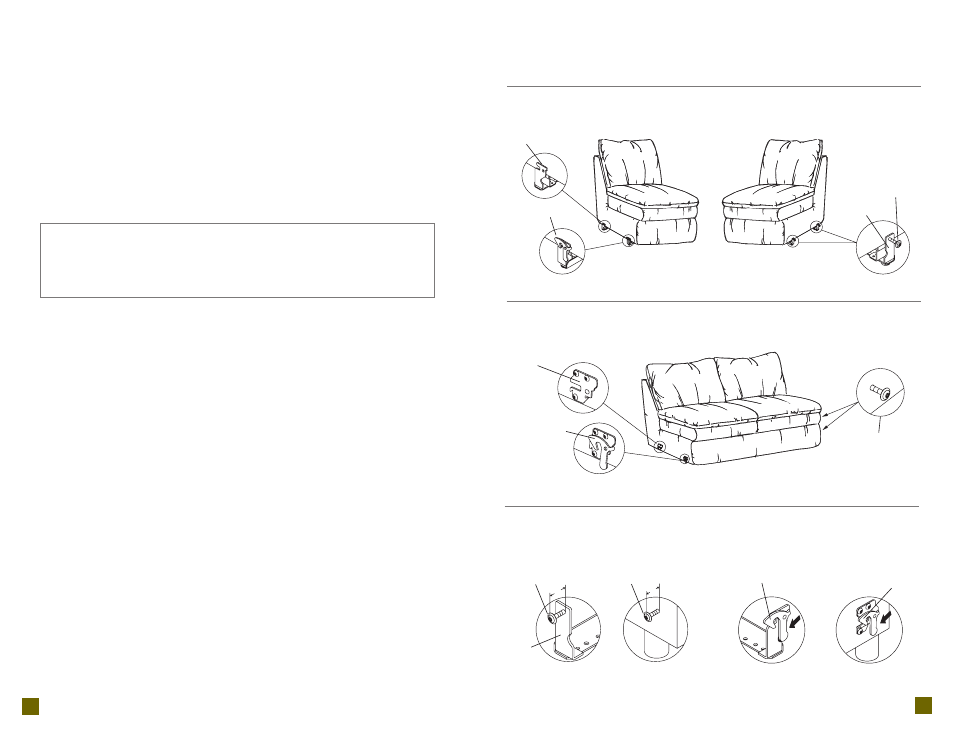
Modular units with metal base rails have one locking latch bracket and one
latch bracket on the right side (sitting) of modular units without right side arms,
and two stud mounts with threaded studs on the left side (sitting) of modular
units without left side arms (F
IGURE
6).
Modular units with wood legs have one side mount locking latch bracket and
one side mount latch bracket on the right side (sitting) of modular units without
right side arms, and two threaded studs on the left side (sitting) of modular units
without left side arms (F
IGURE
7).
CAUTION-The purpose of the latch bracket system is to connect
the units and prevent them from being separated. The latch
bracket system does not provide adequate structural suppor t for
the movement of latched units. Do not move the units while
latched together, damage may occur.
4. Use a T-30 torx driver to loosen the threaded studs to approximately 1", this
measurement may var y depending on the fabric and style (F
IGURE
8). The
threaded studs are located on the left side (sitting) of modular units without
left side arms.
5. Align the units to be joined next to each other. Move the unit with the latch
brackets approximately 4" forward of the unit with the threaded studs. The
latch brackets are located on the right side (sitting) of modular units without
right side arms.
6. Slide the unit with the latch brackets back until the threaded studs are
securely engaged in both the front and rear latch brackets. The rear bracket
is not a locking bracket.
NOTE: Due to variations in upholster y and style the threaded stud length
may need to be adjusted to fit into the latch brackets. Loosen or tighten the
threaded studs to provide adequate clearance.
7. Continue connecting the modular units until all have been securely joined.
8. All modular units must be disconnected to safely move the modular group.
To disconnect the units, apply pressure to the swing arm of the locking latch
bracket (F
IGURE
9) and slide the unit forward. Repeat this step to disconnect
the remaining units.
Assembly Instructions for La-Z-Time
®
Modular Units (Continued)
17
16
F
IGURE
6
Latch Bracket
Threaded
Stud
Stud
Mount
Locking Latch
Bracket
1
"
1
"
F
IGURE
7
F
IGURE
8
F
IGURE
9
Side
Mount
Latch
Bracket
Side Mount
Locking
Latch
Bracket
Threaded
Stud
Threaded
Stud
Threaded
Stud
Stud
Mount
Base Units
Base Units
Leg Units
Leg Units
Locking Latch
Bracket
Side Mount Locking
Latch Bracket