Canon 320 User Manual
Page 32
29
Routine Maintenance
Print Head Deep Cleaning
If print quality does not improve by standard Print Head Cleaning, try Print Head
Deep Cleaning, which is a more powerful process. Note that cleaning the Print
Head causes used ink to be absorbed in the ink absorber. Print Head Deep
Cleaning consumes more ink than standard Print Head Cleaning, so perform
this procedure only when necessary.
1
Prepare for printing.
Turn on the printer.
See “Turning On/Off the Printer” on page 6.
2
Start Print Head Deep Cleaning.
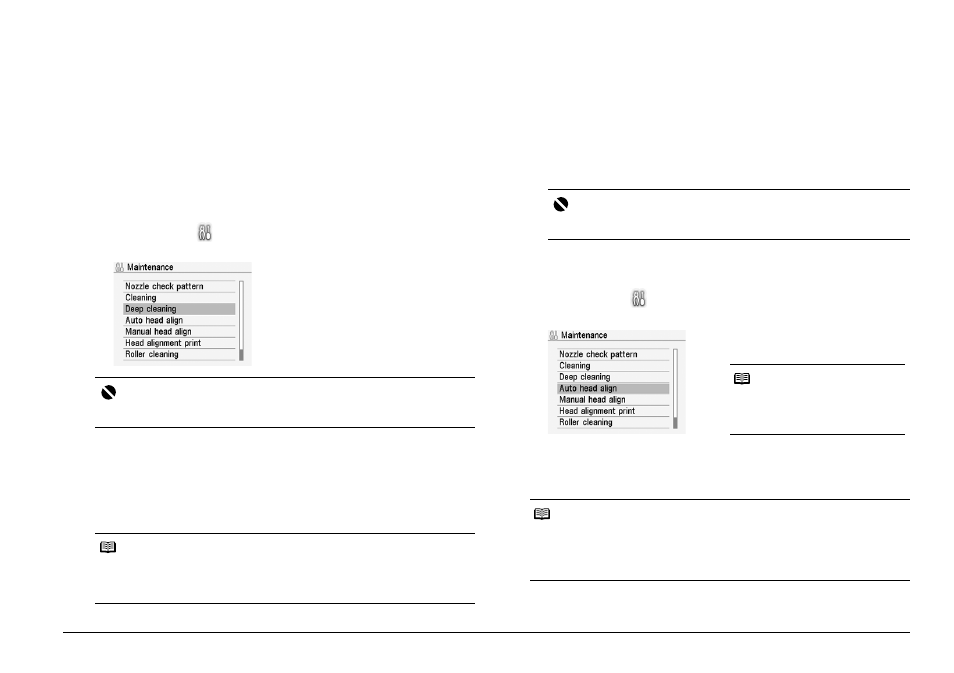
(1) Select Settings
on the Home screen, then press the OK button.
(2) Select Maintenance, then press the OK button.
3
Print the nozzle check pattern to verify that the Print Head Nozzles
are clean.
When Print Head Deep Cleaning finishes, the confirmation message is
displayed. Select Yes to print the Nozzle Check Pattern, and verify the Print
Head Nozzles.
See “Printing the Nozzle Check Pattern” on page 27.
Aligning the Print Head
If print quality is poor, adjust the Print Head position. It may solve the problem.
1
Prepare for printing.
(1) Turn on the printer.
See “Turning On/Off the Printer” on page 6.
(2) Load one sheet of the supplied 5" x 7" / 127.0 x 177.8 mm paper or
same-sized Canon genuine paper in the Rear Tray.
(3) Make sure that the Paper Thickness Lever is set to the right.
2
Adjust the print head position.
(1) Select Settings
on the Home screen, then press the OK button.
(2) Select Maintenance, then press the OK button.
(4) Select Yes, then press the OK button.
The pattern is printed and the Print Head is aligned automatically. This
takes about 3 minutes.
Important
Do not perform any other operations until the Print Head Deep Cleaning finishes.
This takes about 90 seconds.
Note
If the print head nozzles are still not clean, turn off the printer and perform another
Print Head Deep Cleaning after 24 hours.
If this does not resolve the problem, the Print Head may be damaged. Contact
your Canon service representative.
(3) Select Deep cleaning, then press
the OK button.
(4) Select Yes, then press the OK
button.
Print Head Deep Cleaning starts.
Important
Be sure to use the following paper.
Photo Paper Plus Glossy (PP-101) 5" x 7" / 127.0 x 177.8 mm
Note
z
The print head alignment pattern is printed in black and blue.
z
If adjustment was not done successfully, the “Auto head align has failed. Press
the OK button and repeat operation.
displayed on the LCD. For details, see “Error Message Is Displayed on the
LCD” on page 35.
(3) Select Auto head align, then press
the OK button.
Note
If you select Head alignment print,
the printer exits the process after
printing the current adjustment
values.