Antenna, Battery installation, Storing the battery for transport – Elecraft T1 ATU Owner's Manual User Manual
Page 5: Connections, Figure 2
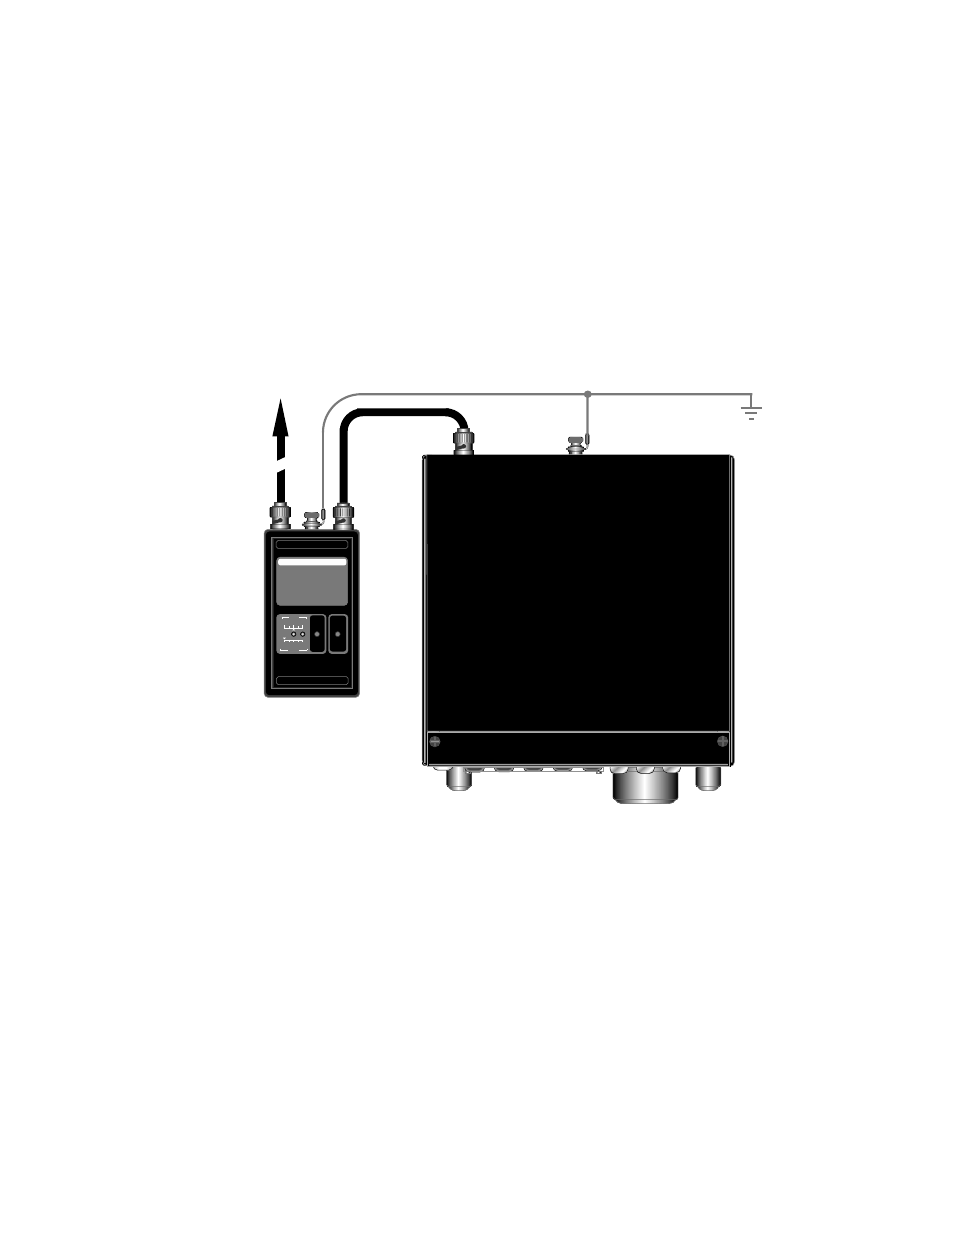
5
Battery Installation
Slide open the battery compartment cover on the bottom of the T1. Align the 9-V battery’s (
-
) terminal with
the wider of the two contacts (Figure 1). Note: The T1 includes reverse-polarity protection.
Storing the Battery for Transport
When packing the T1 for travel, remove the battery and re-install it flipped left-to-right, with the battery
terminals away from the contacts. This takes just a couple of seconds, and will prevent the T1 from getting
turned on inside a pack or suitcase. (Even if it does get turned on, it will turn itself off after a few seconds.)
Connections
Connect the T1 to your transceiver, antenna, and ground as shown in Figure 2. (Also see Antenna
Considerations on page 9.) If you have a T1 remote control adapter, connect its 3.5 mm phone plug to J3
on the left side of the T1, and plug the other end into your transceiver’s accessory jack. (Further
information can be found in the instruction sheet for your adapter.)
ANT
XCVR
3:1
2:1
1:1
PWR
Tune: Hold TUNE; LEDs show SWR.
Power: Tap PWR; LEDs show P (W).
Bypass: Tap PWR, then BYP. Status
indicated by green (IN) or yellow (OUT).
Info (in CW): Tap PWR; hold INFO.
Low Battery: Red LED flashes briefly.
TUNE
(Hold)
SWR
GND
PWR
(Tap)
INFO
(Hold)
BYP
(Tap)
E
L E C R A F T
T
1
Automatic Antenna Tuner
Quick Reference
H F ~ 6 m 2 0 W max.
10
5
1
Antenna
Figure 2