Regulator assembly – Dynojet 248x: DynoWare EX+ Upgrade User Manual
Page 18
DynoWare EX+ Upgrade For The Model 248 Dynamometer
A P P E N D I X A
Installation
A-4
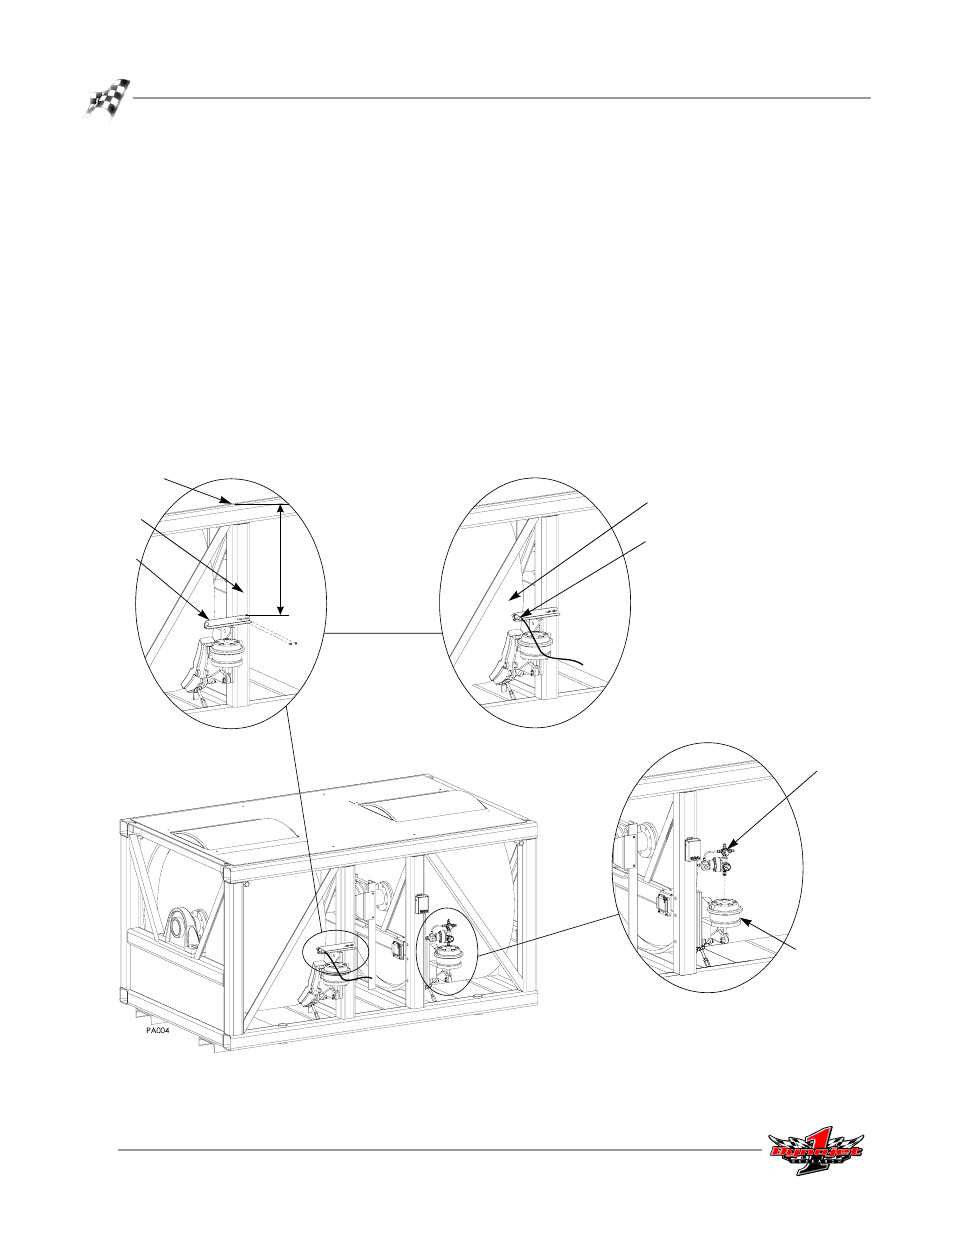
3
Install the temperature sensor.
3a
Clamp the temperature sensor bracket to the left post 24-inches down from
the top of the dyno frame.
3b
Using a center punch, mark the bracket mounting holes in the middle of
both slots. Remove the clamp and bracket.
3c
Drill and tap the mounting holes for 1/4-inch UNC bolts.
3d
Loosely attach the bracket to the dyno using two 1/4-inch button head allen
bolts. Do not tighten the bolts.
3e
Install the temperature sensor so it is approximately three inches from the
surface of the drum.
3f
Adjust the bracket so the temperature sensor is aimed at the interface of the
knurl and brake surface. Tighten the bolts to secure the bracket.
4
Screw the prop air regulator assembly into the right side brake canister. Tighten it
so the air gauge is facing out
Figure A-4: Install the Temperature Sensor and Prop Air Regulator Assembly
post
bracket
24 in.
prop air regulator
assembly
air canister
sensor
install bracket
install sensor
install prop air
regulator assembly
drum
top of dyno
frame