Installation, Removing the standard air brake system, Figure a-2: remove the standard air brake – Dynojet 248x: DynoWare EX+ Upgrade User Manual
Page 16
DynoWare EX+ Upgrade For The Model 248 Dynamometer
A P P E N D I X A
Installation
A-2
. . . . . . . . . . . . . . . . . . . . . . . . . . . . . . . . . . .
INSTALLATION
This section describes the procedures to remove the standard air brake system, install
the proportional air brake system, and wire the Breakout board.
R
EMOVING
THE
S
TANDARD
A
IR
B
RAKE
S
YSTEM
1
Turn off the power on the DynoWare EX+ hardware.
2
Shut off and release the air pressure to the air pressure regulator.
3
Remove the two black wires from the wiring block labeled BRAKE on the
Breakout board.
4
Remove the yellow and black wires from the wiring block labeled PRESS on the
Breakout board.
5
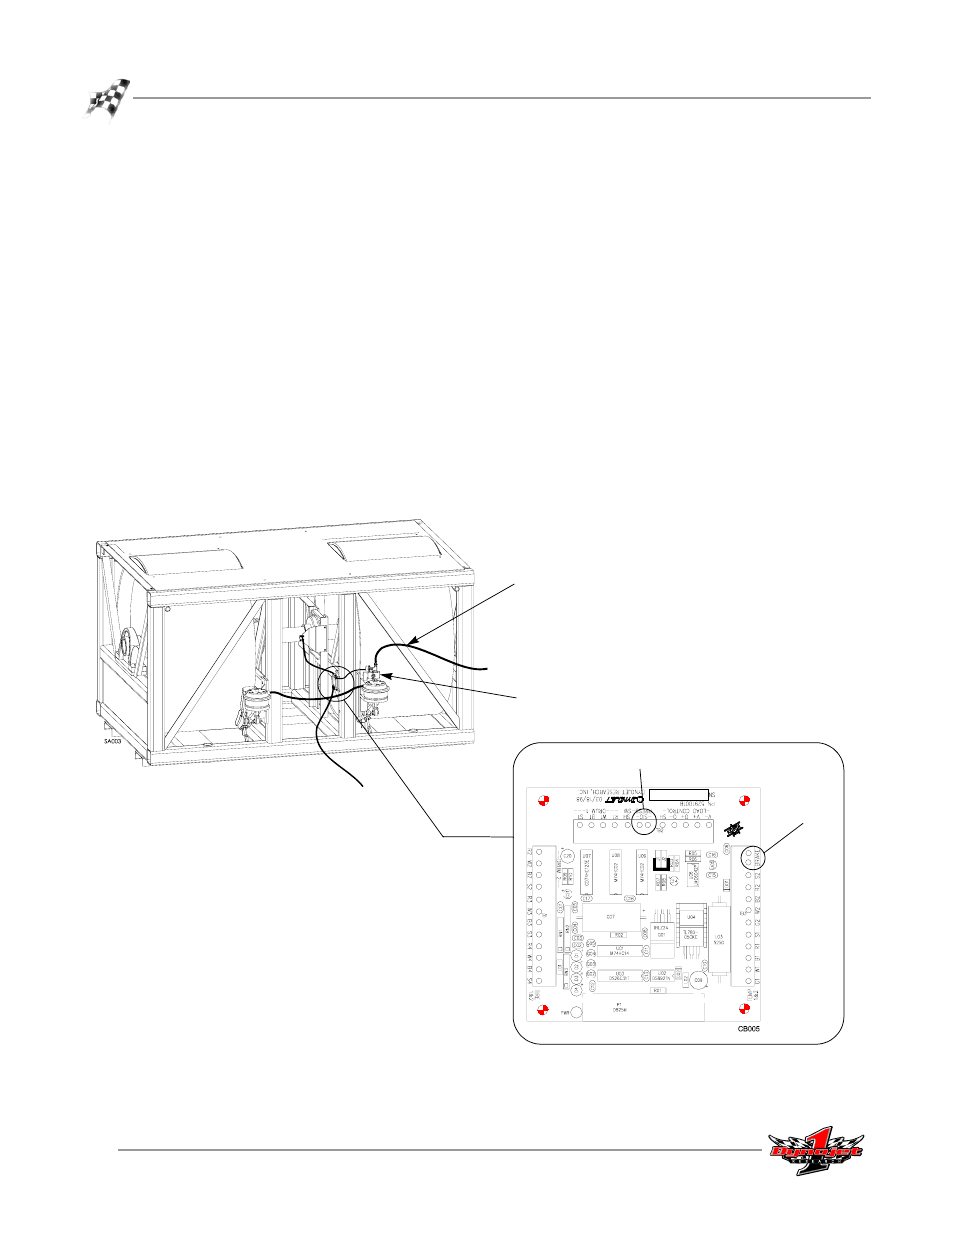
Disconnect the 3/8-inch air hose from the fitting on the air brake control switch.
The air brake control switch is located on top of the right side air canister.
Note: Leave the air hose with the dyno as it will be used later.
6
Unscrew and remove the air brake control switch.
Figure A-2: Remove the Standard Air Brake
brake
press
air hose
air brake
control switch