Installation instructions-permanent mount – Code 3 LIT3 Mounting Kit User Manual
Page 9
9
Installation Instructions-Permanent Mount.
Step 1 Permanent Mount Determine the location for the lightbar on the vehicle and check that no equipment or wiring will be damaged when
drilling holes in the vehicle to mount the lightbar.
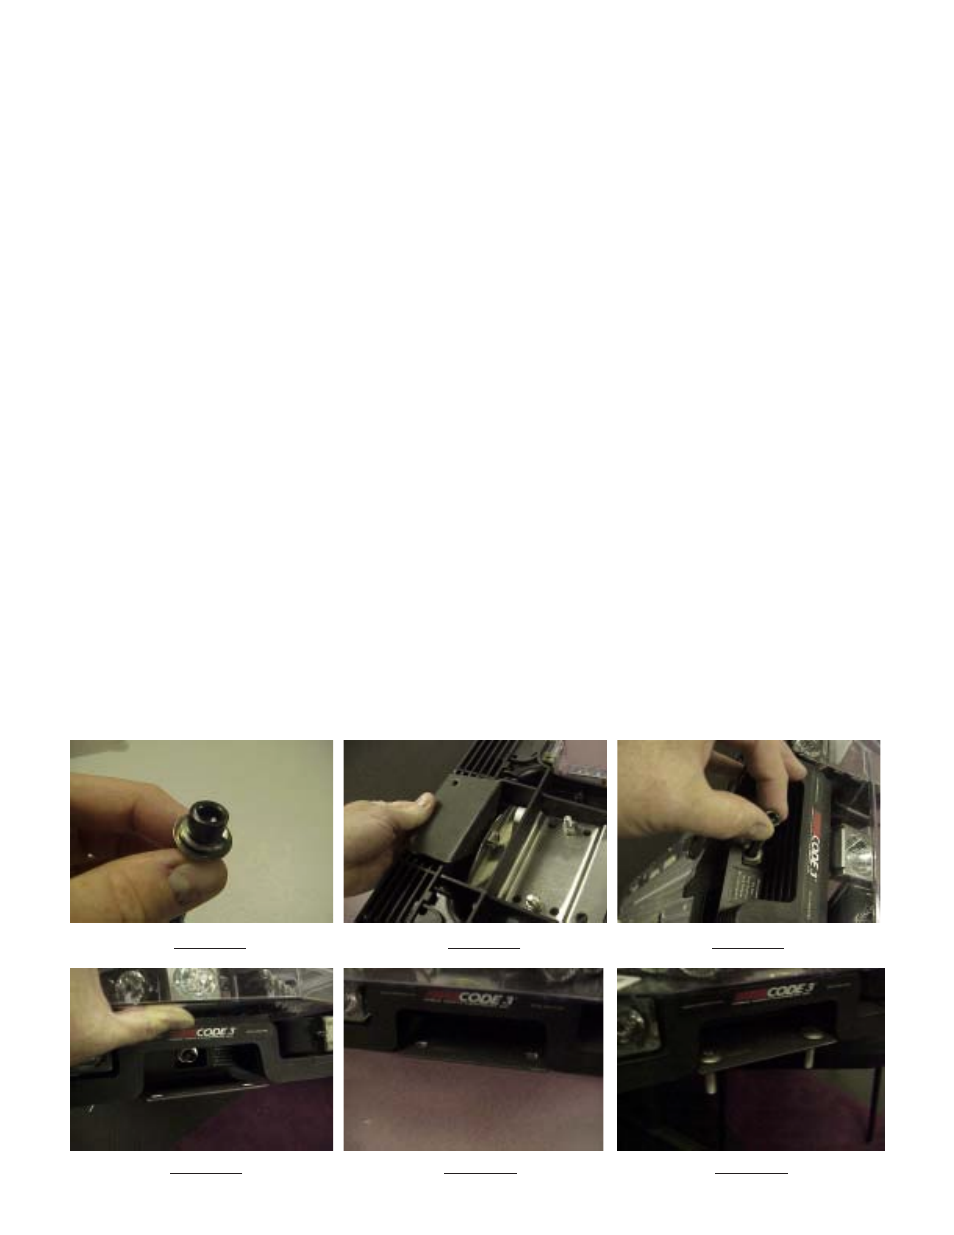
Step 2 Install a 5/16" split lock washer and a 5/16" flat washer onto each of the the 5/16-18 X 3" long Screws as shown in Figure 43. Position the
Permanent Mount Mounting Brackets and align the slot in the Brackets with the threaded hole in the cage nut as shown in Figure 44.
Step 3 Hold the Permanent Mount Mounting Brackets in place and thread the 5/16-18 X 3" long Screw into the cage nut in the stainless steel
mounting bracket as shown in Figure 45. Thread the 5/16-18 X 3" long Screw all the way in until it is finger tight against the Permanent Mount
Mounting Bracket (see Figure 46). Note: The 5/16-18 screw is purposefully 3" long to allow easy re-installation if the lightbar is
removed for maintenance by the Customer.
Step 4 Position the lightbar onto the surface of the vehicle and locate it as desired, then push the Permanent Mount Mounting Brackets down so
that they are in full contact with the mounting surface of the vehicle (see Figure 47).
Step 5 With a short pencil or other marking device, mark the four hole locations using the square holes in the Permanent Mount Mounting
Brackets as a template.
Step 6 Remove the lightbar and drill a 3/8" diameter hole through the vehicle's roof at the four mounting hole locations.
Step 7 After the lightbar's cable has been routed as desired you are ready to install the lightbar.
Step 8 Apply user supplied RTV sealant all around the four drilled holes in the vehicle's roof.
Step 9 Apply user supplied RTV sealant all around under the heads of four user supplied 5/16-18 carriage bolts and insert them through the
square holes in the Permanent Mount Mounting Brackets as shown in Figure 48.
Step 10 Reposition the lightbar over the vehicle's roof and lower the lightbar into position while carefully guiding the four carriage bolts through
the drilled holes in the vehicle's roof.
Step 11 Install appropriate user supplied fender washers, lock washers, and 5-16-18 hex nuts onto the carriage bolts and tighten the four 5/16-
18 hex nuts.
Step 12 Tighten the two 5/16-18 X 3" long Screws.
FIGURE 43 FIGURE 44 FIGURE 45
FIGURE 46 FIGURE 47 FIGURE 48