English – AVer SPB350+ User Manual
Page 19
17
ENGLISH
OSD Menu
Description
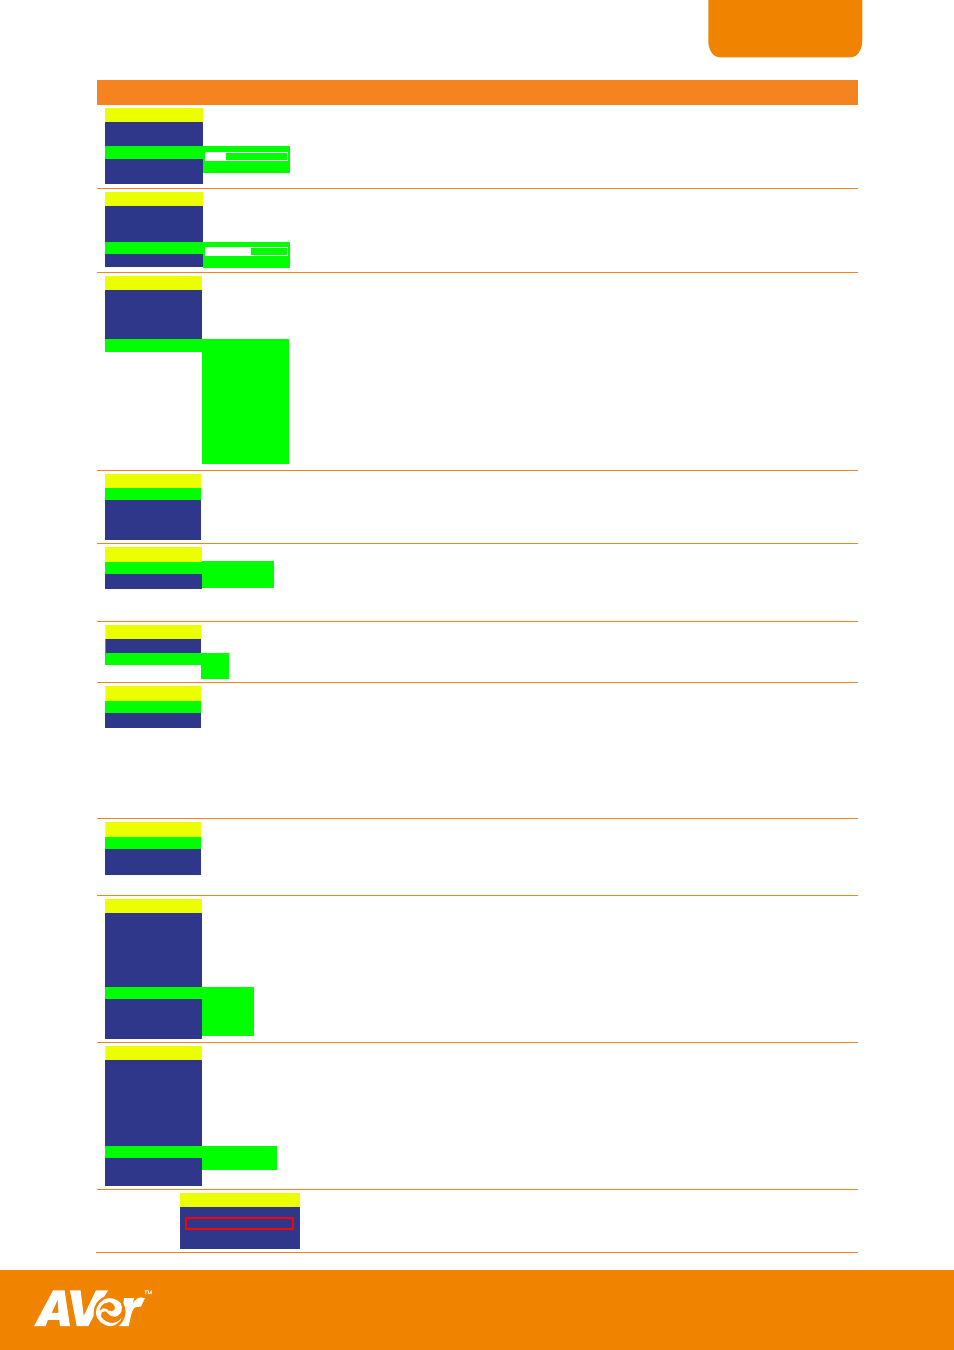
IMAGE
EXPOSURE
WHITE BALANCE
BRIGHTNESS
CONTRAST
RESOLUTION
63
16
0
SETTING > IMAGE > BRIGHTNESS
Use ►or◄ buttons to increase or decrease the brightness level and improve the
visibility of the image. The brightness level can be set up to 63.
IMAGE
EXPOSURE
WHITE BALANCE
BRIGHTNESS
CONTRAST
RESOLUTION
255
140
0
SETTING > IMAGE > CONTRAST
Use ►or◄ buttons to emphasize or reduce the difference between light and dark
conditions. The contrast level can be adjustable up to 255.
IMAGE
EXPOSURE
WHITE BALANCE
BRIGHTNESS
CONTRAST
RESOLUTION
800 x 600
1024 x 768
1280 x 960
1600 x 1200
1280 x 720
1920 x 1080
HD 720p 60 Hz
HD 1080p 60 Hz
HD 720p 50Hz
HD 1080p 50Hz
SETTING > IMAGE > RESOLUTION
Press ► and use ▲or▼ buttons to choose from different display resolutions then
press ►/ENTER to make the selection.
This selection will not be available in TV output (Composite/S-Video)
LANGUAGE
ENGLISH
ESPAÑOL
日本語
繁體中文
SETTING > LANGUAGE
Use ▲or▼ buttons to select from different languages then press ►/ENTER to
make the selection.
MEMORY
EMBEDDED
SD CARD
SETTING > MEMORY
Use ▲or▼ buttons to select either SOURCE or FORMAT.
SOURCE – select the image storage in Camera mode or the source of the image
to display in Playback mode either in the built-in memory or SD card.
SOURCE
FORMAT
MEMORY
SOURCE
FORMAT
NO
YES
FORMAT – select NO to exit or YES to format and delete all the images saved in
the memory source then press ►/ENTER.
Please wait till the message “FORMAT” disappear to finish the process.
USB CONNECTION
USB CAMERA
MASS STORAGE
SETTING > USB CONNECTION
Use ▲or▼ buttons to select the USB function between USB Camera and Mass
Storage.
USB Camera - can be used as a computer webcam or with our bundled software
as video recorder and capture still image.
Mass Storage - transfer the captured images from the memory source to
computer hard disk.
SAVE
PROFILE 1
PROFILE 2
PROFILE 3
SETTING > SAVE
Use ▲or▼ buttons to select which user setting profile number to save your
preferred setting. Only effect, mode, brightness and contrast SETTING can be
saved.
MENU
EFFECT
MIRROR
PRESENTER
SPLIT SCREEN
PIP
SETTING
TIMER
CAPTURE
RECALL
DEFAULT
START
PAUSE
STOP
SET TIME
TIMER
Press ► and use ▲or▼ buttons to select SET TIME to set the time value, START
to begin the countdown timer, PAUSE/RESUME to temporarily halt or continue, and
STOP to end.
MENU
SINGLE
CONTINUOUS
CAPTURE
Press ► and use ▲or▼ buttons to select SINGLE or CONTINUOUS capture
mode. Then press ►/ENTER to make a selection.
SINGLE saves one still image only.
CONTINUOUS saves successive still images until the memory source is full or
when the CAP/DEL button is being press again to stop.
EFFECT
MIRROR
PRESENTER
SPLIT SCREEN
PIP
SETTING
TIMER
CAPTURE
RECALL
DEFAULT
INTERVAL
5 SECS
Use ►or◄ buttons to increase or decrease the capture time interval between
frames and then press ENTER to save the setting and exit. The time interval can
be set from 5 to 600 sec.