Installation step 11, Figure 1, I luinii – Craftsman 139.53675SRT User Manual
Page 24: Fasten door bracket
Attention! The text in this document has been recognized automatically. To view the original document, you can use the "Original mode".
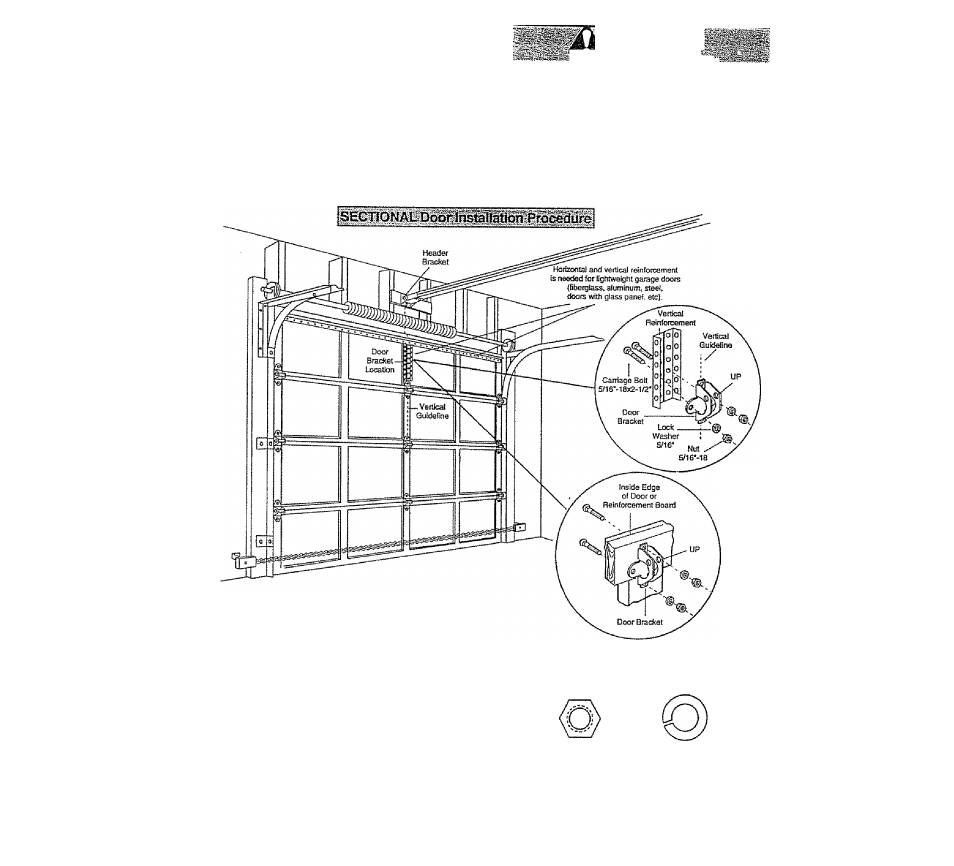
Installation Step 11
Fasten Door Bracket
Foilow Instructions which apply to your door
type as illustrated below or on page
25
.
I lUINIi
To
prevent
damage
to
steel,
aluminum,
fiberglass
or
glass
pane!
doors,
always
reinforce the inside of the door both vertically
and horizontally with an angle iron.
A horizontal brace should be long enough to be secured to 2 vertical supports. A vertical brace should
cover the height of the top panel.
The Illustration shows one piece of angle iron as the horizontal brace. For the vertical brace, 2 pieces of
angle iron are used to create a "IF-shaped support The best solution Is to check with your garage door
manufacturer for an opener instailatlon door reinforcement kit
Figure 1
Figure 2
* Center the door bracket on the previousiy marked
vertical guideline used for the header bracket
installation,
Nate correct UP placement, as
stamped inside the bracket
*
Position the bracket on the face of the door within
the following limits:
A) The top edge of the bracket 2“-4" below the top
edge of the door.
8) The top edge of the bracket directly below any
structural support across the top of the door.
* Mark and drill 5/16" left and right fastening holes.
Secure the bracket as shown in Rgure 1 if there is
vertical reinforcement.
If your installation doesn’t require verticai reinforce
ment but does need top and bottom fastening holes
for the door bracket, fasten as shown in Figure
2
Hardware Shown Actual Size
Nut 5/16-1 a
Lode Washei S/16"
Camags Bel!
S/!6".l8x2-t/2‘
24