1.removing the stock assembly, 2.installation of outlet pipe – Tomei Powered OUTLET COMPONENT EVO.7/8/9 Ver.2 User Manual
Page 6
1.Removing the stock assembly
The following are basic instructions. For more details please refer to the vehicle's
official service manual.
1. Disconnect the negative battery terminal.
5. Disconnect the o2 sensor connector.
2. Remove the engine under cover.
6. Remove the front exhaust pipe.
3. Remove the crossmember bar.
7. Remove the outlet bracket.
4. Remove the turbo charger heat shield.
8. Remove the exhaust fitting (outlet).
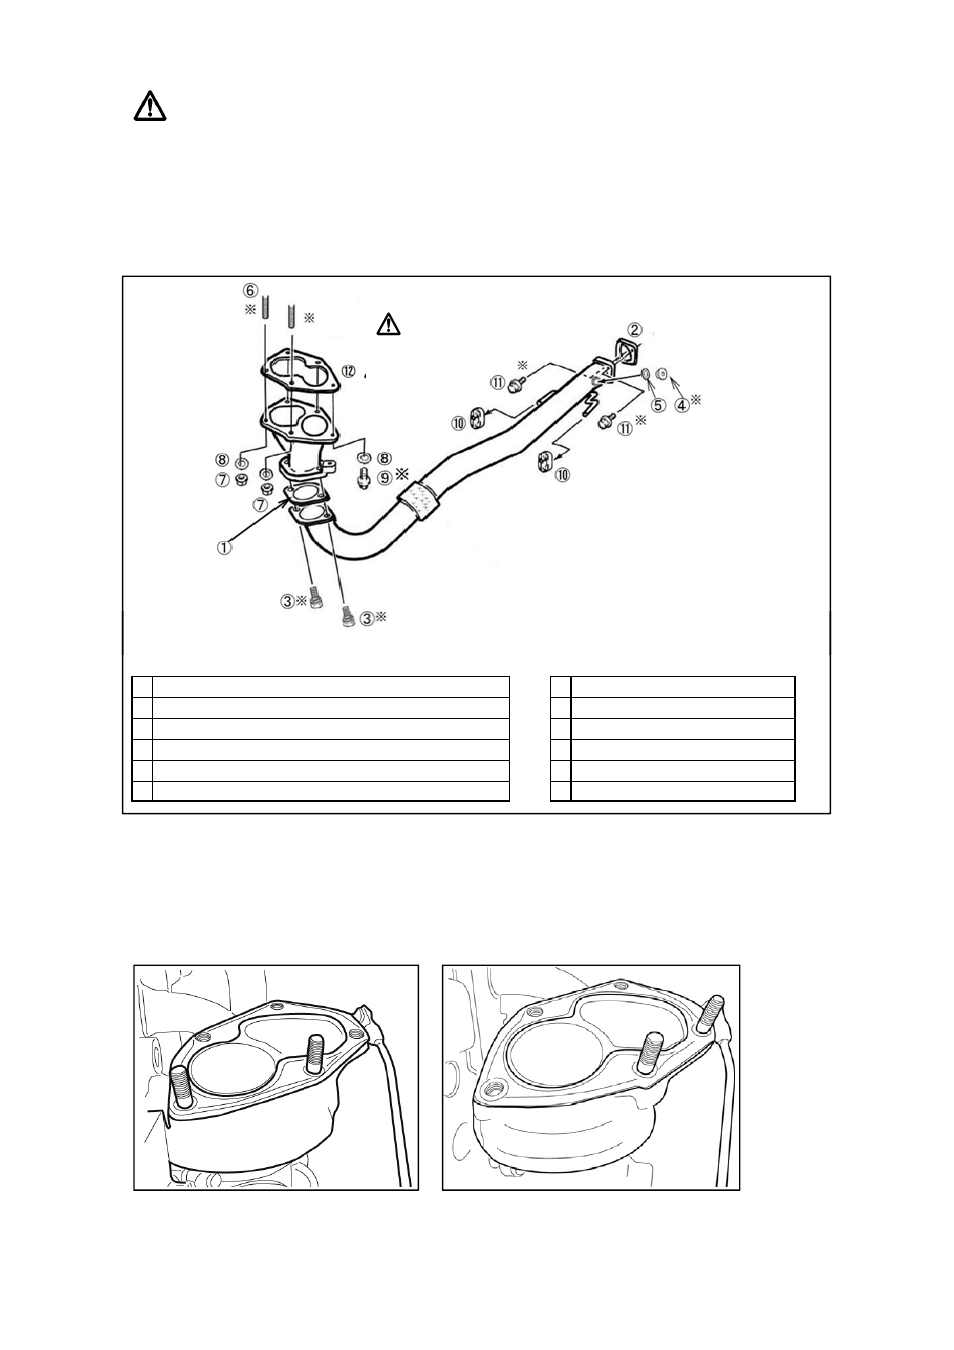
2.Installation of outlet pipe
<Positioning of the included parts
<Positioning of the stock components
※ apply the included Smooth Bolt Paste to
prevent the parts from becoming seized.
replace with a
new gasket
Figure A
6
<Positioning of the included parts
<Positioning of the stock components
and torque specification.>
and torque specification.>
①
Gasket between the Outlet and Front Pipe.
⑦
Nut [59N・m(5.9kgf-m)]
②
Gasket between the Front Pipe and Catalyst
⑧
Washer (5 points)
③
Flange Bolt (M10-P1.25) [50N・m(5.1kgf-m)]
⑨
Bolt (3 points)[59N・m(5.9kgf-m)]
④
Blind Bolt
※use when not fitting an A/F meter
⑩
Hanger
⑤
Copper Washer
※use when not fitting an A/F meter
⑪ Bolt [49N・m(4.9kgf-m)]
⑥
M10 Studs [29.4N・m (3.0kgf-m)]
⑫ Exhaust fitting gasket
【Installation procedure】
※Please ensure that areas most likely to be affected by heat from the exhaust have sufficient
thermal insulation applied.
1. Reposition of one of the studs on the turbo charger outlet.
Before
After
Using the two included hex nuts, apply
Using the two included hex nuts, apply the 'double nut'
the 'double nut' method to remove
method to fit the included stud
one of the studs on the turbo charger
※ Do not move the stud when removing the 'double nut' .
outlet.
If the stud was accidentally moved during this process,
retighten the stud.
6