Installation – Tomei Powered BAFFLE STIFFENER User Manual
Page 5
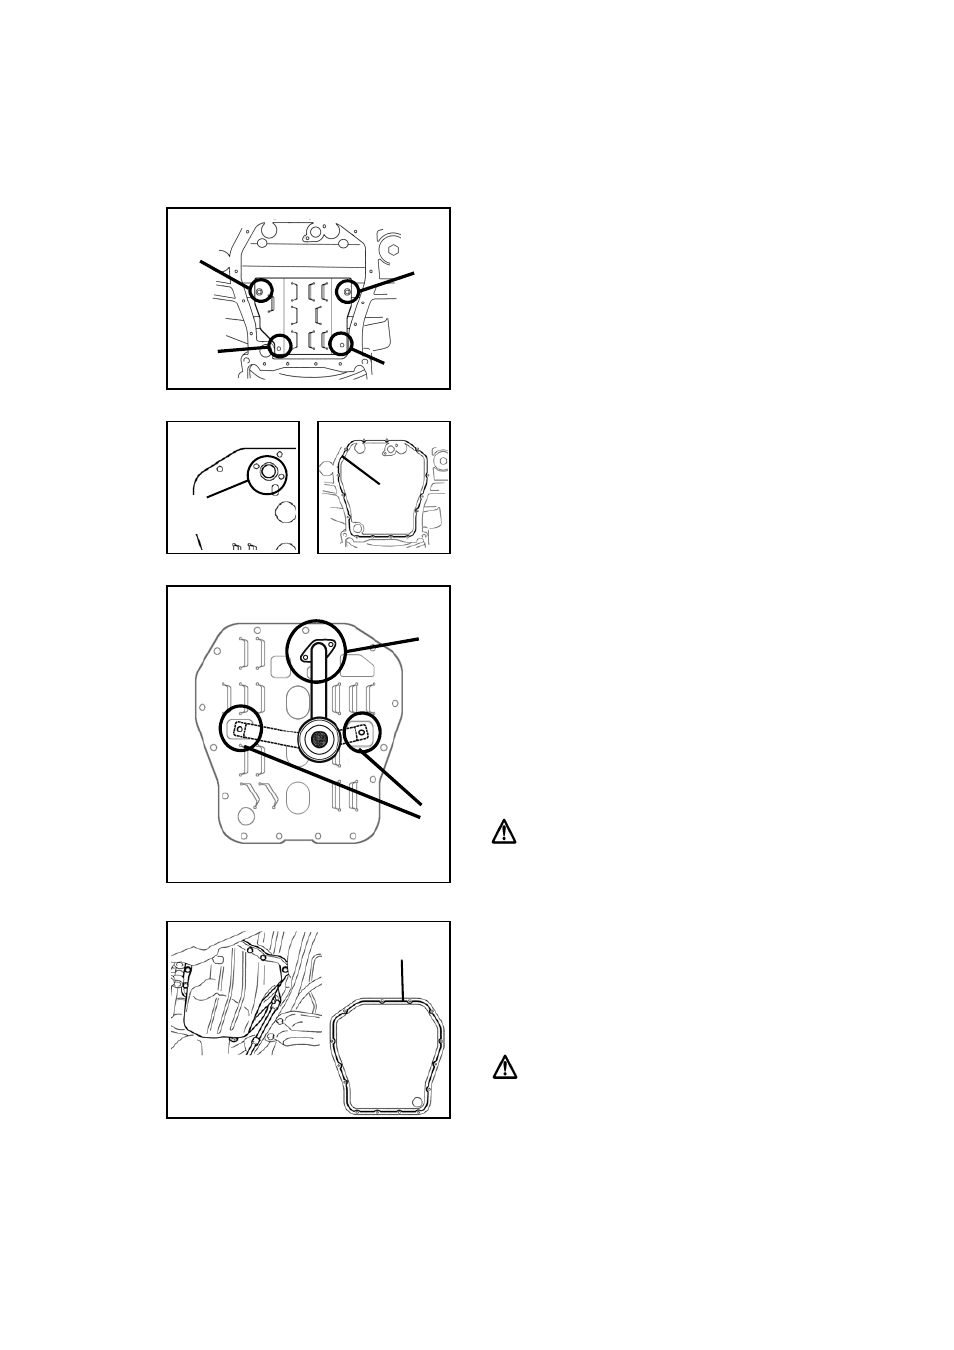
INSTALLATION
(1) Gain access and remove the original baffle plate with reference to the official Subaru Service Manual
(2) Fit the Baffle Plate
Secure the Baffle to the block with the bolts as shown
on the left with bolt reference as noted below.
①-A , ①-B Bolt M6x16
※Install to suit the position of the oil pickup.
② Bolt M6×30
③ Bolt M6×16
Torque Specs : 0.65kgf-m (6.5N・m)
(3)Oil Strainer Installation Preparation
Fig A : Fit the brand new O-Ring to the Stiffener and
take care not to lose it.
Fig B : Apply Liquid (Silicone) Gasket to the cylinder
blocks meting surface.
(4)Oil Strainer and Stiffener installation.
①-A
①-B
③
②
Take Care not
to lose O-Ring
A
B
Liquid
Gasket
Make sure that the O-Ring does not come off during
the installation of the Oil Strainer and check that the
oil strainer lines up with the oil line.
Fit the Oil Strainer with the original bolts
① Bolt M6×20 (Torque Specs:1.0kgf-m(10N・m))
② Bolt M6×16 (Torque Specs:0.65kgf-m(6.5N・m))
※Fit to suit the strainers correct mounting position,
position can vary between engine models.
CAUTION
Always use a new O-Ring for the Oil Strainer. Don't
reuse the old one.
(5)Oil Pan Installation
Apply the liquid gasket to the Oil Pans meting face side
and install the oil pan with the bolts as noted below.
・Bolt M6×16 (Torque Specs : 0.65kgf-m(6.5N・m))
CAUTION
After installation is completed, check for any signs
of oil leaks.
5
①
②
Liquid
Gasket