Cooling shroud – Dell PowerEdge R210 II User Manual
Page 66
66
Installing System Components
NOTE:
To avoid interference with other components, the maximum allowable
dimensions of the USB key are 24 mm (0.94 in) wide x 79 mm (3.11 in) long x 8.6 mm
(0.33 in) high.
1 Turn off the system, including any attached peripherals, and disconnect
the system from the electrical outlet.
2 Open the system. See "Opening the System" on page 50.
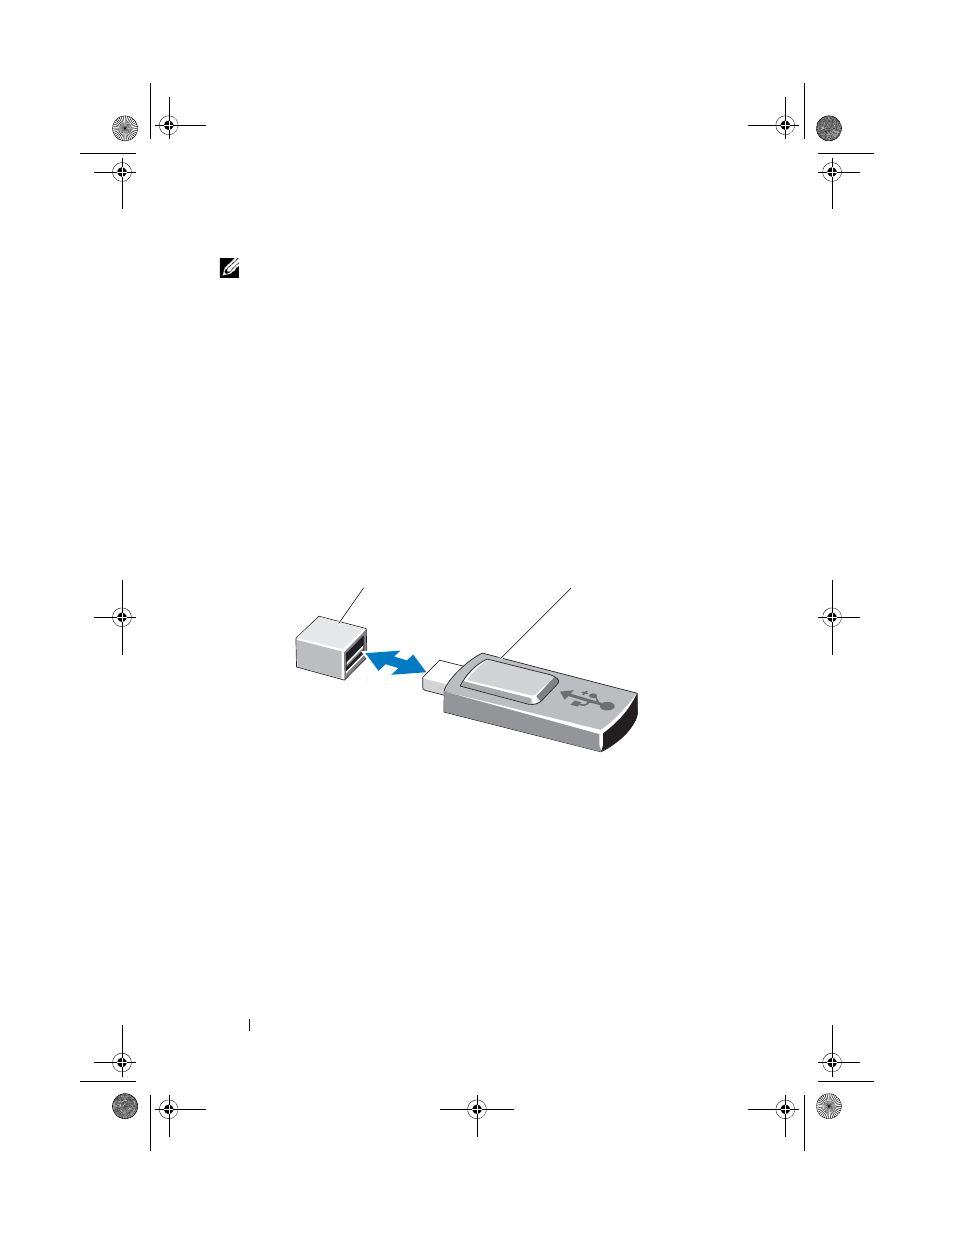
3 Locate the USB connector on the control panel board. See Figure 5-20.
4 Insert the USB memory key into the USB connector.
5 Close the system. See "Closing the System" on page 51.
6 Reconnect the system to its electrical outlet and turn the system on,
including any attached peripherals.
Figure 5-10. Removing and Installing a USB Memory Key
Cooling Shroud
The cooling shroud covers the processor, heat sink, and memory modules, and
provides airflow to these components. Airflow is facilitated by the cooling fan
modules, which are positioned directly behind the cooling shroud.
1
USB memory key connector
2
USB memory key
2
1
book.book Page 66 Friday, March 7, 2014 1:35 PM
- PowerEdge RAID Controller H700 (56 pages)
- PowerEdge RAID Controller H700 (200 pages)
- PowerEdge RAID Controller H700 (178 pages)
- PowerVault TL2000 (1 page)
- PowerVault 110T DLT VS80 (Tape Drive) (49 pages)
- PowerVault TL2000 (22 pages)
- PowerVault TL4000 (306 pages)
- PowerVault TL2000 (2 pages)
- PowerVault TL4000 (2 pages)
- PowerVault TL2000 (176 pages)
- PowerVault TL2000 (16 pages)
- PowerVault TL2000 (3 pages)
- PowerVault TL2000 (116 pages)
- PowerVault 130T DLT (Tape Library) (49 pages)
- PowerEdge 800 (82 pages)
- PowerEdge 800 (2 pages)
- PowerEdge 800 (27 pages)
- PowerEdge 800 (28 pages)
- PowerEdge 800 (58 pages)
- PowerEdge 800 (87 pages)
- PowerEdge 800 (24 pages)
- PowerEdge 6400 (86 pages)
- PowerVault 124T (57 pages)
- PowerVault 110T LTO (Tape Drive) (28 pages)
- PowerVault 124T (55 pages)
- PowerVault 124T (73 pages)
- PowerVault 124T (65 pages)
- PowerVault 124T (4 pages)
- PowerVault 124T (79 pages)
- PowerVault 124T (2 pages)
- PowerVault 124T (64 pages)
- PowerVault 124T (56 pages)
- PowerVault 124T (66 pages)
- PowerVault TL4000 (116 pages)
- PowerVault TL4000 (1 page)
- PowerVault TL4000 (66 pages)
- PowerVault TL4000 (22 pages)
- PowerVault TL4000 (3 pages)
- PowerVault TL4000 (176 pages)
- PowerVault TL4000 (2 pages)
- PowerVault TL4000 (16 pages)
- PowerEdge RAID Controller 6i (120 pages)
- PowerEdge RAID Controller 6i (156 pages)
- PowerVault 715N (Rackmount NAS Appliance) (56 pages)
- PowerVault 715N (Rackmount NAS Appliance) (86 pages)