Replacing the computer cover – Dell XPS 210 User Manual
Page 96
96
Removing and Installing Parts
Replacing the Computer Cover
CAUTION:
Before you begin any of the procedures in this section, follow the safety instructions located in the
Product Information Guide.
1 Ensure that all cables are connected, and fold cables out of the way.
Gently pull the power cables toward you so that they do not get caught underneath the drives.
2 Ensure that no tools or extra parts are left inside the computer.
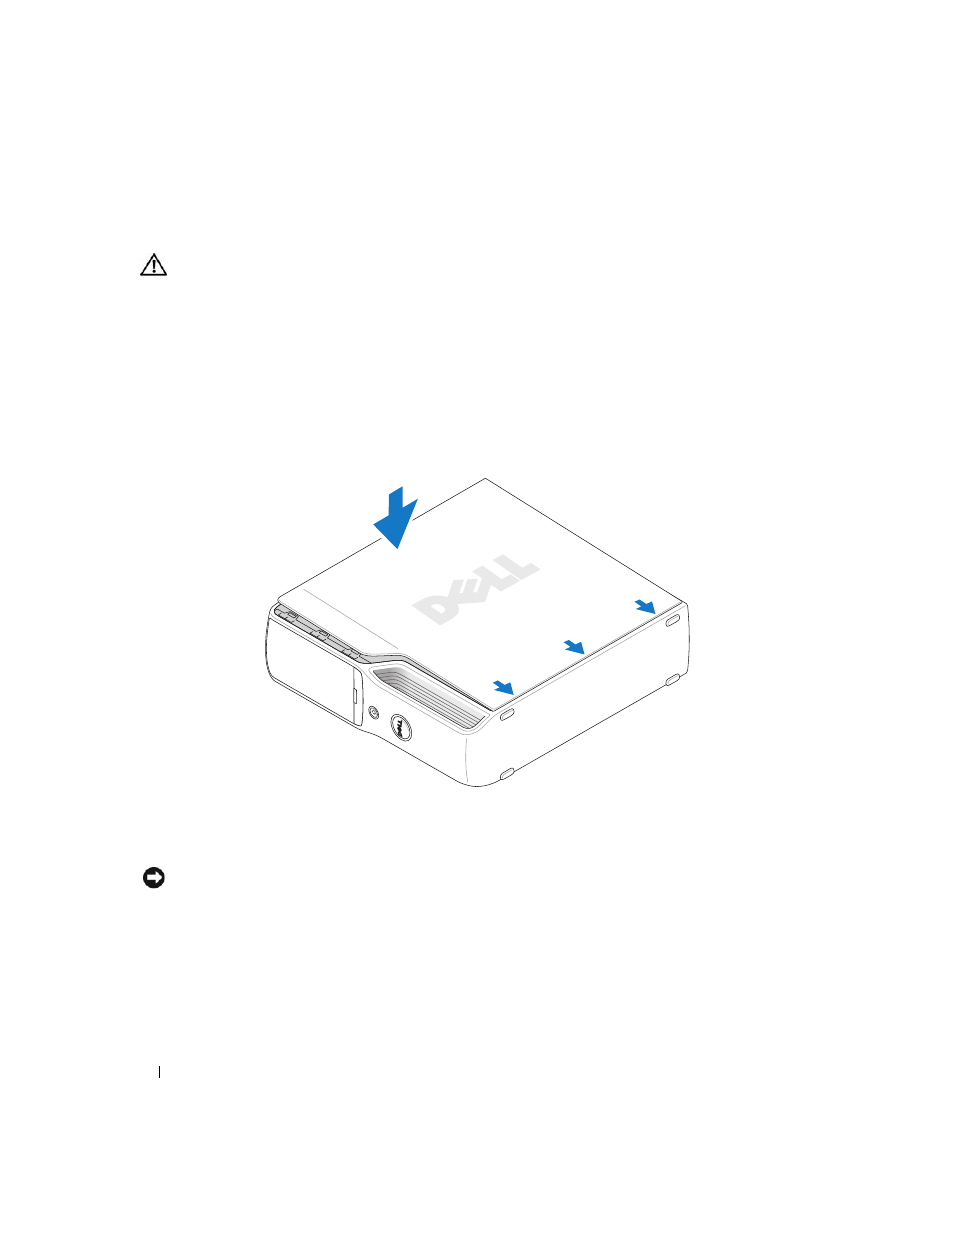
3 Install the cover:
a
Align the bottom of the cover with the tabs located along the bottom of edge of the computer.
b
Using the tabs as leverage, rotate the cover downward.
c
Snap the cover into place by pulling back on the cover release latch, and then releasing the latch
when the cover is properly seated.
d
Ensure that the cover is seated correctly before moving the computer to the upright position.
NOTICE:
To connect a network cable, first plug the cable into the network device and then plug it into the
computer.
4 Connect your computer and devices to electrical outlets, and turn them on.