Front panel – Dell XPS/Dimension XPS Gen 5 User Manual
Page 115
Removing and Installing Parts
115
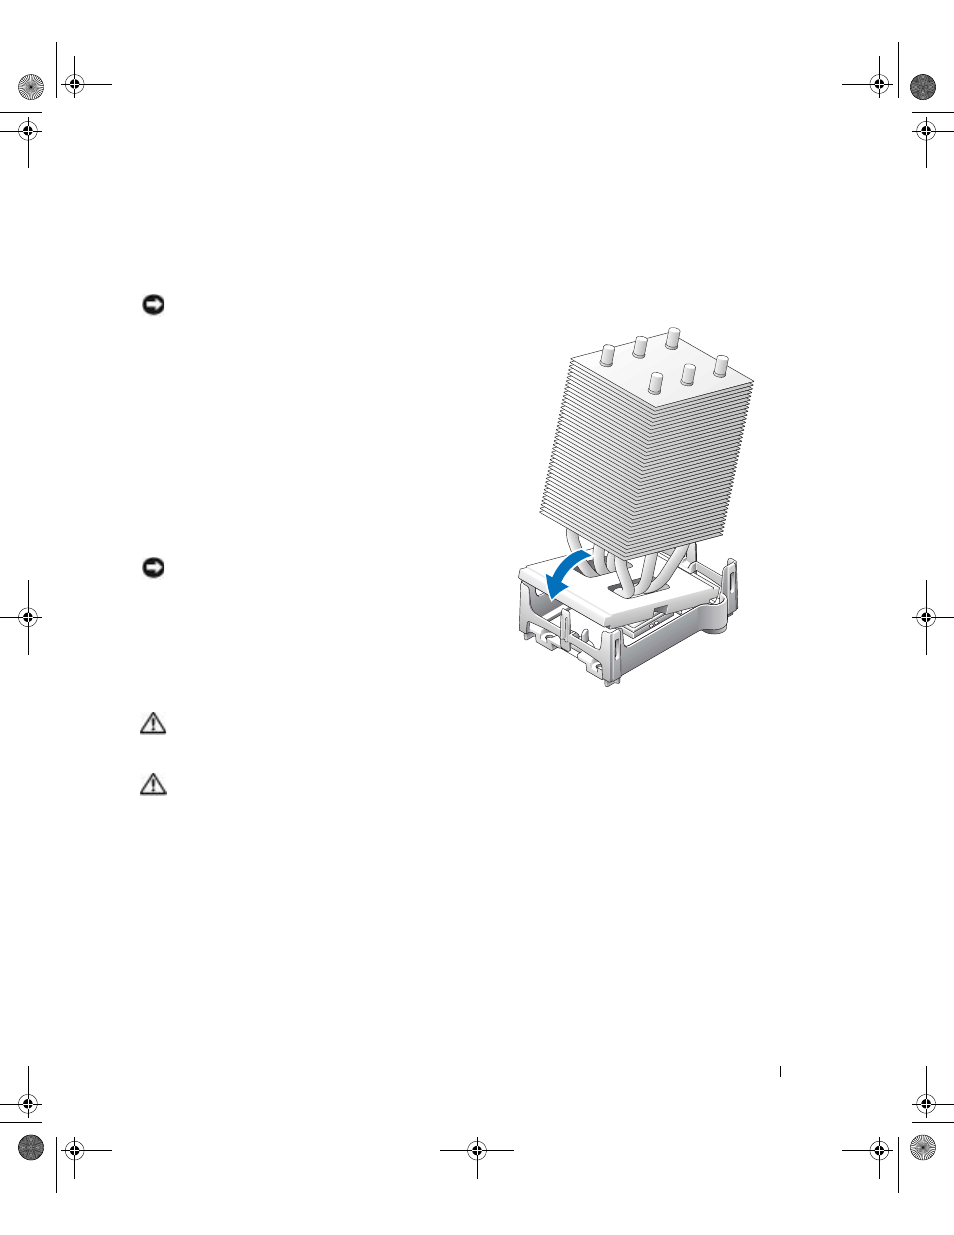
7 Install the heat sink:
a
Slide one end of the heat sink under the retention tab.
b
Pull out the other retention tab and lower the heat sink until it fits securely in the base.
NOTICE:
Ensure that the heat sink is correctly seated and secure.
8 Reinstall the retention module clips.
9 Lower the airflow shroud over the heat sink.
10 Reconnect the two cooling fan power cables to
the FANREAR and FANCPU connectors (see
"System Board Components" on page 77) on
the system board.
11 Reconnect the power cable to the POWER12V
connector (see "System Board Components" on
page 77) on the system board.
12 Close the computer cover (see page 121).
NOTICE:
To connect a network cable, first plug the
cable into the network wall jack and then plug it into
the computer.
13 Connect your computer and devices to
electrical outlets, and turn them on.
Front Panel
CAUTION:
To prevent static damage to components inside your computer, discharge static electricity
from your body before you touch any of your computer’s electronic components. You can do so by
touching an unpainted metal surface on the computer chassis.
CAUTION:
Before you begin any of the procedures in this section, follow the safety instructions
located in the Product Information Guide.
D8659bk0.book Page 115 Thursday, March 10, 2005 10:18 AM