Dell OptiPlex G1 User Manual
Page 123
Installing Drives
7-11
5HPRYHWKHGULYHEUDFNHWIURPWKHFKDVVLV
If a hard-disk drive is already installed in the drive bracket, disconnect the DC
power cable and EIDE cable from the drive.
Remove the screw securing the hard-disk drive bracket to the drive cage in the
chassis.
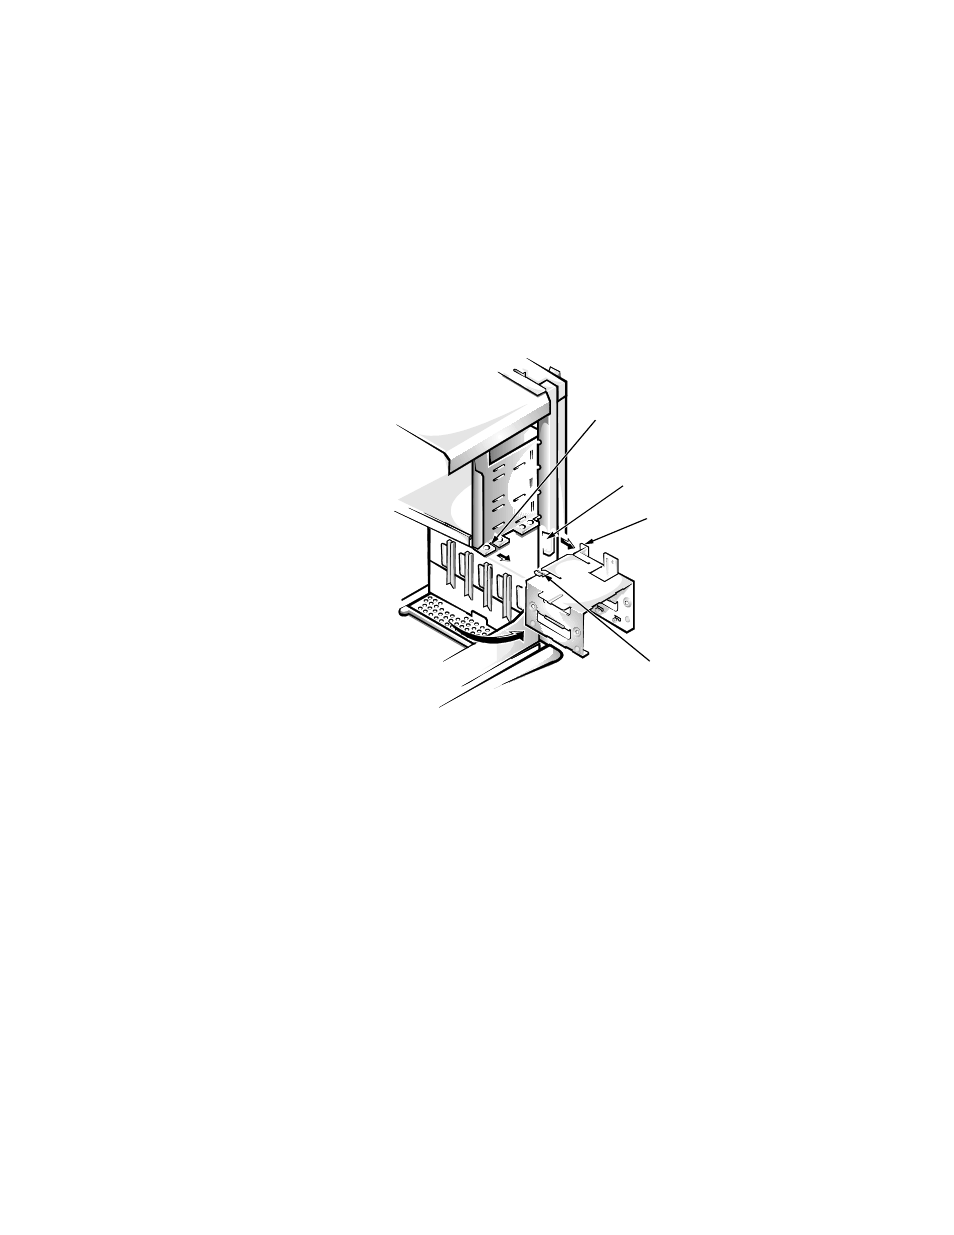
Grasp the bracket, and rotate it outward from the chassis until the sliding tab
clears the slide rail on the drive cage (see Figure 7-10). Lift the bracket up slightly
to free its hinge tabs from the chassis slots.
)LJXUH5HPRYLQJWKH+DUG'LVN'ULYH%UDFNHW
6OLGHWKHGULYHLQWRWKHFKRVHQED\RIWKHEUDFNHWRULHQWHGVRWKDWWKH
FRQQHFWRUVRQWKHEDFNRIWKHGULYHZLOOIDFHWKHEDFNRIWKHFKDVVLV
ZKHQWKHEUDFNHWLVUHLQVWDOOHGVHH)LJXUH
$OLJQWKHIRXUVFUHZKROHVRIWKHGULYHDQGEUDFNHW,QVHUWDQGWLJKWHQ
WKHVFUHZVWKDWFDPHZLWK\RXUXSJUDGHNLW
If you are installing a drive in the 1.6-inch bay, use the four screw holes in the side
of the bracket (see Figure 7-11). If you are installing a drive in the 1-inch bay, use
the four screw holes in the bottom of the bracket.
sliding tab
hinge tabs
drive-cage slide rail
chassis slots