Dell PowerEdge 1500SC User Manual
Page 41
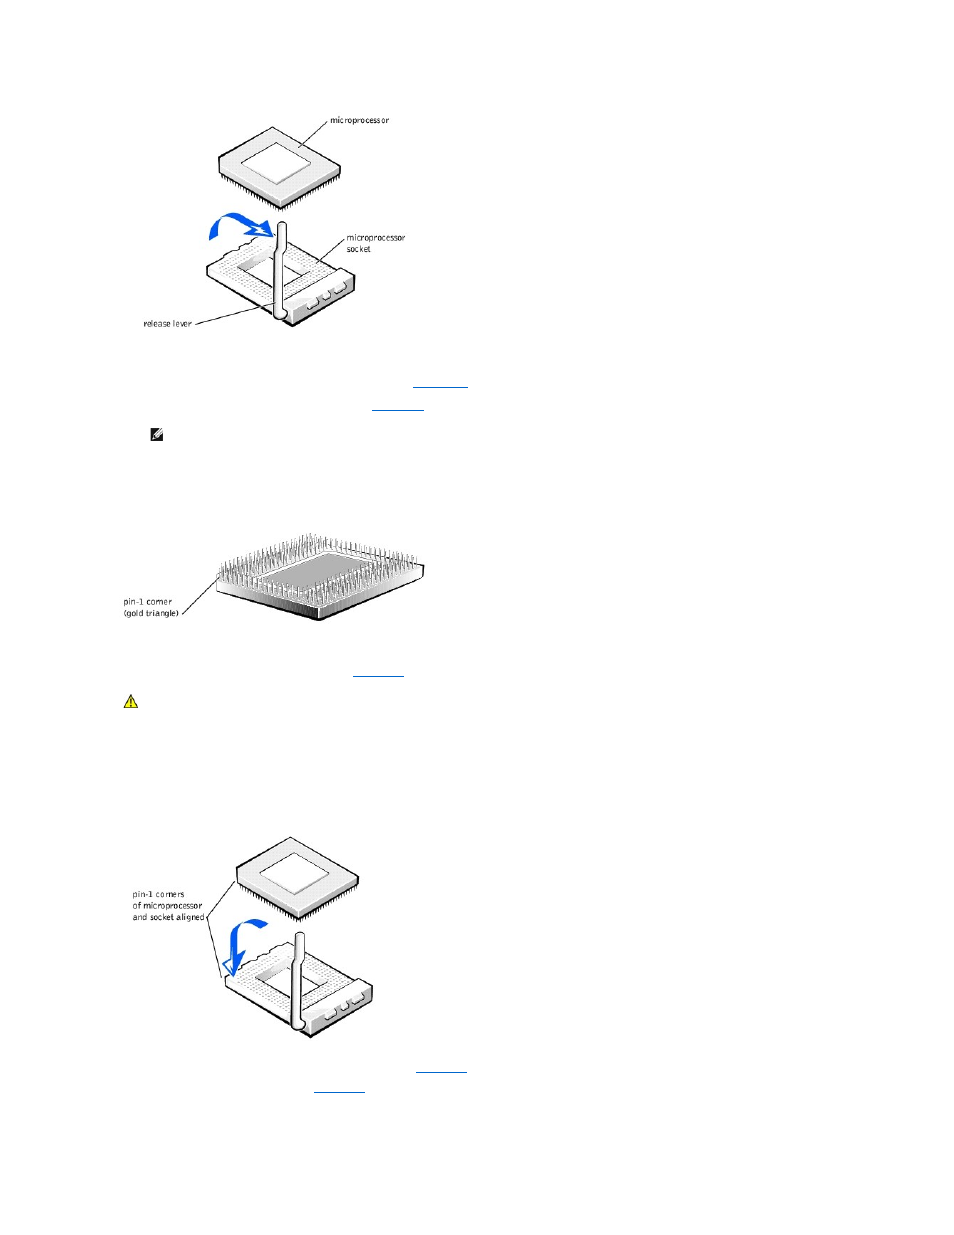
10.
Unpack the new microprocessor.
If any of the pins on the microprocessor appear bent, see "
Getting Help
," for instructions on obtaining technical assistance.
11.
Align the pin-1 corner of the microprocessor (see
) with the pin-1 corner of the microprocessor socket.
Identify the pin-1 corner of the microprocessor by locating the tiny gold triangle that extends from one corner of the large central rectangular area. The
gold triangle points toward pin 1, which is also uniquely identified by a square pad.
Figure 6-13. Pin-1 Identification
12.
If the release lever on the microprocessor socket is not all the way up, move it to that position now.
13.
Install the microprocessor in the socket (see
).
14.
When the microprocessor is fully seated in the socket, rotate the socket release lever back down until it snaps into place, securing the microprocessor.
Figure 6-14. Installing the Microprocessor
15.
Place the new heat sink on top of the microprocessor (see
).
16.
Orient the securing clip as shown in
.
Figure 6-15. Installing the Heat-Sink
NOTE:
Identifying the pin-1 corners is critical to positioning the microprocessor correctly.
CAUTION:
Positioning the microprocessor incorrectly can permanently damage the microprocessor and the system when you turn on the system.
When placing the microprocessor in the socket, ensure that all of the pins on the microprocessor go into the corresponding holes. Be careful not
to bend the pins.