Autopilot setup, Other hardware devices, Settings – Jeppesen Marine Workboat Navigator 1.3 User Manual
Page 25: Autopilot wiring
2 - Installation
2
-
Installation
2
-
Installation
21
Autopilot Setup
Interfacing autopilot with Jeppesen Workboat Navigator provides you with a number
of time-saving and ease-of-use benefits, including easier route planning and more
precise options and adjustments.
Settings
Each autopilot requires that certain, specific information be provided by Jeppesen
Workboat Navigator. Most autopilots follow the same basic principles of heading
and cross track error. Your autopilot tries to maintain a heading to a mark while
maintaining a minimum Cross Track Error.
Workboat Navigator contains a number of specific settings that have been created
because not all autopilots work the same way. Consult your autopilot manual to
verify precisely what information the device needs.
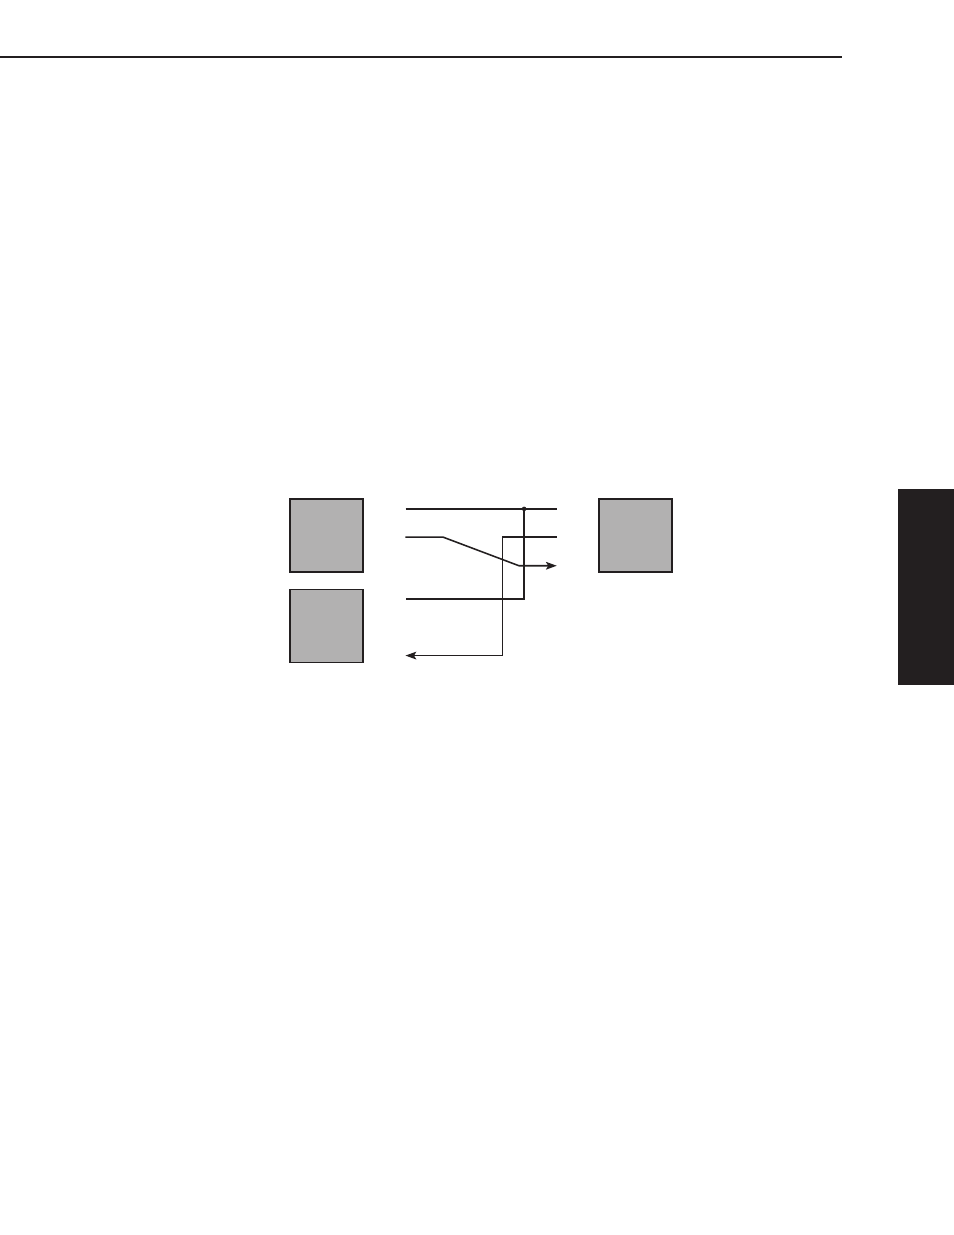
Autopilot Wiring
Figure 2.19 shows a typical wiring diagram for a connection between your software,
GPS and autopilot. To determine which wires are used for Transmit, Receive and
Ground, please refer to your GPS and Autopilot User's Guides. For more information
on wiring, please refer to the Jeppesen Workboat Navigator Installers’ Guide.
GPS
PC
Ground
Transmit
Receive
Ground
Transmit
Receive
Autopilot
Ground
Transmit
Receive
Computer COM Port
Figure 2.19 - GPS Connection with Autopilot
Other Hardware Devices
For hardware devices other than the GPS and IR2-BB, you will need to make a
physical connection between the device and your computer, power the device on,
and then run the GPS/Port Setup Wizard to detect output from those devices and
configure Jeppesen Workboat Navigator to use their output data. Additional port
settings can be adjusted using the Tools/Settings | Options | Ports: Configure
tab within Jeppesen Workboat Navigator.
See Step 7 in this Chapter for more information.