3 platen adjustment – Bio-Rad Model EP-1 Econo Pump User Manual
Page 13
Lock-Ring Color
Tubing ID
Red
0.8 mm (1/32")
Orange
1.6 mm (1/16")
Yellow
3.2 mm (1/8")
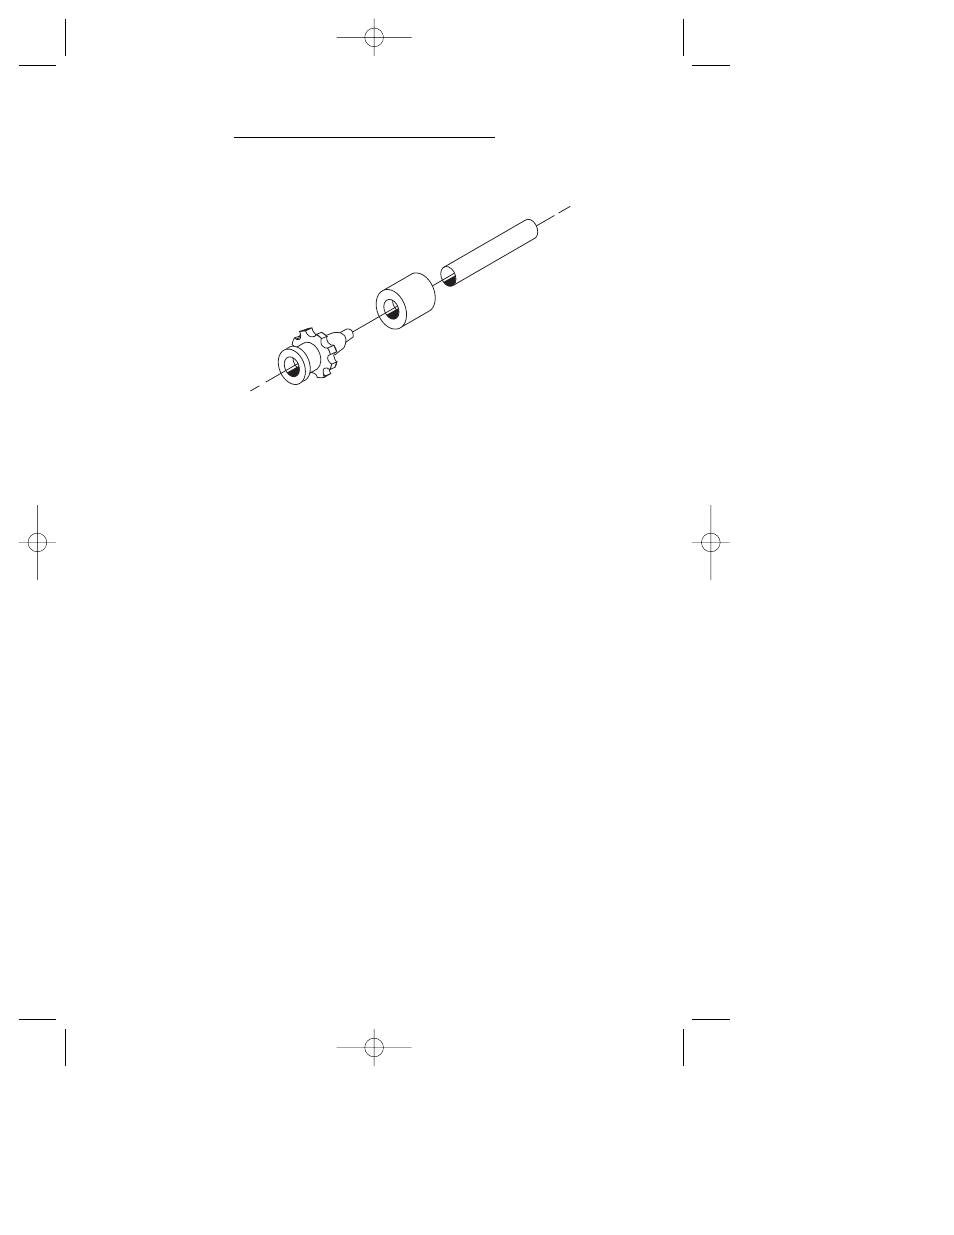
Fig. 5.2. Attachment of tubing fittings.
3. Insert one end of the tubing into the tubing retaining bracket of the
pump head. Lightly pull the tubing around the rollers to remove slack.
Attach the other end of tubing into the tubing retaining bracket on the
opposite side of the pump head.
4. Slide the platen back into the pump head frame assembly until it rests
up against the tubing. Press the cam lever in toward the pump head,
locking the platen up against the tubing and rollers. Note that the
platen can be inserted with the cam lever on the left or the right.
5.3 Platen Adjustment
Proper adjustment of the platen pressure increases flow stability,
minimizes flow pulsation, and prolongs the life of the tubing.
Once the tubing is installed in the pumphead, loosen the platen
adjustment screw, located on the front of the platen, counterclockwise until
the stop is reached. For one piece of either PharMed or Tygon tubing, the
platen is properly adjusted at three to four full turns clockwise from stop.
For one piece of silicon tubing, the platen is properly adjusted two full turns
clockwise from stop. When using two pieces of tubing, approximately 50%
more turns clockwise from stop will be required.
10
M7318140J.qxp 4/17/2006 2:17 PM Page 10