Bio-Rad Helios® Gene Gun System User Manual
Page 18
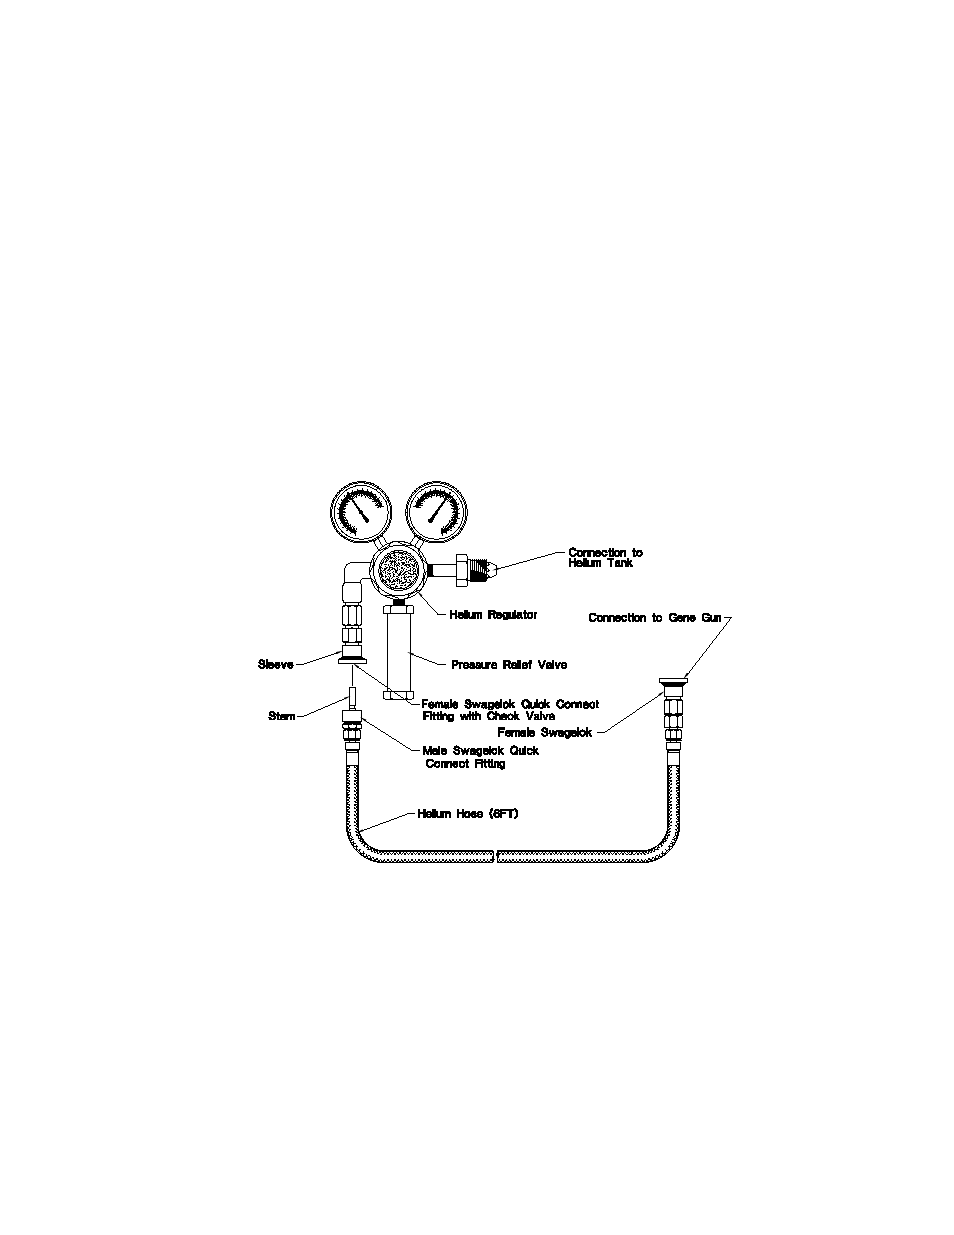
Attaching the Helios Gene Gun to the Helium Regulator
Components needed
Helium regulator attached to a helium cylinder
Helium hose assembly
Helios Gene Gun
Procedure
1. Insert the stem of the Swagelok Quick-Connect fitting on the helium hose into the opening in
the body of the Swagelok Quick-Connect fitting on the helium regulator and push until it
clicks. The helium hose will be locked into the helium regulator (see Figure 10). Note: If the
helium regulator has been pressurized, the stem and body will not lock. Turning the regulator
valve counter-clockwise will depressurize the system.
2. In a similar manner, insert the stem of the Swagelok Quick-Connect fitting on the Helios
Gene Gun into the opening in the body of the Swagelok Quick-Connect fitting on the
helium hose until it clicks. The Gene Gun will be locked into the helium hose.
Fig. 10. Connecting the helium hose to the helium regulator.
4.3 Setting up the Tubing Prep Station
Refer to Section 3.2, Identification of System Components and Controls, prior to system
installation. See Figure 11 for a diagram of the assembled Tubing Prep Station.
The Tubing Prep Station is shipped disassembled. The following sections describe assem-
bly of the Tubing Prep Station, attachment of the syringes and tubing, installation of the nitrogen
pressure regulator, and connection of the Tubing Prep Station to the nitrogen regulator.
A peristaltic pump is recommended for removal of the ethanol from the Gold-Coat tubing
after the microcarriers have been loaded (see Section 5.1). If a peristaltic pump is not available,
this may be done manually using a syringe. Assembly of the syringe and tubing is described
in step 5 in the following section.
14