190s shank, 196s shank, 190s shank 569-196s shank – Great Plains TC5319 Assembly Manual User Manual
Page 22
18
TC5109-5323
Great Plains Manufacturing, Inc.
566-046E
04/12/2012
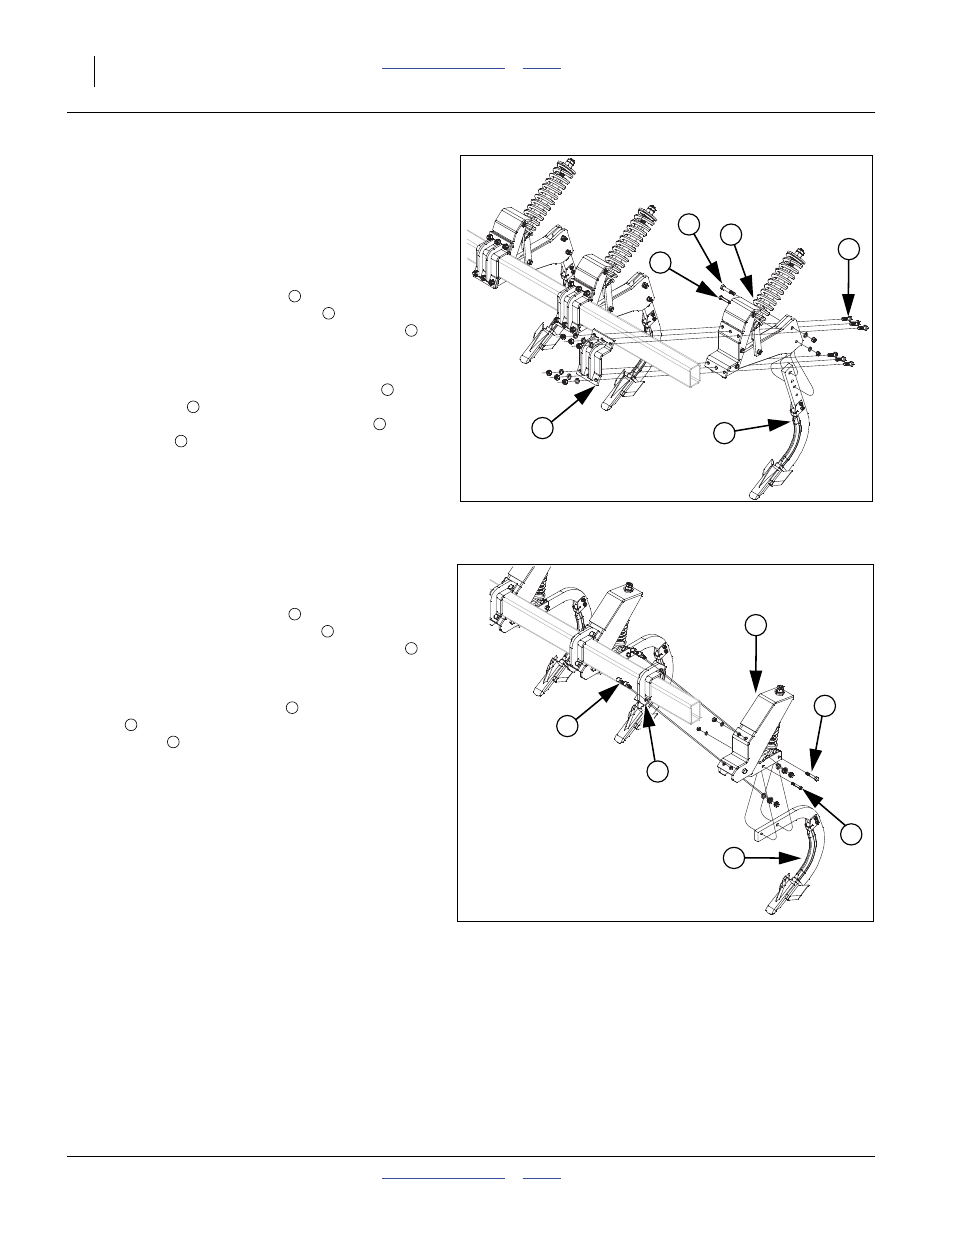
569-190S Shank
Note: See machine layouts in Appendix for proper shank
placement. The front and rear shank mount assem-
blies will be shipped pre assembled from factory in
two parts in boxes. There will be the mount assem-
bly and the shank assembly.
Refer to Figure 15
84. Install the mount assembly
to the rear side of
tubes. Install front mount bracket
on front of tubes,
align holes, secure with 3/4 x 2 1/2 hex bolts
, 3/4
lock washers and 3/4 nuts. Slide these two parts
over frame tube in proper location.
85. Attach the upper hole of shank assembly
with 3/4
x 4 hex bolts
, 3/4 lock washers and 3/4 nuts.
Attach the lower hole of shank assembly
with 5/8 x
4 hex bolts
, 3/4 lock nut.
86. Tighten all bolts to specs, See “Torque Values
569-196S Shank
Refer to Figure 16
87. Install the mount assembly
to the rear side of
tubes. Install front mount bracket
on front of tubes,
align holes, secure with 3/4 x 2 1/2 hex bolts
, 3/4
lock washers and 3/4 nuts. Slide these two parts
over frame tube in proper location.
88. Attach the shank assembly
with 5/8 x 4 1/2 hex
bolt
, 5/8 lock washer and 5/8 nut (rear hole), 1/2 x
3 hex bolt
, 1/2 lock washer and 1/2 nut (front
hole).
89. Tighten all bolts to specs, See “Torque Values
Figure 15
569-190S Shank
42645
2
5
3
4
1
6
1
2
3
4
5
4
6
Figure 16
569-196S Shank
42012
1
3
4
2
5
6
1
2
3
4
5
5