Fm6100 series multi-point lock, Installation of the top pusher assembly, Installation of the bottom bolt assembly continued – SARGENT FM6100 Multi-Point Auto Deadlocking Storm Shutter User Manual
Page 4
FM6100 Series Multi-Point Lock
4
www.sargentlock.com • A8058:A
4
/1
6
/1
0
C
o
p
yr
ig
h
t
©
2
0
1
0
,S
a
rg
e
n
t
M
a
n
u
fa
c
tu
ri
n
g
C
o
m
p
a
n
y,
a
n
A
S
S
A
A
B
LO
Y
G
ro
u
p
c
o
m
p
a
n
y.
A
ll
ri
g
h
ts
re
se
rv
e
d
.
R
e
p
ro
d
u
c
ti
o
n
in
w
h
o
le
o
r
in
p
a
rt
w
it
h
o
u
t
th
e
e
xp
re
ss
w
ri
tt
e
n
p
e
rm
is
si
o
n
o
f
S
a
rg
e
n
t
M
a
n
u
fa
c
tu
ri
n
g
C
o
m
p
a
n
y
is
p
ro
h
ib
it
e
d
.
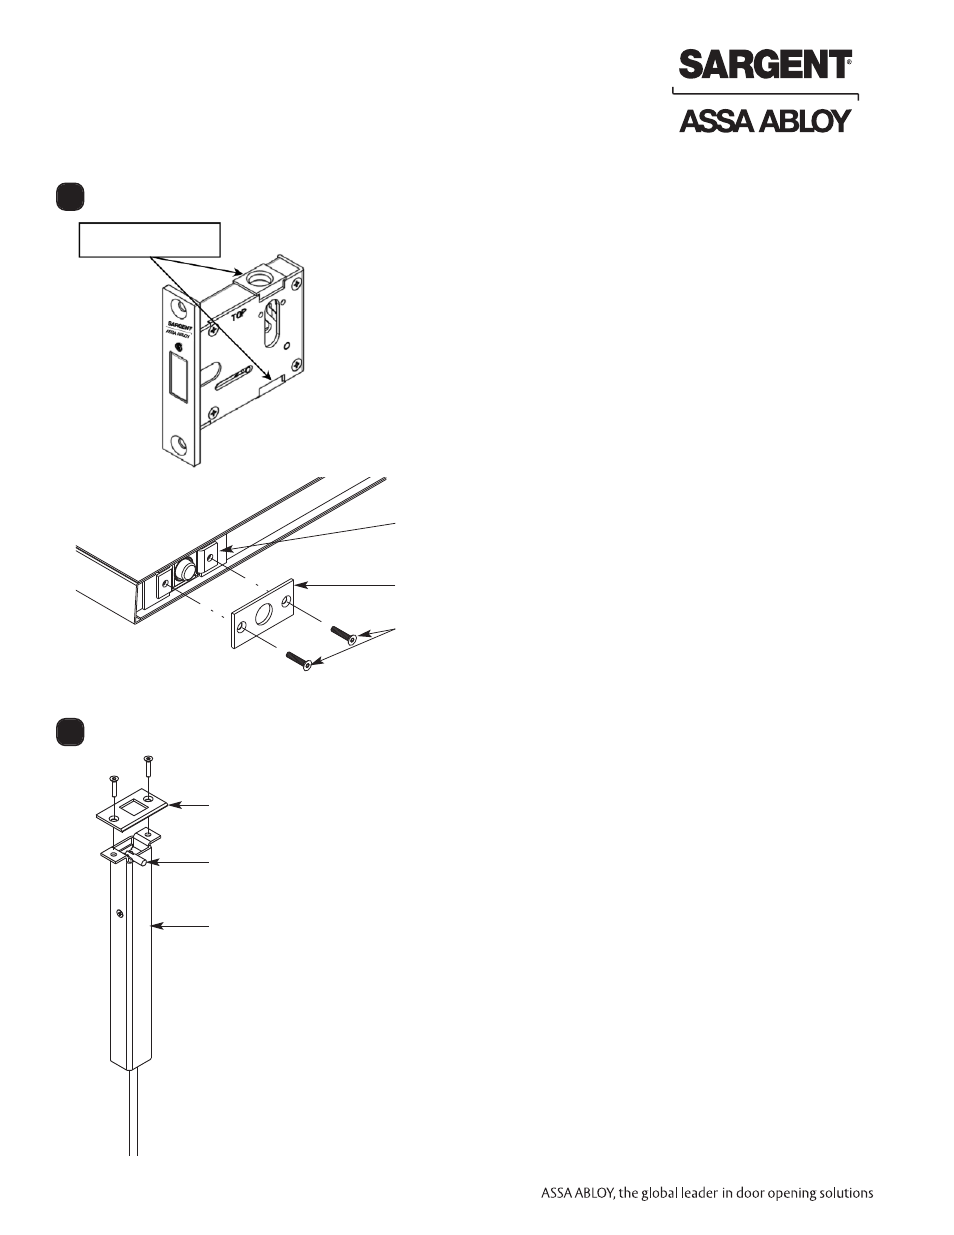
• Slide this assembly into the prep. at the top of the shutter,
making sure the plunger pin is oriented with the clearance
slot on the stop side of the shutter.
• Visually align the rod of the Top Pusher Assembly so that it
enters the tube of the Bottom Bolt Assembly that extends
out of the Deadbolt Assembly.
• Align the Top Strike plate to shutter prep. Noting the position
of the beveled edge. It should be on the same side as the
plunger pin.
• Fasten the Top Strike plate and Top Pusher Assembly to the
top of the shutter using (2) #12-24 by 1" Flat Head Cap
Screws.
Installation of the Top Pusher Assembly
3
•
With the Deadbolt Retracted, slide the Bottom Bolt Sub
Assembly into the prep. hole in the bottom of the shutter. As
you guide the assembly up into the shutter you will need to
guide it into the bottom nylon guide of the Deadbolt Assembly
and then up through the top nylon guide.
• Seat the bottom bolt bracket against the shutters lower
reinforcement plate.
• Align Bottom Bolt Plate to shutter prep.
• Fasten the Bottom Bolt Assembly and Bottom Bolt Plate to
the bottom of the shutter using (2) #12-24 by 1" Flat Head
Cap Screws.
Installation of the Bottom Bolt Assembly continued
2
Strike Plate note
beveled edge position
Plunger Pin
Top Pusher Assembly
Nylon Guides