OSRAM SYLVANIA LEDstixx User Manual
Page 6
2.0 ELECTRICAL INSTRUCTIONS
2.1 General Instructions:
If additional wiring becomes necessary, it is the responsibility of the installer to provide this wiring
and ensure that the wiring meets all applicable Class 2 requirements as pertains to the installation.
Pay attention to standard Electrostatic Discharge (ESD) precautions when installing the system.
2.1 Wiring Instructions and Power Supply Installation Instructions
2.1.1 When retrofitting an existing refrigerated case, access the existing
fluorescent ballast.
2.1.2 Disconnect the line and load side connectors from the ballast. Unscrew the
ballast mounting screws and remove the ballast.
2.1.3 Install the new Optotronic OT75 power supply and re-use the previous
ballast’s screws to secure the OT75 into the existing mounting holes.
2.1.4 The LEDstixx Canopy fixtures can be wired in parallel to the power supply or
connected in daisy chain series. Up to 12 feet of the LEDstixx Canopy fixtures
can be daisy chained together in series. See wiring diagrams in Figure G and
Figure H for wiring options.
2.1.5 Connect 24V output leads from power supply to existing wiring used
previously for the removed fluorescent system making connections for
multiple fixtures as shown in Figures G or Figure H.
Note:
Depending on the size of the ballast removed, it may become necessary to drill an
additional mounting hole to match the foot print of the LED Power supply. The AC
ground wire from the line side wiring must be firmly bonded to the case of the LED
power supply.
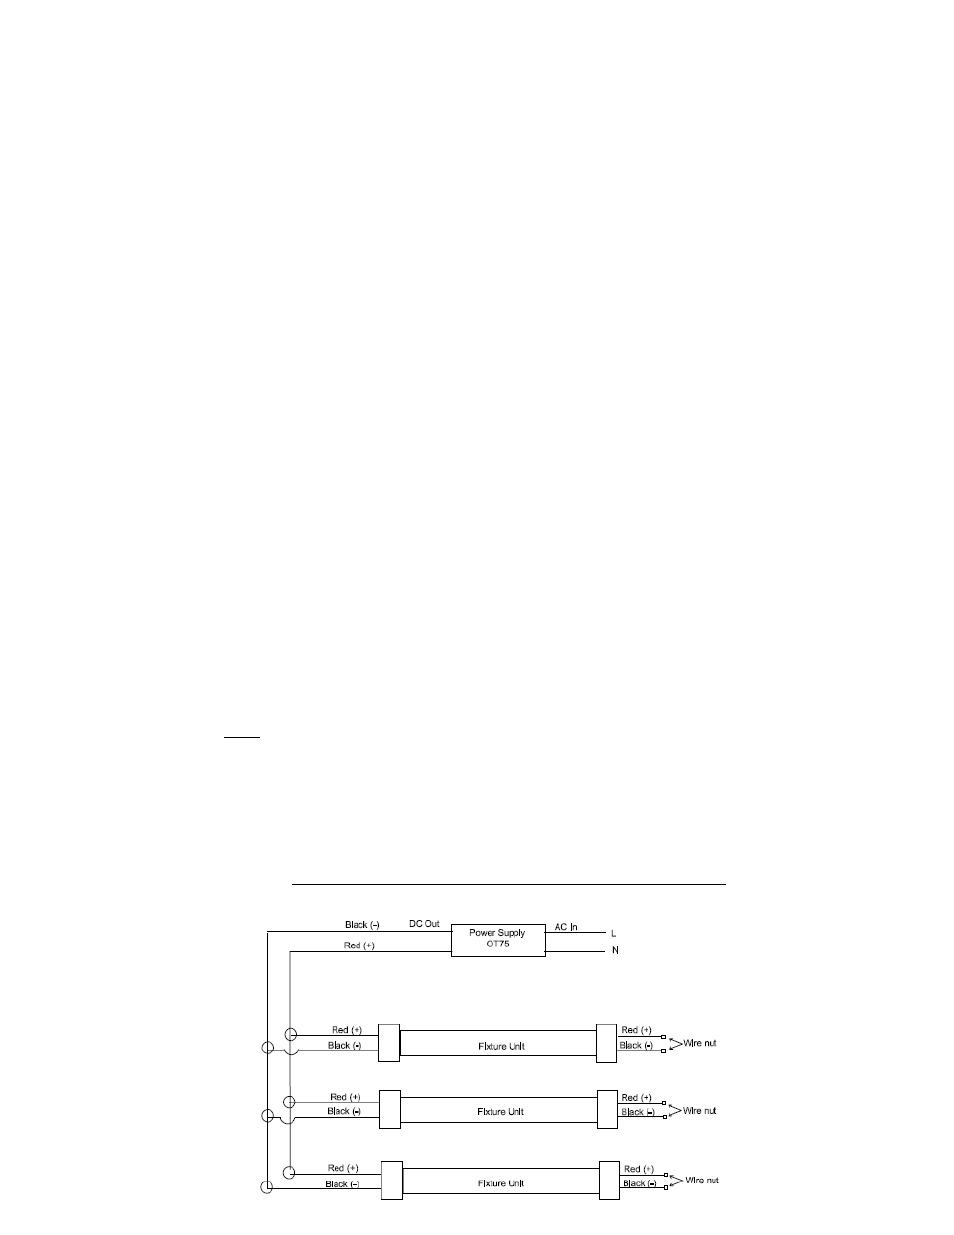
2.2 Wiring Diagrams
3.0 Figure G – Basic Wiring Diagram Showing Parallel Connection