CCI Thermal Technologies CF1 - ProVector Explosion-Proof Convection Heater User Manual
Page 4
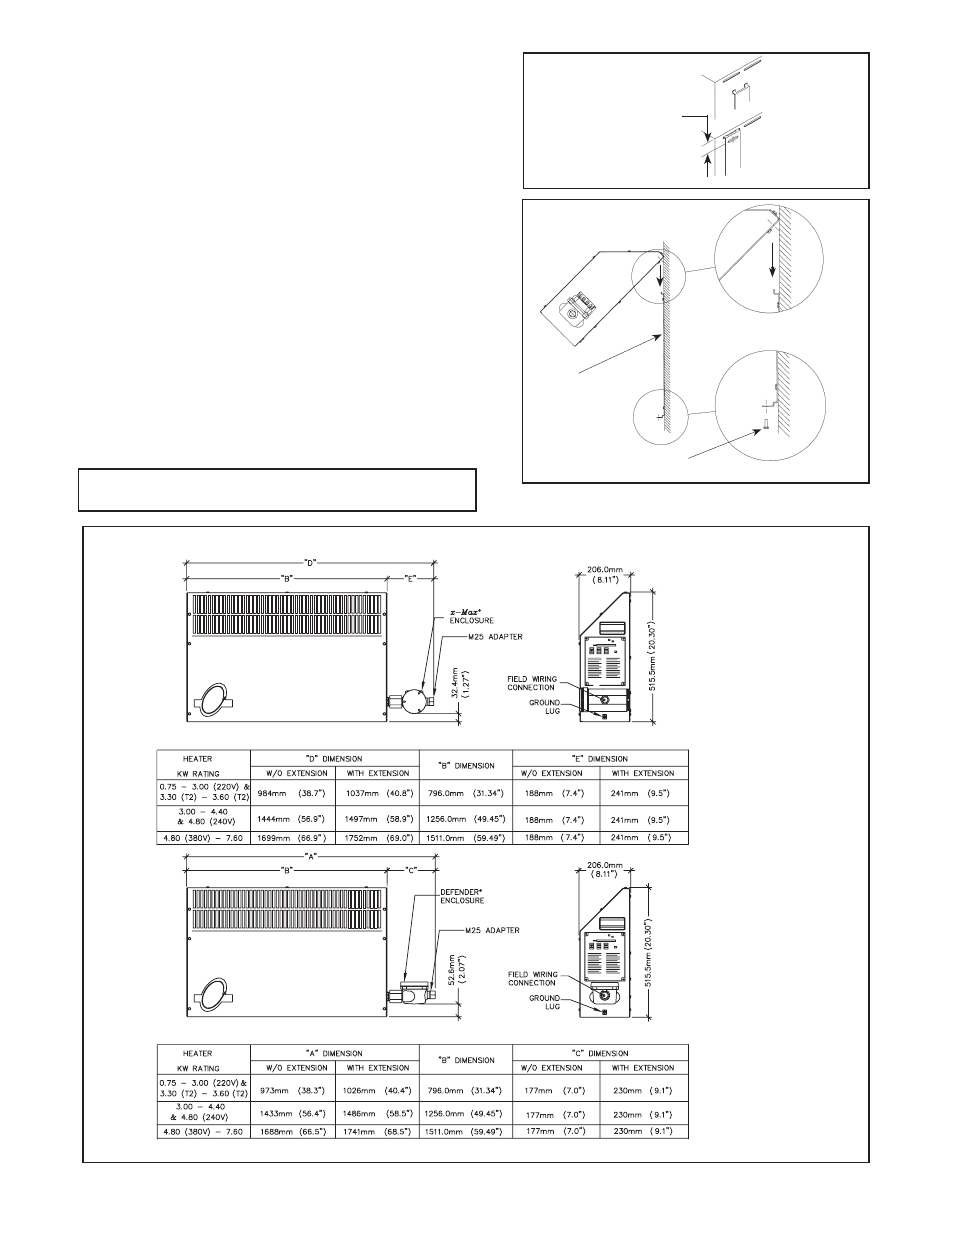
3. Secure mounting brackets to vertical surface
with the top mounting hole 38 mm (1.5") below
the desired top surface height (Figure 1a). Refer
to Figure 2 for physical dimensions and Figure
3 for required installation clearances. Mounting
brackets are to be spaced to match the slots in
the rear panel of heater cabinet.
4. After mounting brackets are secured, tilt the
heater and lower it onto the top tabs of the
mounting bracket such that the tabs go into the
mounting slots on the rear panel of the heater
cabinet (Figure 1b).
5. Carefully swing the bottom of the heater into the
mounting brackets so that it is resting on the
bottom tab (Figure 1b).
6. Insert the securing screw through the bottom
mounting bracket tab and into the cabinet to keep
the heater from dislodging from the mounting
bracket (Figure 1b).
7. Caution: Use fasteners with yield stress greater
than or equal to 58ksi (400MPa).
Note:
Figures 1-3 are shown with optional built-in room thermostat.
FIGURE 1a
Mounting Bracket
Top Tab Detail
Bottom Tab Detail
FIGURE 2: Physical Dimensions
Securing
Screw
38.0 mm (1.5")
FIGURE 1b
– 4 –
M:\My Documents\Manuals & Instructions\Norseman\XR
M:\My Documents\Manuals & Instructions\Norseman\XR
M:\My Documents\Manuals & Instructions\Norseman\XR
M:\My Documents\Manuals & Instructions\Norseman\XR
M:\My Documents\Manuals & Instructions\Norseman\XR
M:\My Documents\Manuals & Instructions\Norseman\XR
Notes: Heaters with built-in thermostat come with tube extensions.