Single o-ring seal, Double o-ring seal – Viking Pump TSM230: Hygienic Series User Manual
Page 12
SECTION TSM
230
ISSUE
B
PAGE 12 OF 15
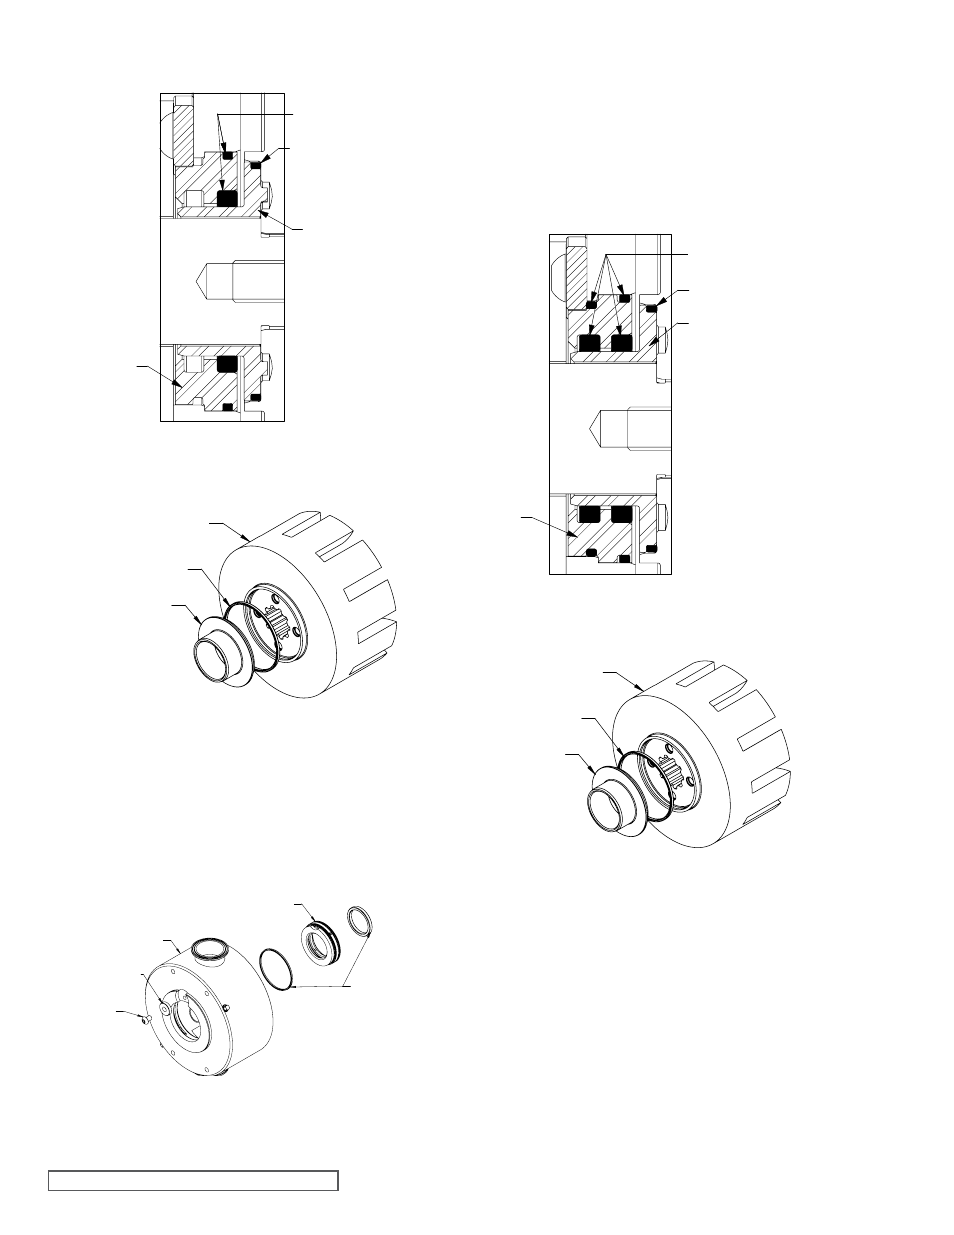
Rotary Member Installation (FIGURE 15):
1. Install the rotary seal insert O-ring onto the rotary seal
insert.
2. Install the rotary seal insert onto the backside of the
rotor. Make sure that the lugs on the backside of the
rotary seal insert line up with the anti-rotation holes in
the rotor.
FIGURE 14
SINGLE O-RING SEAL CROSS SECTION
FIGURE 15
SINGLE O-RING SEAL ROTARY MEMBER
ROTARY SEAL INSERT O-RING
SEAL HOUSING O-RING
SEAL HOUSING
ROTARY SEAL INSERT
FIGURE 16
SINGLE O-RING SEAL STATIONARY MEMBER
ROTOR
ROTARY SEAL
INSERT O-RING
ROTARY
SEAL INSERT
CAP SCREW FOR
ANTI-ROTATION
WASHER
CASING
SEAL HOUSING
SEAL HOUSING O-RING
ANTI-ROTATION WASHER
FIGURE 17
DOUBLE O-RING SEAL CROSS SECTION
FIGURE 18
DOUBLE O-RING SEAL ROTARY MEMBER
DUAL O-RING SEAL
ROTARY SEAL INSERT O-RING
SEAL HOUSING
ROTARY SEAL INSERT
SEAL HOUSING O-RING
ROTOR
ROTARY SEAL
INSERT O-RING
ROTARY
SEAL INSERT
SINGLE O-RING SEAL
Stationary Member Installation (FIGURE 16):
1. Install the two seal housing O-rings into the seal housing.
2. Install the seal housing into the casing. When installing
the seal housing into the casing, the anti-rotation cut out
of the seal housing must line up with the anti-rotation
washer on the backside of the casing.
DOUBLE O-RING SEAL
Rotary Member Installation (FIGURE 18):
1. Install the rotary seal insert O-ring onto the rotary seal
insert.
2. Install the rotary seal insert onto the backside of the rotor.
Make sure that the lugs on the backside of the rotary seal
insert line up with the anti-rotation holes in the rotor.