Robotic deflection mount – Tweco RDM-2000 User Manual
Page 11
Robotic Deflection Mount
3-7
SM-RDM-20000
inStAllAtion AnD opeRAtion
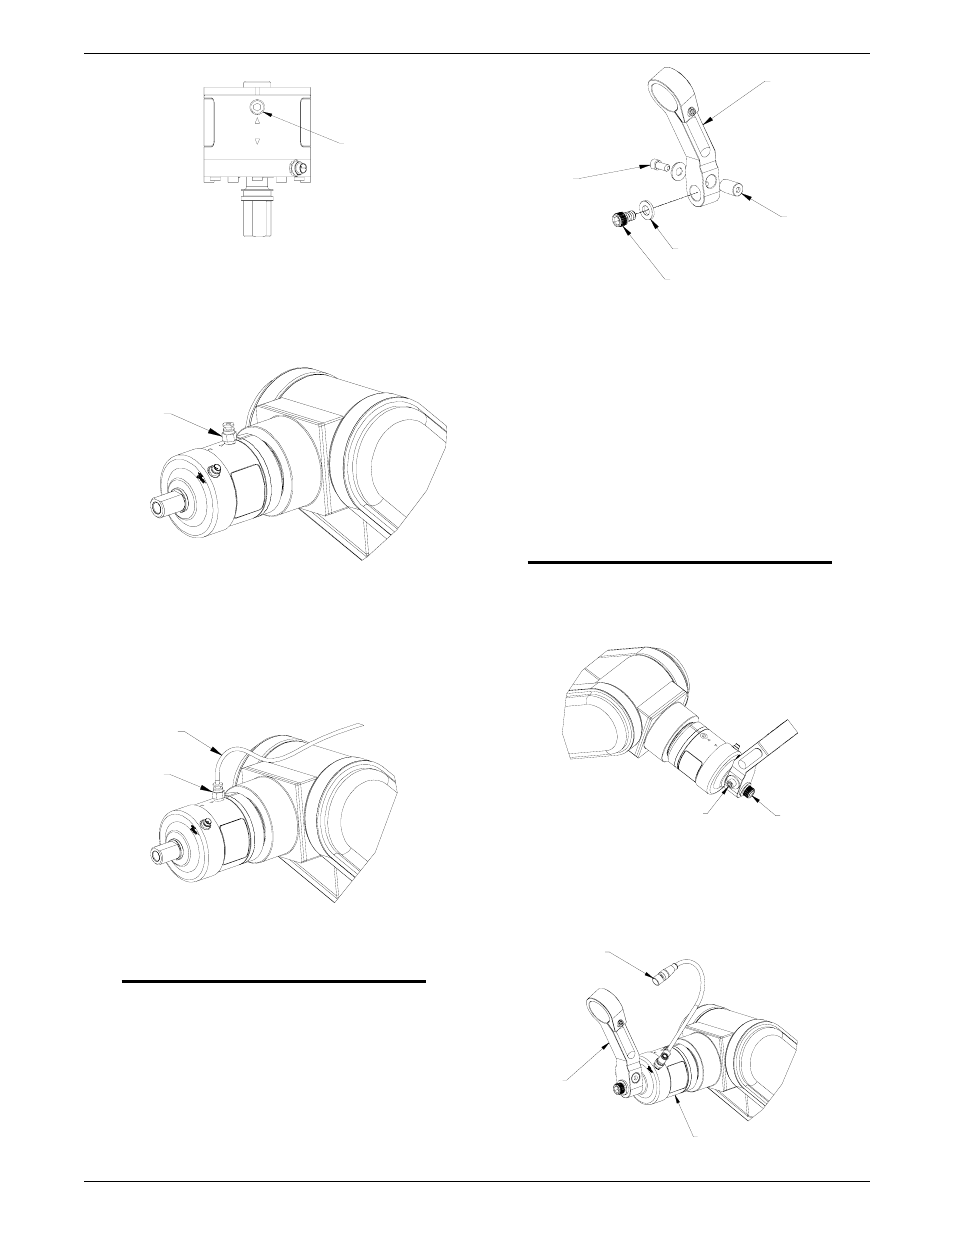
Figure 7: Air Assist Port
AIR ASSIST PORT
(1/8 NPT)
11. Thread the air fitting supplied from the factory, into
the RDM mount and tighten. The fitting will accept
5/32” tubing, (not supplied), from a compressed air
regulator. Refer to Figure 8.
Figure 8: Installation of Air Fitting
AIR FITTING
12. To provide the air assist, a 5/32” (3,97mm) tubing
coming out of the air fitting should be extended back
to the feeder or robot base where it is attached to an
adjustable air line regulator. Refer to Section 3.02 page
10 for more detail on the air assist option.
NOTE
it’s recommended that the air assist feature
be installed in a manner that a continuous
air pressure is supplied to the mount during
operation.
13. The RDM mount is now ready for the RDM mounting
arm to be secured into position.
14. Loosen the 5/16”-18 socket head cap screw that is
threaded into the wedge pin of the mounting hardware
of the RDM arm. Refer to Figure 10.
AIR FITTING
5/32” TUBING
Figure 9: Air Tubing To Air Line Regulator
Figure 10: Exploded View of RDM Mounting Arm &
Mounting Screws
7/16-20 SOCKET HEAD CAP SCREW
7/16 FLAT WASHER
WEDGE PIN
RDM MOUNTING
ARM
5/16-18 SOCKET
HEAD CAP
SCREW
& WASHER
15. Align the machined key slot on the mounting arm with
the 3/16” key stock on the RDM mount shaft. Slide the
mounting arm over the mount shaft.
16. Tighten the 5/16”-18 socket head cap screw until the
wedge pin is drawn into contact against the shaft on the
RDM mount. This connection must be wrench tight.
17. Install the 7/16-20 socket head cap screw and 7/16” flat
washer removed in Step 5 onto the RDM mount and
secure. Refer to Figure 10.
NOTE
the centerline of the RDM mount arm should
be inline with the engraved arrows on the RDM
mount when in the “hoMe” position.
Figure 11: Mounting Arm Screws Used to Secure Arm
to Mount
5/16-18 SOCKET HEAD
CAP SCREW & WASHER
7/16”-20
SOCKET
HEAD CAP
SCREW
18. Attach the E-Stop cable assembly, supplied from the
factory, to the RDM mount. Refer to Figure 11.
e-Stop cAble
MOUNT ARM
RDM DEFLECTION MOUNT
Figure 12: E-stop Cable Connection