Proplus auto-darkening welding helmets – Tweco ProPlus Digital Auto-Darkening Welding Helmet User Manual
Page 21
ProPlus Auto-Darkening Welding Helmets
Manual 0-5276
21
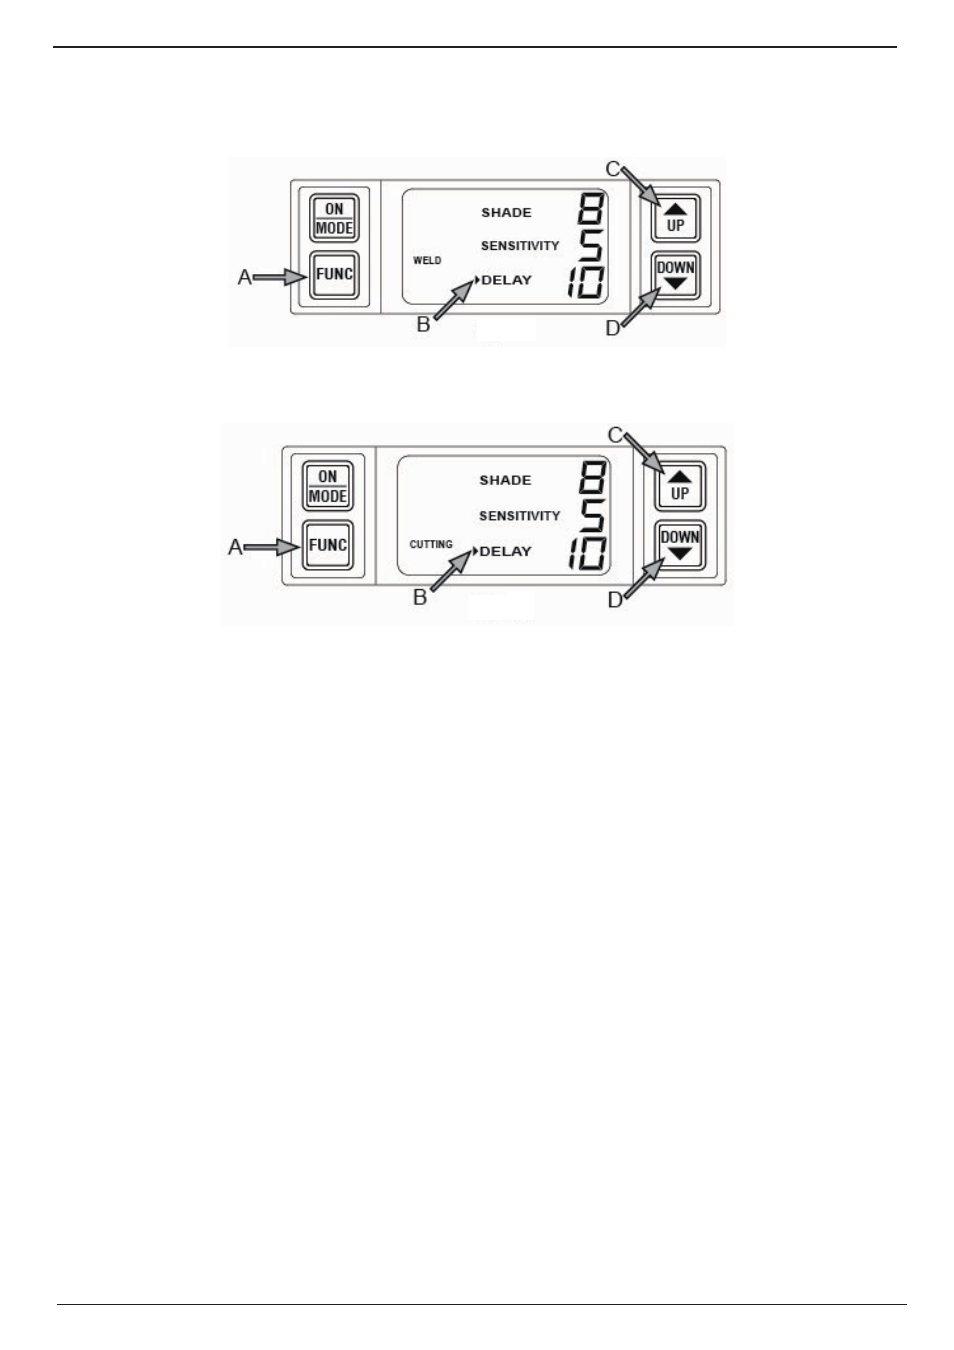
• DELAY CONTROL
Press “FUNC” button to choose “DELAY”, and begin lens delay adjustments (See Fig. 9-8/9-9: A&B). Use the Lens Delay Control “UP”
and “DOWN” buttons to adjust the time for the lens to switch to the clear state after welding or cutting. (See Fig. 9-8/9-9: C&D).
Weld Mode − Delay No. 0-10 (See Fig. 9-8)
9a
Art # A-11804
Figure 9-8 Delay Control- Weld Mode
Cutting Mode −Delay No. 0-10 (See Fig. 9-9)
9b
Art # A-11805
Figure 9-9 Delay Control- Cutting Mode
Grind Mode −No delay adjustment
The delay is particularly useful in eliminating bright after-rays present in higher amperage applications where the molten puddle remains
bright momentarily after welding. Use the Lens Delay Control buttons to adjust delay from 0 to 10 (0.1 to 1.0 second).When welding
ceases, the viewing area automatically changes from dark back to light but with a pre-set delay to compensate for any bright space
afterglow on the workpiece. The delay time / response can be set from Level 0 to level 10. It is recommended to use a shorter delay with
spot welding applications and a long delay with applications using higher currents. Longer delays can also be used for lower current
TIG welding, and TIG / MIG / MAG pulse.