Proplus auto-darkening welding helmets – Tweco ProPlus Digital Auto-Darkening Welding Helmet User Manual
Page 18
ProPlus Auto-Darkening Welding Helmets
18
Manual 0-5276
SECTION 9: ProPlus Digital Auto-Darkening Filter lens Controls
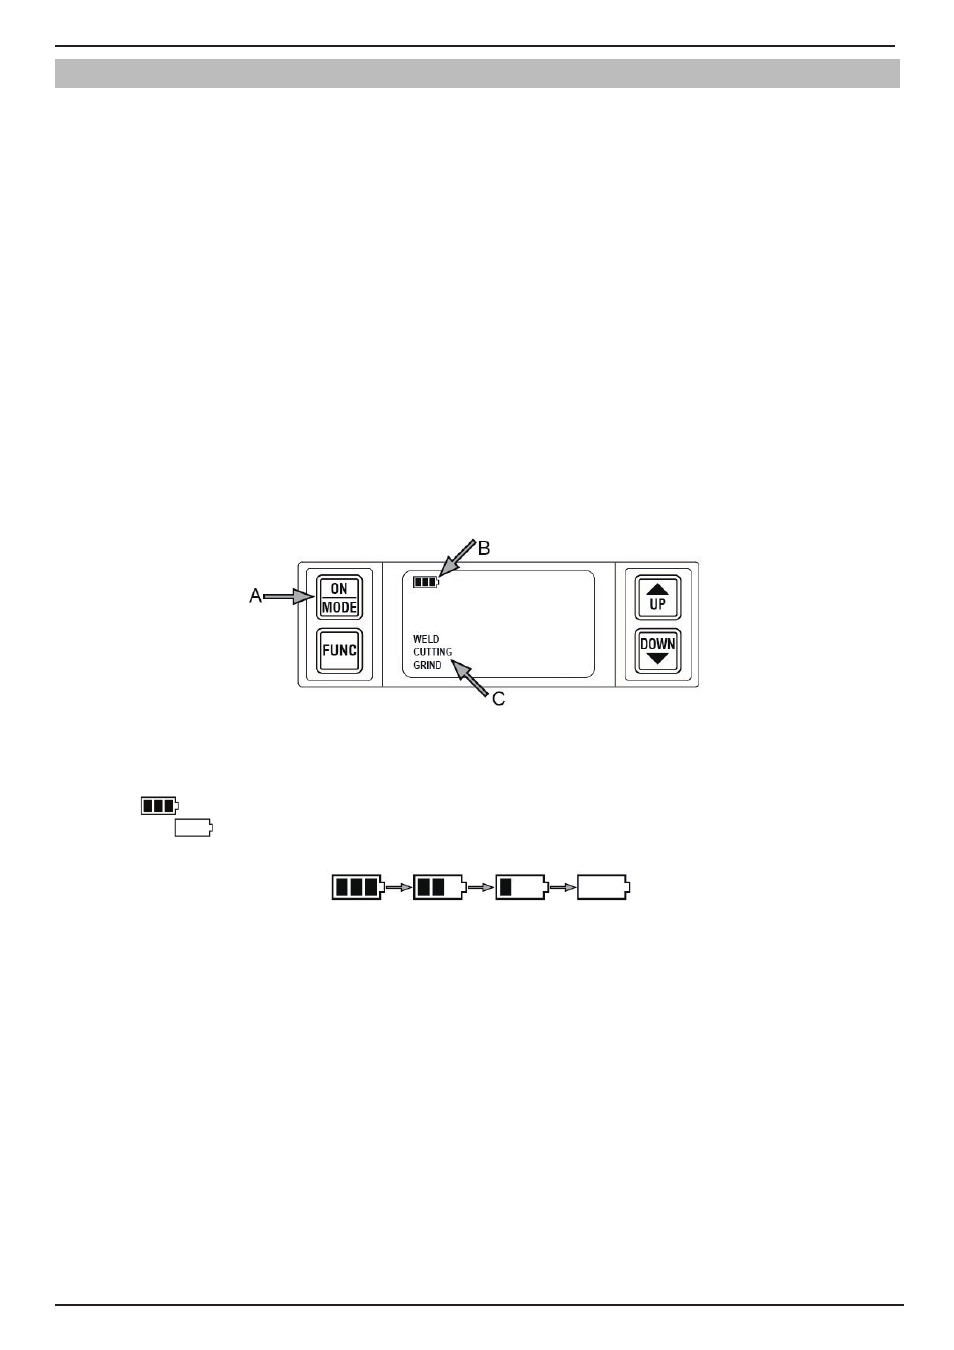
ON/ MODE BUTTON AND BATTERY INDICATOR
• ON-OFF
Shortly press ON/MODE button to check if the lens is working properly and begin to set up lens shade number, sensitivity, and delay
adjustments (See Fig. 9-1A).
When the ON/MODE button is long pressed (3 seconds), the lens will power off, and return to the clear state. Do not use the helmet if
the lens does not function as described.
• MODE CONTROL
Shortly press ON/MODE button to select the mode for the appropriate application (See Fig. 9-1A):
Weld Mode − used for most welding applications. Push “FUNC” button to adjust shade number, sensitivity, and delay settings properly
before welding (See Fig. 9-1C).In this mode the lens turns to dark immediately when you start welding.
Cutting Mode − used for cutting applications. Push “FUNC” button to adjust shade number, sensitivity, and delay settings properly before
cutting (See Fig. 9-1C).In this mode the lens turns to dark immediately when you start cutting (See Fig. 9-1C).
Grind Mode − used for grinding applications. In this mode the lens shade is fixed shade No. 4. Can not adjust shade number, sensitivity,
and delay settings (See Fig. 9-1C).
Art # A-11797
Figure 9-1 ON/MODE Button
• BATTERY INDICATOR
The symbol “
“ shows the current state of the battery (See Fig. 9-1B). The capacity of batteries is displayed by three bars(See Fig.
9-2). The symbol “
“ appears on the display screen before 1−2 days of battery life remaining. Replace with 2 x CR2450 Lithium
batteries. The Battery Indicator is not in real-time, but should be updated after shortly pressing ON/MODE button.
6
Art # A-11798
Figure 9-2 Battery Indicator