11 installing wire spool on the remote, 11 installing wire spool on the remote -11, Fabricator 281 – Tweco 281 Thermal Arc Fabricator User Manual
Page 33
FABRICATOR 281
April 10, 2006
3-11
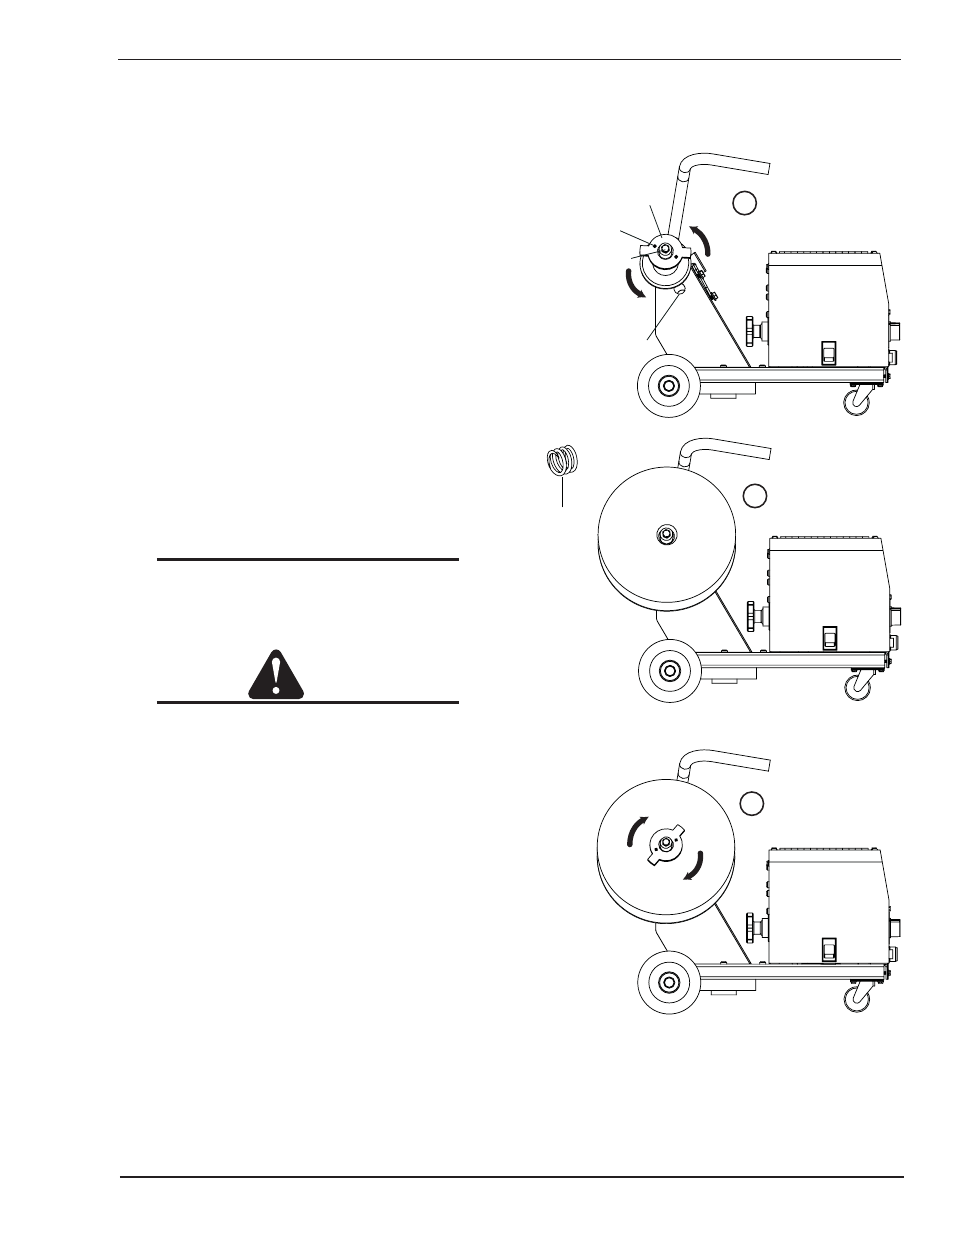
3.11 Installing Wire Spool on the
Remote
As delivered from the factory, the unit is set for a 33/44
lb. or 12" (300mm) spool.
Installation of wire spool
1. Remove Wire Spool Hub Nut by turning counter
clock wise (to the left).
2. Remove the spring from the hub.
3. Place Wire Spool onto the hub, loading it so that
the wire will feed off the bottom of the spool as
the spool rotates counter clockwise. Make sure
to align the spool alignment pin on the hub with
the mating hole in the wire spool.
4. If using a 10 lb. wire spool place the spring on
the exposed hub. Do not use the spring for larger
wire spools that cover the entire hub.
5. Replace the Wire Spool Hub Nut by turning clock
wise (to the right).
NOTE
The Hub tension has been pre-adjusted at the
factory. However if adjustment is required,
refer to section 3.12 and Figure 3-12.
CAUTION
Use care in handling the spooled wire as it
will tend to “unravel” when loosened from the
spool. Grasp the end of the wire firmly and
don’t let go of it.
Art # A-07460
Wire Spool Hub Nut
Hub Tension Bolt
Alignment Pin
Additional Wire Spool
Support Shaft Hole
1
2
3
*Spring
* The Spring is for use with
smaller 10 lb wire spools only
Figure 3-11: Spool Installation