Tweco SL100 User Manual
Page 21
Manual 0-2962
3-5
INSTALLATION
10. Connect the remote pendant adapter to the Remote
Control Cable Connector.
A-03582
1
2
Control Cable
Connector (Machine
Torches Only)
ATC Male
Connector
ATC Adapter
Female Receptacle
Torch Leads
To
Power Supply
Torch Connection - Torch Leads with ATC Male
Connector, Power Supply with ATC Adapter
1
2
Control Cable
Connector (Machine
Torches Only)
ATC Male
Connector
ATC Female Receptacle
(Panel Mounted)
A-03602
Torch Connection - Torch Leads with ATC Male
Connector, Power Supply with Panel-Mounted ATC
Receptacle
11. Check the torch for proper consumable parts.
CAUTION
The torch parts must correspond with the type
of operation. Refer to Section 4.04, Torch Parts
Selection.
C. Mechanized Machine Torch Systems - Torches
with O2B Connectors
Torches with O2B connectors connect directly to the
power supply bulkhead. Mechanized torch leads with O2B
connectors require a remote pendant adapter to accept a
remote pendant.
WARNING
Disconnect primary power at the source before
disassembling the torch or torch leads.
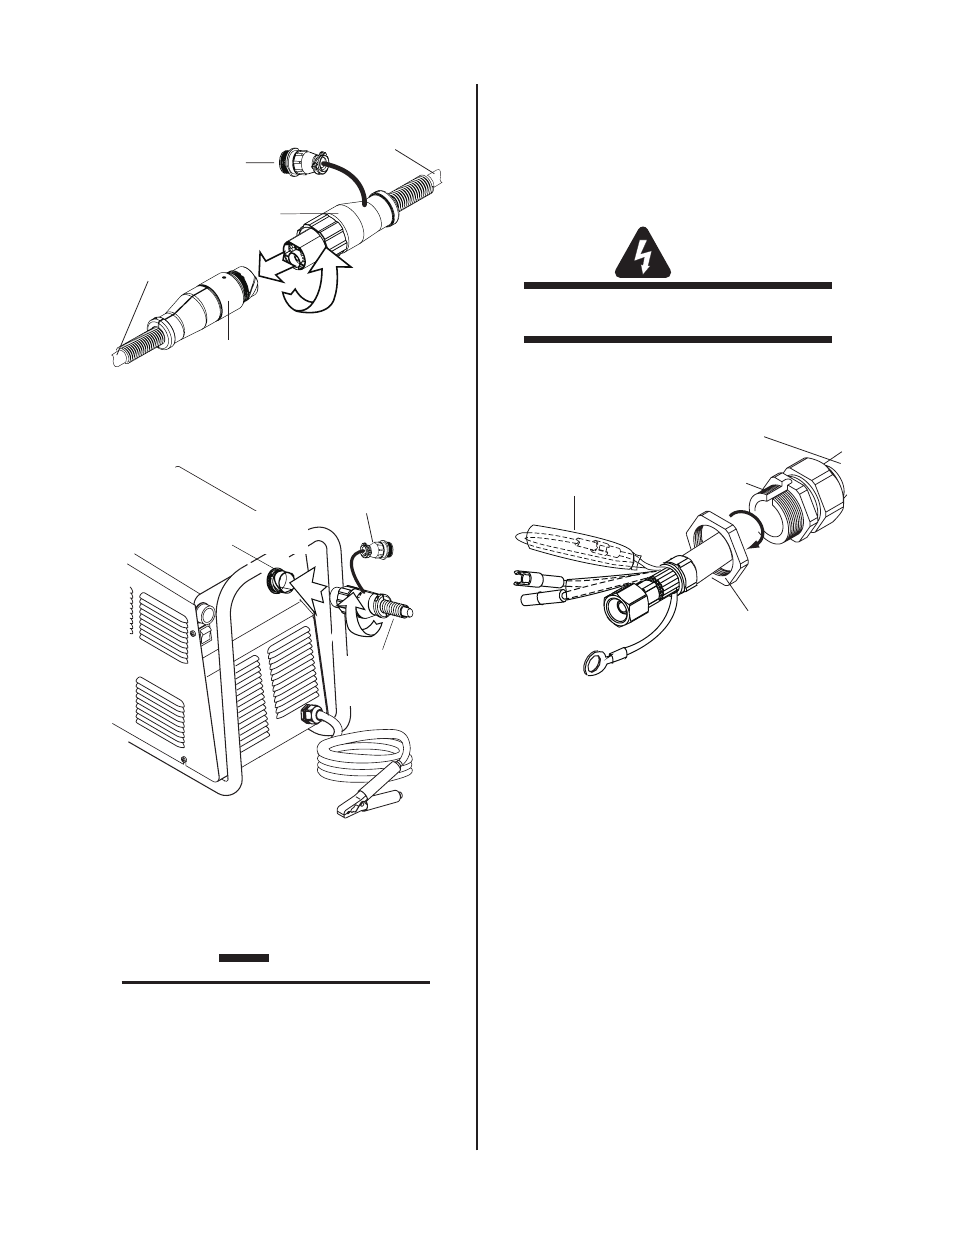
1. Remove the Through - Hole protector Nut from the
Through - Hole protector.
Through - Hole
Protector Nut
Through - Hole
Protector
Torch Leads
Assembly or ATC Adapter
Art # A-03877
Remove Tie Wrap,
Remove Insulator,
Disconnect Wires
Pilot Lead
Through - Hole Protector Nut Removal
2. The leads Assembly includes two wires joined with
mating connectors and covered with an insulating
sleeve. Remove the tie wrap and insulating sleeve.
Disconnect the two joined wires.
3. Feed the end of the torch leads and the Through -
Hole protector into the hole in the unit.
4. Route the wire harness on the Remote Pendant
Adapter through the Through - Hole protector and
Through - Hole protector Nut. Tighten the Through
- Hole protector Nut to secure the Through - Hole
protector to the Power Supply.
5. Connect the Negative / Plasma lead to the bulkhead
connection inside the power supply.