2 torch leads and leads extension packages – Tweco PAK 10 User Manual
Page 29
Manual No. 0-0515
17
Service
6. PCH-4B: Install the back cap (14) and tighten it se-
curely.
CAUTION
Use care to see that the back cap is turned all the
way down to hold the collet (12) securely. On
the machine torches this cap goes down inside
and may seem tight, but still may not be holding
the collet tightly. Arcing may result, welding
the collet to the torch and causing irreparable
damage.
7. Insert the electrode (7) in the torch from the front.
Push it back against the spring to make sure it slides
freely back and forth.
8. Install a gas distributor (3) in the tip (2) and install
the tip in the front of the torch. Tighten it securely
with a tip wrench (16).
9. Install a gasket (9) and two O-rings (8) on the front
of the torch. The O-rings must be lubricated with
O-ring lubricant (Cat. No. 8-4025).
10. Install the cup (1) on the front of the torch.
The torch is now ready for operation.
4.2
TORCH LEADS AND LEADS
EXTENSION PACKAGES
Torch Leads Replacement
To replace the torch leads on a hand torch separate the
leads covering from the torch handle by pulling the
torch switch sheath (5, Fig. 4-B) back over itself to ex-
pose where the leads covering is secured to the handle.
Remove the tape securing the covering to the handle.
Pull the covering away from the handle and discon-
nect the switch from the leads package. Unscrew the
handle from the torch and slide back to expose the leads
connections. Leads are connected to the appropriate
fittings on the torch in accordance with the color cod-
ing-red/yellow for secondary gas and green/black for
plasma gas. A plastic insulator is located between the
fittings in the handle.
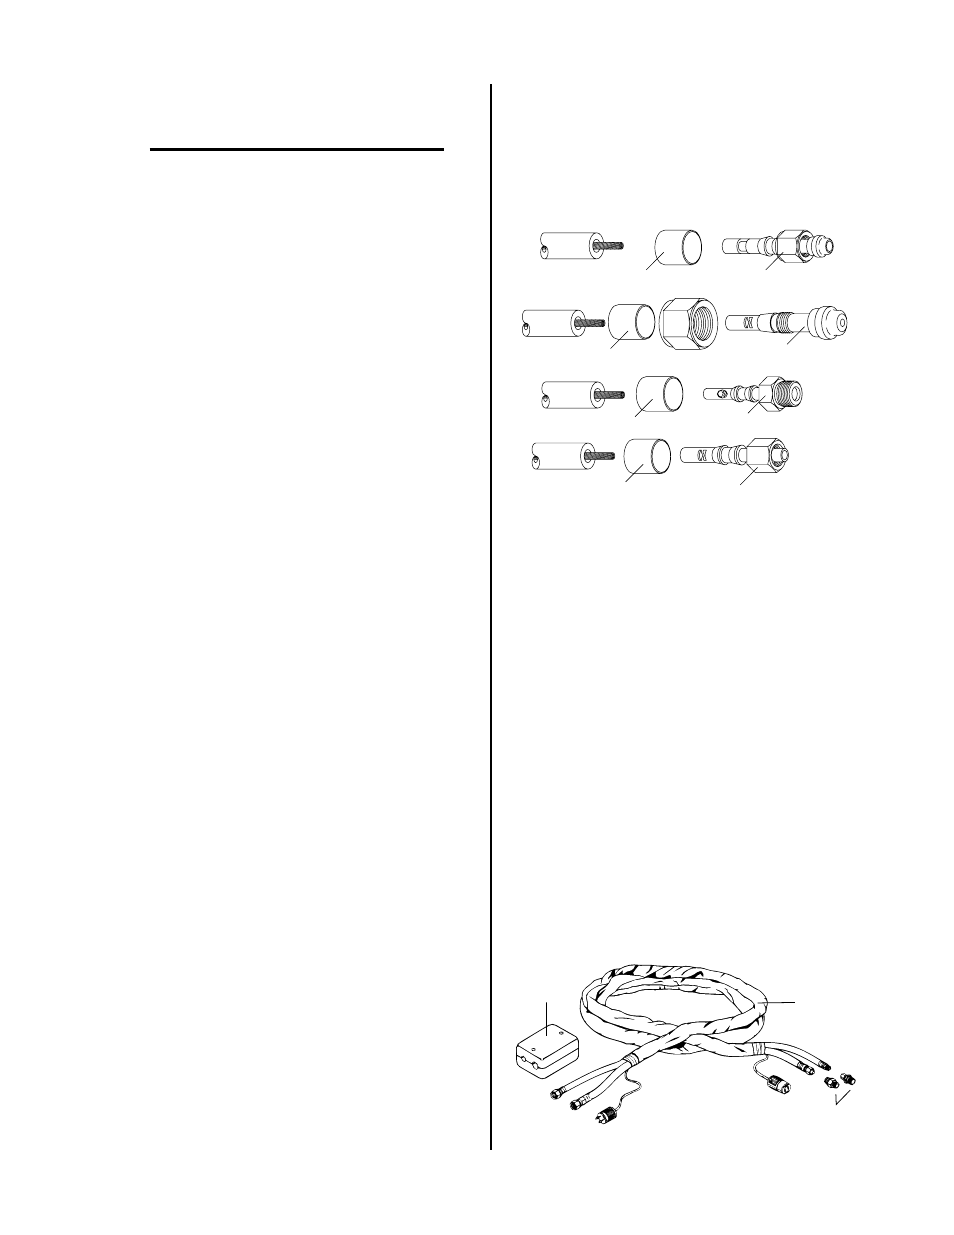
The fittings (Figure 4-C) on the ends of the torch leads
may be replaced. Cut the hose close to the old fitting.
Cut the wire inside the hose and discard the old fitting.
Attach new fittings to the wire by crimping the tube,
on the fitting, onto the wire. Crimp the tube with a
Stakon size C crimping tool. It is important to crimp
the tube all the way back to the first hole to ensure ad-
equate gas passage.
Use a ferrule (1) to secure the hose to the fitting or lock
the hose in place with a twisted wire. If a ferrule is
used, crimp (1) in place with 1/2 inch diameter crimp-
ing dies, Scovill No. 39 or equal. Crimp (1a) in place
with 5/8 inch diameter crimping dies, Scovill No. 34
or equal.
1a
3
5
4
1
2
6
1
1a
A-03313
Figure 4-C Torch Lead Fittings
l. Ferrule
2. Fitting, console end (-)
3 Nut, console end (+)
4. Fitting, console end (+)
5. Fitting, torch end (+)
6. Fitting, torch end (-)
LEADS EXTENSION PACKAGES
Leads extension packages are available to extend the
torch leads in increments of 25 and 50 feet. The pack-
ages are available as follows:
PCH-4B 25': Cat. No. 4-2739 50': Cat. No. 4-2740
PCM-4BT 25': Cat. No. 4-2741 50': Cat. No. 4-2742
1. Lead Adapter
2. Insulator
3. Leads (25' or 50')
3
2
1
A-03314
Figure 4-D Leads Extension Package