Cutmaster a40 – Tweco A40 CutMaster User Manual
Page 84
CUTMASTER A40
5-8
SERVICE
Manual 0-4978
Optional Single-Stage Filter Element Replacement
These instructions apply to power supplies where the optional
Single-Stage Filter has been installed.
The Power Supply shuts down automatically when the Filter
Element becomes completely saturated. The Filter Element
can be removed from its housing, dried, and reused. Allow
24 hours for Element to dry. Refer to Section 6, Parts List, for
replacement filter element catalog number.
1. Remove power from power supply.
2. Shut OFF air supply and bleed down system before
disassembling Filter to change Filter Element.
3. Disconnect gas supply hose.
4. Turn the Filter Housing Cover counter-clockwise and
remove it. The Filter Element is located inside the
housing.
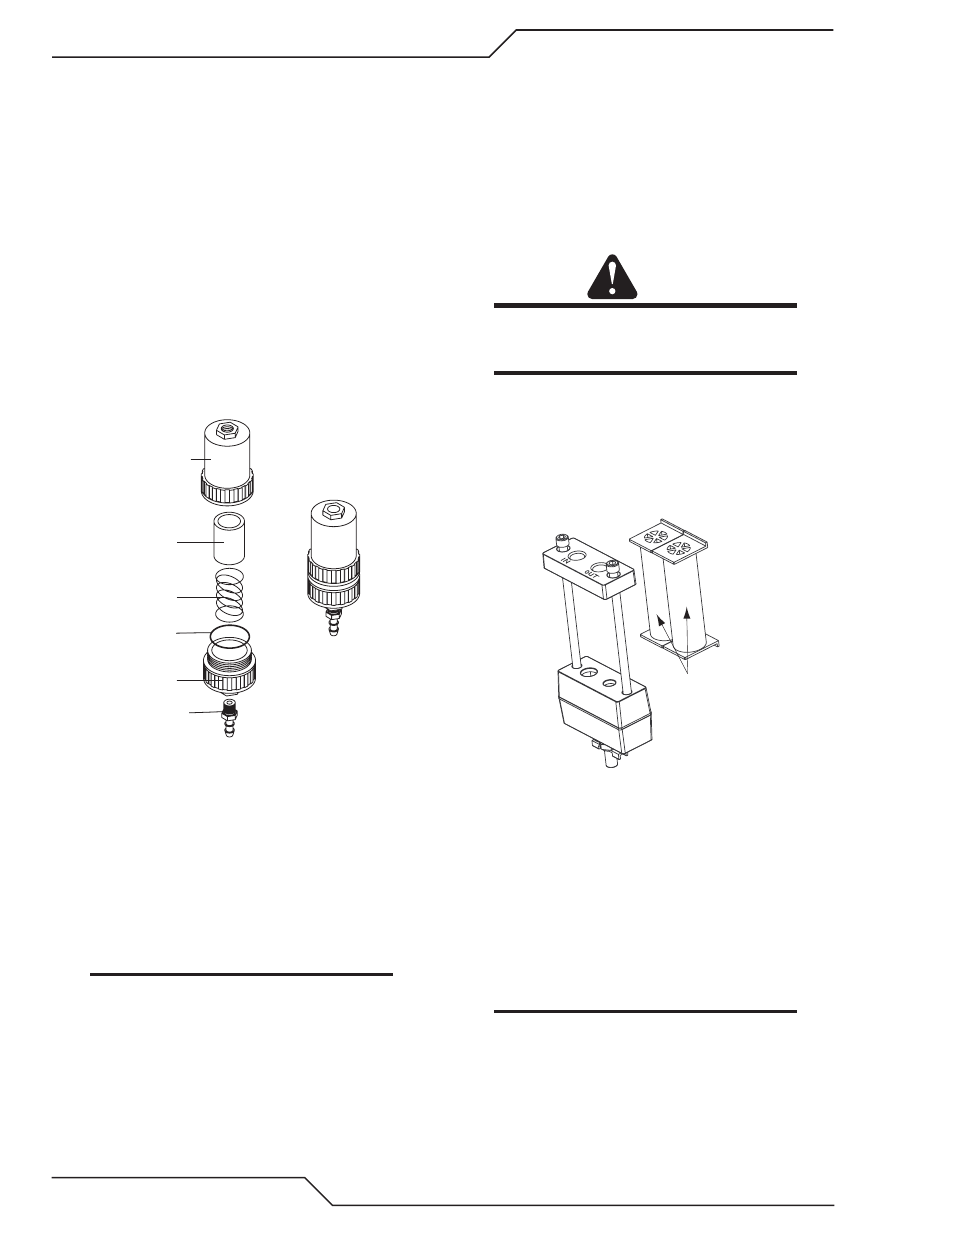
Art # A-02476
Filter
Element
(Cat. No. 9-7741)
Housing
Cover
Barbed
Fitting
Spring
Assembled Filter
O-ring
(Cat. No. 9-7743)
Optional Single-Stage Filter Element Replacement
5. Remove the Filter Element from the housing and set
Element aside to dry.
6. Wipe inside of housing clean, then insert the replace-
ment Filter Element open side first.
7. Replace housing on Cover.
8. Reattach gas supply.
NOTE
If unit leaks between housing and cover, inspect
the O-Ring for cuts or other damage.
Optional Two-Stage Filter Element Replacement
The Two-Stage Air Filter has two Filter Elements. When the Filter
Elements become dirty the Power Supply will continue to oper-
ate but cut quality may become unacceptable. Refer to Section
6, Parts List, for replacement filter element catalog number.
1. Shut OFF primary input power.
2. Shut OFF air supply and bleed down system.
WARNING
Always turn OFF the air supply and bleed the system
before disassembling the Filter Assembly as injury
could result.
3. Loosen the two bolts on the top of the Filter Assembly
enough to allow the Filter Elements to move freely.
4. Note the location and orientation of the old Filter Ele-
ments.
5. Slide out the old Filter Elements.
First & Second
Stage
Cartridges
(as marked)
Art # A-02942
Optional Two-Stage Filter Replacement
6. Slide the replacement Filter Elements into the Filter
Assembly, with the same orientation as noted in Step
4 above.
7. Hand tighten the two bolts evenly, then torque each
bolt to 20 - 30 in-lbs (2.3 - 3.4 Nm). Improper torque
may damage the gasket.
8. Slowly apply air pressure to the assembly, checking
for leaks.
NOTE
A small amount of air leakage from the bottom
fitting is normal.
This completes the parts replacement procedures.