Tweco Merlin 6000 Plasma Cutting CE Slave Power Supply User Manual
Page 22
INSTALLATION PROCEDURES
3-6
Manual 0-2603
A-01448
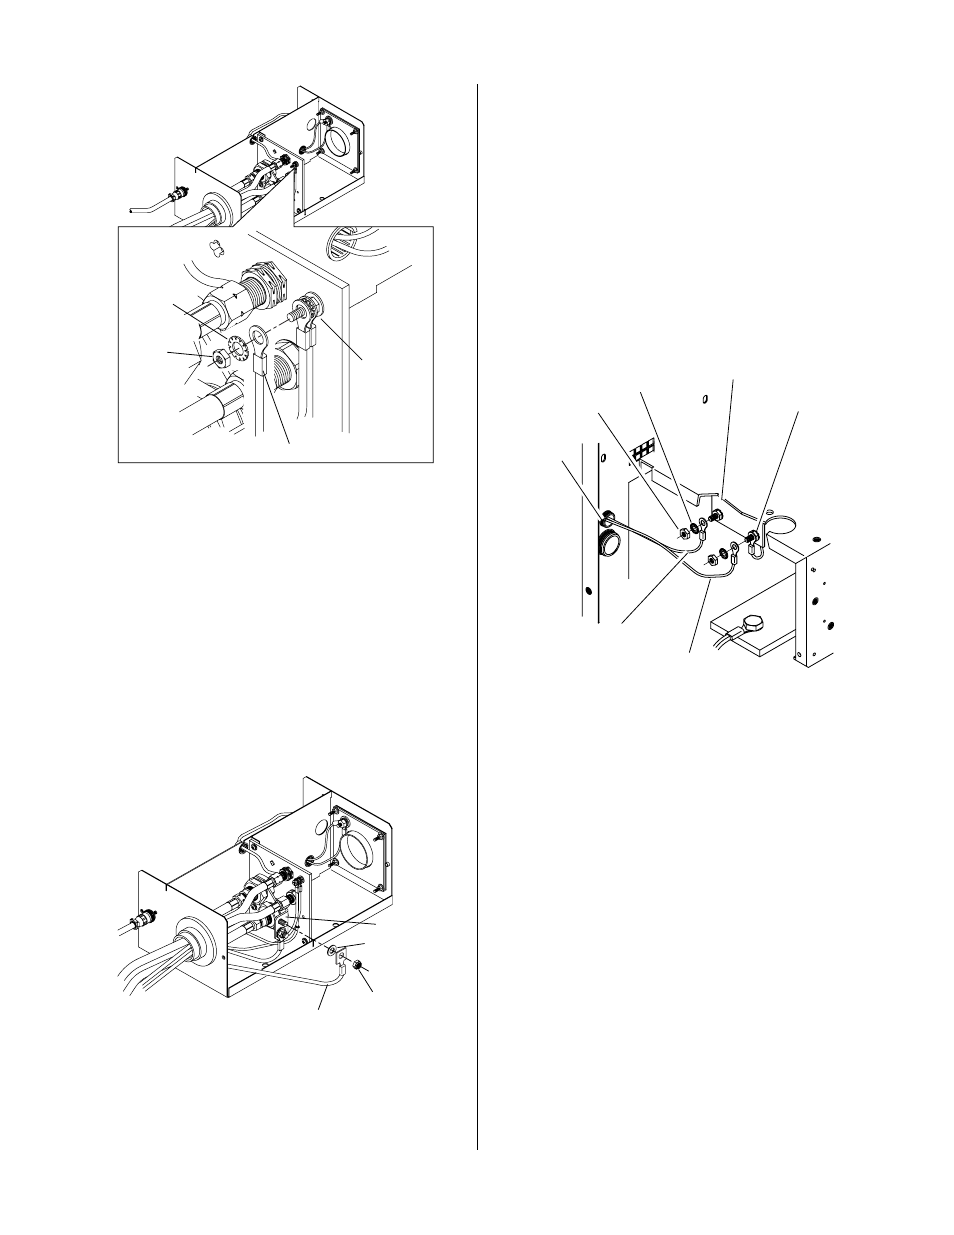
Nut
Star
Washer
Slave Pilot Lead
Pilot Lead
Connection
Figure 3-7 Pilot Lead Connection - Slave
4. Feed the Slave Power Supply power lead through
the boot at the end of the Arc Starter Box.
5. Connect the power lead to the buss bar per the
following procedure:
a. Remove the lock nut and washer from the up-
per bolt.
b. Place the ring lug on the power lead over the
end of the bolt.
c. Re-install the lock nut and washer to secure
the lead.
A-01449
Washer
Lock Nut
Slave Power
Lead
Buss Bar
Figure 3-8 Power Lead Connection - Slave
6. Connect the other end of the Pilot Lead, two wires,
to the Slave Power Supply per the following pro-
cedure:
a. Remove the right side panel from the Slave
Power Supply.
b. Feed the Pilot Lead, two wires, through the
small strain relief at the front panel of the Slave
Power Supply.
c. Remove the nut and star washer on the ground
terminal of the pilot connection inside the
power supply.
Small Strain
Relief
Black Wire
of Pilot Lead
Ground Terminal
Nut
Star Washer
Pilot Terminal
Red Wire
of Pilot Lead
A-01536
Figure 3-9 Pilot Lead Connection at Slave Power
Supply
d. Secure the shield lead (black) to the ground
connection with the nut and star washer re-
moved above.
e. Remove the nut and star washer from the other
pilot connection inside the power supply.
f. Secure the pilot lead (red) to the pilot connec-
tion with the nut and star washer removed
above.
9. Connect the other end of the Power Lead to the
Slave Power Supply per the following procedure:
a. Feed the Power Lead through the large strain
relief at the front panel of the Slave Power Sup-
ply.
b. Remove the lock nut from the power connec-
tion terminal inside the power supply.